

MTB Pedals NZ: Expert Guide for Riders
- by Nigel
-

You've just finished a wet ride and your feet won't stay where you put them. One pedal is packed with mud, the pins have lost their bite, and every root feels like a small negotiation between your shoes and the bike. Or perhaps you're considering clipless pedals, but the thought of unclipping on a steep, loose corner makes you hesitate.
That is the core question behind MTB pedals NZ. The right pedal is not just the lightest option or the one with the most aggressive pins. It should suit the way New Zealand trails behave, the shoes you wear, the bike you ride, and your ability to move a foot quickly when the trail changes.
Why Your Pedals Matter for NZ Trails
A rider leaves a Nelson trailhead after overnight rain. The first climb is manageable, but the surface becomes loose as the gradient increases. On the descent, wet roots arrive at irregular angles. One foot slips from a narrow, smooth pedal, the rider loses momentum, and the next corner becomes a rushed dab instead of a controlled turn.
That moment explains why pedals deserve more attention than a catalogue comparison of weight and colour. Your pedals transfer power during climbs, support your body while braking, and help you keep the bike underneath you when the surface becomes unpredictable. If mud fills the mechanism or your shoe can't find reliable grip, even good riding technique becomes harder to apply.
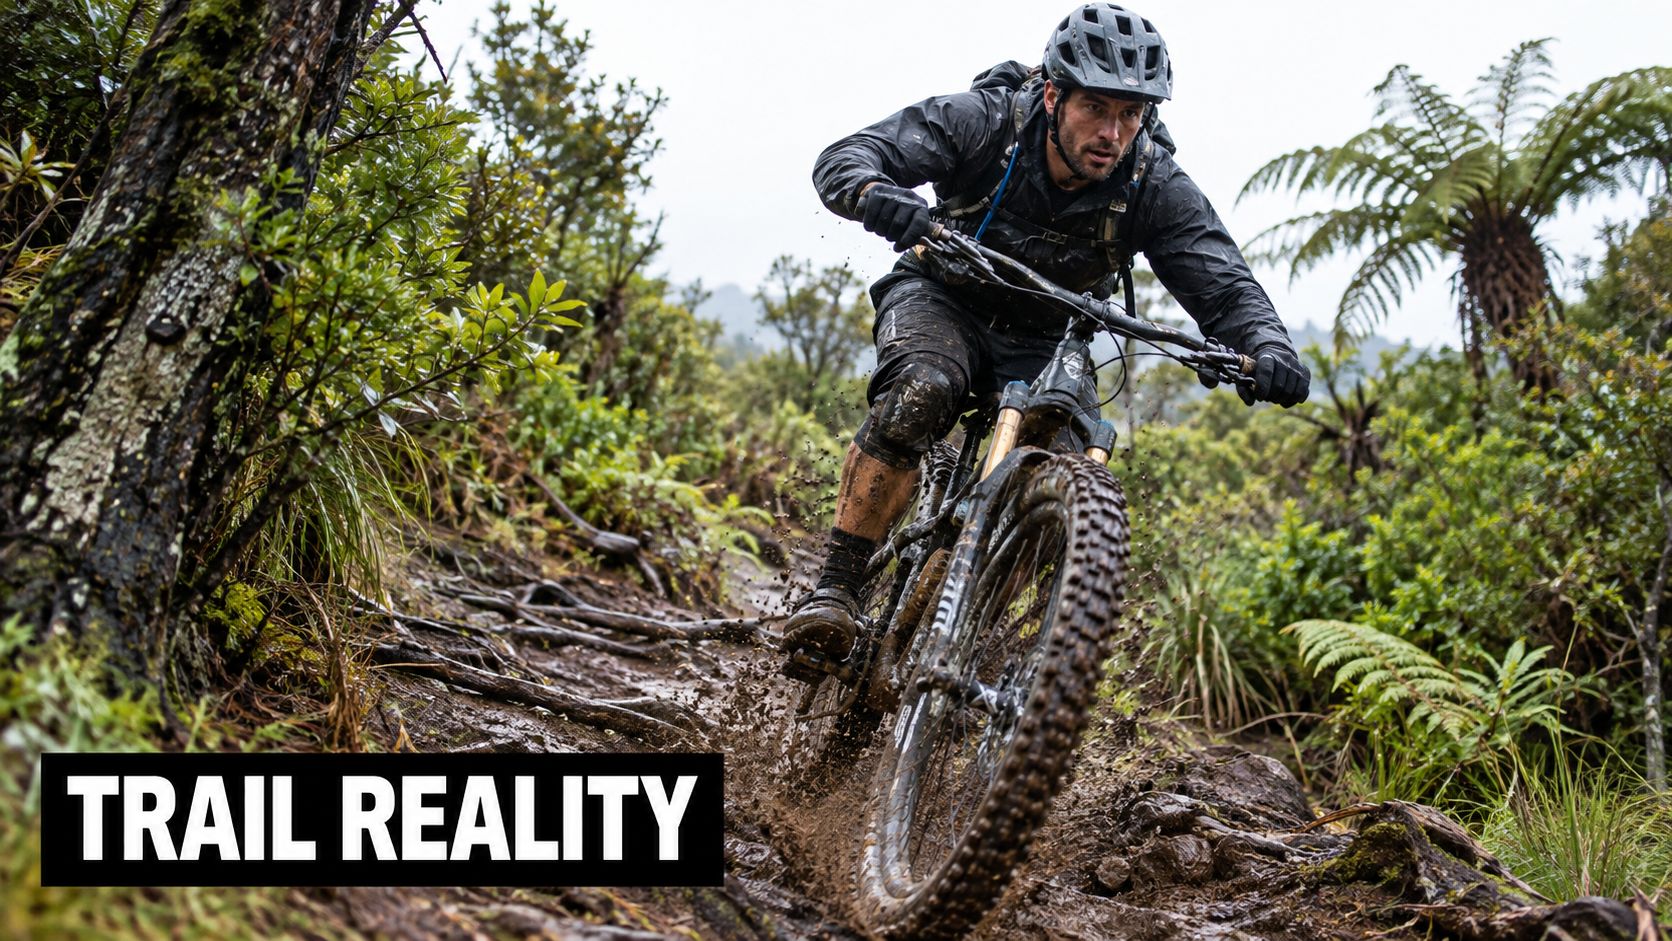
The local riding context
New Zealand offers a substantial base of mountain-bike riders. Sport New Zealand's 2013–14 Active Recreation Survey found that 8.8% of adults aged 16 and over, approximately 292,000 people, had participated in mountain biking during the previous 12 months. The survey is summarised in this overview of New Zealand's mountain-bike participation.
Those riders don't all use the same trails. Rotorua can bring volcanic soil, roots, and heavily ridden forest surfaces. Nelson mixes loose, technical terrain with dry dust in some periods and slippery conditions in others. Christchurch and alpine areas can add rock, grit, exposure, and sharp changes in weather.
Mechanic's rule: choose the pedal that keeps your foot predictable when the trail is at its worst, not the pedal that looks impressive on a dry shop floor.
A broad platform can spread pressure across the sole. A concave flat pedal can help centre the shoe between the pins. An open clipless body can clear debris more readily than a closed mechanism. These details sound small, but they affect whether you can climb smoothly, brake without shifting your feet, and recover after a dab.
Flat vs Clipless Pedals for Local Riders
Flat pedals and clipless pedals solve different problems. Flats let you remove your feet immediately, which is useful when you're learning, riding unfamiliar trails, or stopping frequently. Clipless pedals hold the cleat in a consistent position and can make repeated climbing and rough pedalling feel more connected.
| Riding situation | Flat pedals | Clipless pedals |
|---|---|---|
| Learning technical skills | Easy to dab and reset | Requires release practice |
| Muddy, rooty trails | Grip depends on pins and shoes | Mechanism must shed mud |
| Mixed commuting and trail use | Simple with ordinary footwear options | Requires compatible shoes |
| Long climbs | Encourages active foot and body control | Consistent foot placement |
| Low-speed stops | Immediate foot removal | Release timing matters |
Flats aren't merely a beginner product. A grippy, slightly concave platform paired with proper mountain-bike shoes can give experienced riders a strong connection while preserving the ability to reposition quickly. They're also practical for family rides, trail networks with frequent intersections, and e-bikes used for both transport and recreation.
Clipless systems can be a good choice for riders who already understand their balance and can practise releasing before tackling difficult terrain. Adjustable retention lets you begin with a lighter release setting, while multi-release cleats can offer a less intimidating transition than a system that releases in only one direction. Your shoes still need a sole pattern that doesn't interfere with the mechanism.
Match the system to the stop
A rider who regularly dabs on loose corners may value instant foot removal more than maximum pedalling consistency. Someone riding long technical climbs may prefer the repeatable position of clipless pedals, provided they can release before slowing or turning sharply.
A cycling-safety study identified 16 crashes in which clip-in pedals contributed, including situations where riders couldn't release quickly while slowing or turning, as described in the Safe System cycling study. That doesn't make clipless pedals unsafe. It means release skill must match the environment.
For a more detailed explanation of the mechanism, cleats, and riding technique, see this guide to clipless bike pedals. Whichever system you choose, practise the movement at low speed on a clear surface before relying on it beside roots, rocks, or traffic.
Understanding Key Pedal Features
A pedal specification only matters if you can connect it to something your feet experience on the trail. Start with the body, then look at the contact points, axle, and bearings. You're trying to answer a practical question: will this pedal continue to support and rotate smoothly after mud, grit, rock strikes, and repeated loading?
Platform and pins
A larger platform gives the shoe more area to contact, but bigger isn't automatically better. It should suit your shoe size and leave enough clearance for the bike's geometry and the trail. A concave platform places the shoe lower in the centre, allowing the pins to support the front and rear of the sole rather than relying on pin height alone.
Pins provide the first layer of grip, but maximum height can make repositioning difficult and can damage soft soles. Replaceable pins are useful because rocks eventually bend or wear them. On wet trails, an open layout gives mud somewhere to escape instead of creating a slippery layer between the shoe and the pedal.
Axle and bearings
A replaceable steel axle is a sensible choice for riders who expect regular impacts, especially on an e-bike. Sealed cartridge bearings or serviceable bushings can help keep contamination away from the rotating surfaces, although no bearing arrangement eliminates the need for inspection.
Weight deserves context. The New Zealand Mountain Bike Trail Builders Handbook identifies gradients above 10° as particularly vulnerable to erosion unless they receive rock armouring, and notes that steep trails require continued maintenance. Those conditions often produce wet grit, exposed rock, and repeated impacts, so a pedal's serviceability can matter more than saving a small amount of weight.
Look for: an open body, replaceable pins, a serviceable bearing system, and spare-parts support. These features reduce the chance that one damaged component ends the useful life of the whole pedal.
The axle threads also need to match the crank and be installed correctly. A pedal that spins smoothly in the workshop but develops play after muddy rides needs investigation, not more grease applied from the outside.
The following video shows the kind of internal construction and servicing detail worth understanding before you buy.
Choosing the Right Pedals for Your Ride
Start with where and how you ride, then narrow the specifications. A Nelson trail rider who frequently encounters loose, technical sections may need a forgiving system that supports quick dabs. A rider focused on long cross-country loops may prefer clipless pedals for consistent positioning, but only after practising release until it becomes automatic.
For trail and enduro riding
Choose a metal flat pedal when you want a solid platform, replaceable pins, and confidence while moving your feet. A moderate concavity can hold the shoe without making it feel trapped. Look for enough platform to support your shoe, but don't choose a huge body if your bike already has limited ground clearance.
Clipless trail pedals suit riders who want retention through braking, climbing, and impacts. An adjustable mechanism and an open cage are particularly useful in wet conditions. Set the release tension conservatively at first and learn how the cleat exits before increasing resistance.
For e-bikes
E-bikes place different demands on pedals because the system carries more mass and the motor can add torque during technical climbs. That makes a sturdy body, reliable axle, and available replacement parts worthwhile. A metal flat pedal is often a practical choice for riders who expect pedal strikes, while a solid clipless trail pedal can work well for experienced riders who value retention.
Don't select based on motor assistance alone. Assistance can make starts and low-speed manoeuvres happen quickly, leaving less time to decide where your foot should go.
For families and mixed-use riders
Flat pedals usually simplify a bike that moves between commuting, family rides, and trails. Choose pins that provide grip without becoming unnecessarily difficult to reposition, and pair them with shoes that have a firm, reasonably sticky sole. Ordinary trainers can work for casual use, but they often don't hold the foot as consistently as purpose-built mountain-bike shoes.
A useful decision test is simple. Ask where you most often stop, how frequently you put a foot down, and whether you can already release from clipless pedals without thinking. Your answer should influence the pedal more than an ambition to ride a particular discipline.
Installation and Sizing Tips
Pedal installation is straightforward, but the left and right threads catch out many riders. The right pedal uses a standard right-hand thread, while the left pedal uses a reverse thread. Both pedals tighten towards the front of the bike when you're looking at the crank from the outside.
Fit the pedals carefully
- Identify the sides. Check the markings on the axle or packaging before starting. Never force a pedal that feels cross-threaded.
- Clean the threads. Remove old grit from the crank and pedal axle. Apply a suitable layer of bicycle grease or the lubricant recommended by the manufacturer, because dry threads can seize or make later removal difficult.
- Start by hand. Turn the axle gently with your fingers for several rotations. If it won't start smoothly, remove it and realign it rather than using a spanner to force the thread.
- Tighten with the correct tool. Use a pedal spanner or the appropriate hex key from the crank side. Follow the pedal manufacturer's torque specification and your crank manufacturer's instructions, since the correct setting varies by component.
- Check the rotation. Each pedal should spin smoothly without obvious grinding or side-to-side movement.
Sizing is about the interface between your shoe and the platform. A small body may feel agile but leave parts of a larger shoe unsupported. A very large platform can improve support, yet it may strike rocks more readily on a low bike.
For clipless pedals, align the cleat with the shoe's natural position before fine-tuning it. Start with low release tension, practise unclipping on both sides, and confirm that the cleat releases without the shoe sole catching on the pedal body.
Maintenance and Troubleshooting
New Zealand mud doesn't need to stay on a pedal long to affect its movement. Rinse away soil after a ride, but don't aim a high-pressure jet directly at the bearing seals. A gentle hose or bucket of clean water is safer, followed by drying and a light wipe of the axle.
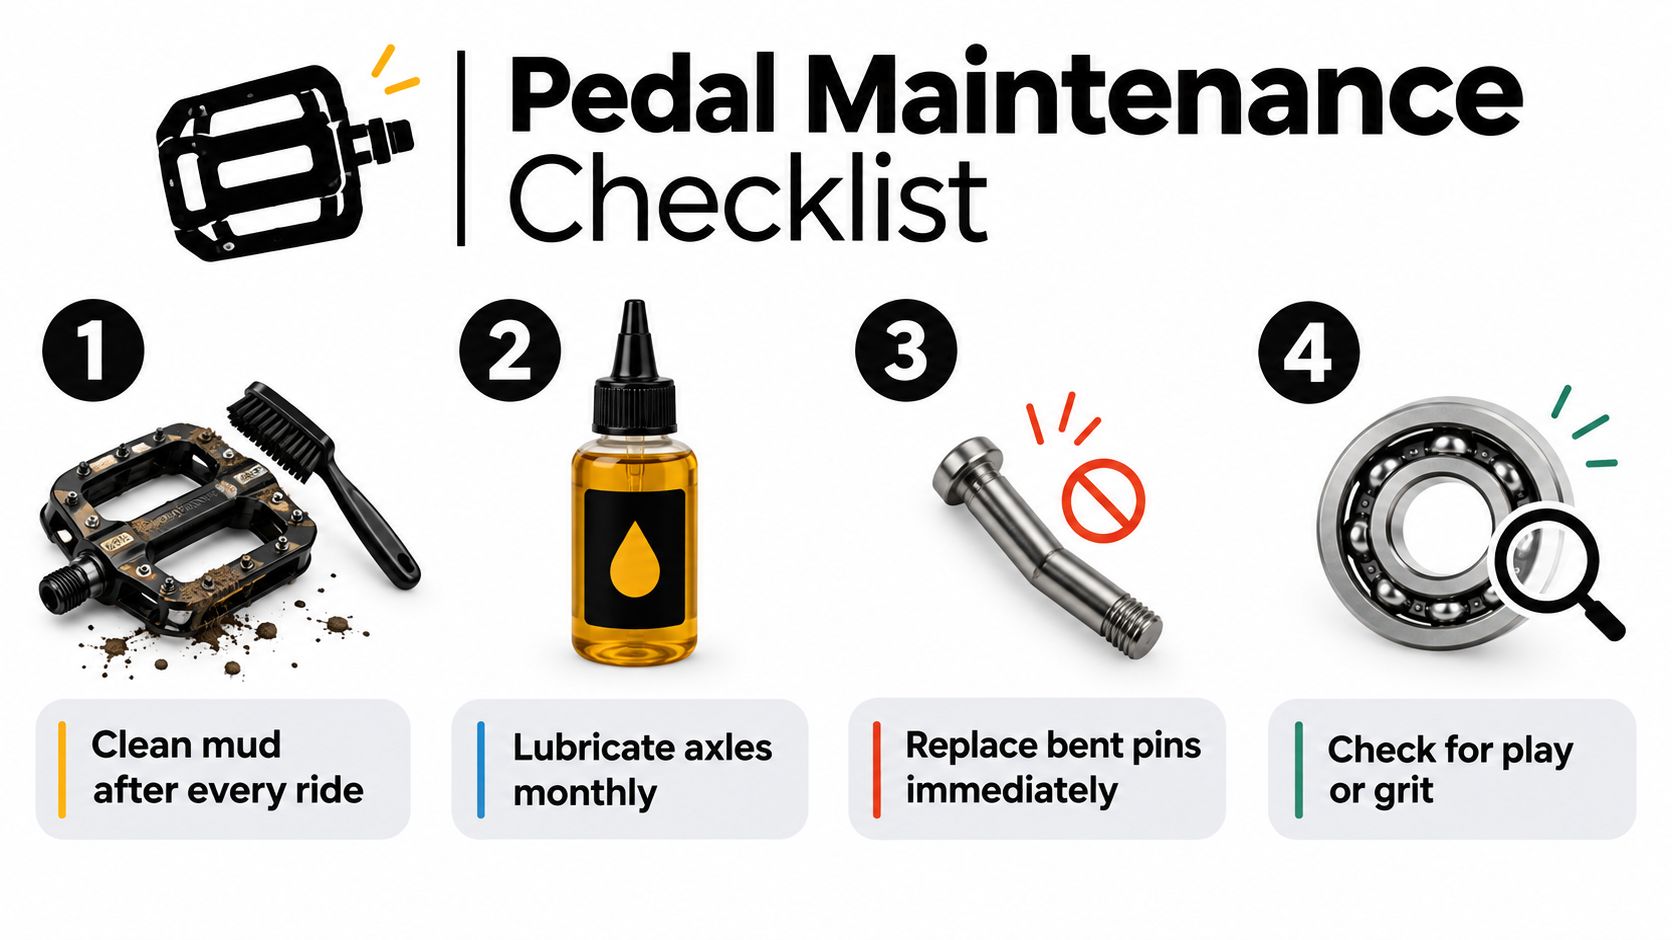
A simple trail-ready routine
Regional guidance describes New Zealand riding with roots, loose rock, off-camber sections, steep grades, and natural surfaces. Those conditions increase foot movement and the chance of accidental unclipping, so retention and mud clearance deserve priority over weight alone, as explained in this New Zealand mountain-biking guide.
- Clean the body: Brush packed mud from between the pins and around the clipless mechanism.
- Inspect the pins: Replace bent or missing pins before the shoe loses consistent contact.
- Check for play: Hold the pedal and move it sideways. Any noticeable movement or roughness deserves bearing or bushing inspection.
- Examine the axle: Look for impact damage, corrosion, or marks that suggest the pedal has been striking rocks.
- Service the mechanism: Follow the manufacturer's instructions rather than flooding a sealed bearing with random lubricant.
A squeak may come from the shoe, cleat, pedal pin, or bearing, so isolate the source before replacing parts. A flat pedal that feels slippery after cleaning may have worn pins, a contaminated shoe sole, or mud filling the concavity.
For a broader workshop routine, use this professional bike maintenance guide. On an e-bike, inspect more often if you ride rocky climbs or regularly strike the pedals, because impact and torque can accelerate wear.
Purchasing MTB Pedals in New Zealand
Buying locally gives you a better chance of matching the pedal to the actual ride rather than choosing from a generic discipline label. A shop team can ask about your shoe size, crank clearance, local trails, riding experience, and whether the bike is an e-bike. Those questions often reveal that the apparently ideal pedal is too aggressive, too closed to shed mud, or unsuitable for frequent stops.
The 2025 Ngā Haerenga evaluation recorded almost 2.58 million trail trips. It also reported that 14% of users encountered adverse weather, 6% experienced equipment failure, and 5% reported an injury, with trail-surface condition identified as an opportunity for improvement in the 2025 evaluation report. Those findings reinforce a practical point: local conditions should influence component decisions.
What to ask before buying
Take your riding shoes, or at least know their sole pattern and size. For flats, ask whether the pin height can be adjusted or replaced, whether the axle can be serviced, and whether the platform offers useful concavity. For clipless pedals, confirm the cleat standard, release direction, tension adjustment, and compatibility between the cleat and shoe.
Local support also matters after the sale. A mechanic can install pedals without damaging crank threads, check bearing play, fit cleats, and help diagnose a release problem. That assistance is particularly useful when you're moving from flats to clipless or setting up an e-bike for mixed trail use.
A New Zealand retailer such as Rider 18 offers MTB and e-bike components, workshop support, product guidance, and nationwide shipping, so riders can compare pedal systems with practical fit and servicing questions in mind. The store's guide to choosing pedals in New Zealand is another useful reference when you're weighing local riding conditions against pedal design.
Common Misconceptions About MTB Pedals
The lightest pedal isn't automatically the fastest pedal for your ride. If a slightly more substantial platform keeps your shoe stable, clears mud, and survives repeated rock contact, it may help you ride with less interruption. Catalogue weight matters, but it sits below grip, clearance, bearing condition, and serviceability in a wet and technical environment.
Another common assumption is that more pins always mean more control. Tall, aggressive pins can hold a shoe firmly, but they can also make repositioning harder and may catch a soft sole too strongly. A well-shaped concave body with sensible, replaceable pins can provide a more predictable interface than a flat body covered in extreme pins.
Clipless pedals aren't a compulsory upgrade. They can support consistent foot placement and efficient pedalling, but they also introduce a release skill that must be practised. Flats remain a sound choice for riders who dab often, stop in mixed traffic, ride with family, or want to develop body position and pressure control without managing a cleat.
The useful question isn't “Which pedal is more advanced?” It's “Which pedal lets me respond calmly when the trail changes?”
E-bike riders also shouldn't assume motor assistance makes pedal choice less important. Extra system mass and strong assistance can increase the consequences of a misplaced foot, a failed release, or a pedal strike. A durable flat pedal may be more suitable than a lightweight racing model, while an experienced rider may prefer a clipless trail pedal with an open mechanism and adjustable retention.
Choose the shoe and pedal as one system. A sticky flat pedal can't compensate for a smooth running shoe on wet roots, and a good clipless pedal won't release cleanly if the cleat is misaligned or the sole obstructs the mechanism.
Rider 18 stocks MTB and e-bike pedals, compatible shoes, components, and workshop support for riders comparing flats and clipless systems in New Zealand conditions. Visit Rider 18 to discuss the right platform, cleat setup, and maintenance options for your bike before your next muddy ride.


