

How to Choose a Bicycle Frame Bag That Fits Your Bike
- by Nigel
-

You've bought a roomy bicycle frame bag, strapped it under the top tube and started packing. Then the bottom presses against the bottle cage bolts, the rear brake cable disappears beneath a strap, and the zip only closes if you squash your jacket against your phone.
That's a fit problem, not a shortage of capacity. A useful frame bag has to share space with bottles, cables, your knees and, on an e-bike, a battery that still needs to come out. Choose the shape and weather protection around those constraints before you compare litres.
Frame Bag Size Classes at a Glance
A frame bag is sized by the usable opening inside the frame, not the volume printed on its packaging. A long, shallow bag and a short, deep bag can hold similar loads yet fit completely different bikes.
Use these classes as shopping categories rather than standardised dimensions. Manufacturers don't use the labels consistently, and full-triangle describes coverage more reliably than capacity.
Frame bag size classes by capacity and frame fit
| Bag class | Typical capacity | Frame and bike fit | Typical load |
|---|---|---|---|
| Compact | Essentials-only capacity | Small frames, or bikes with a bottle cage in the triangle | Phone, tube, multitool, keys and snacks |
| Mid-size | Commuting and day-ride capacity | Road, gravel and hardtail frames with room beneath the top tube | Commuting kit, tools and a spare layer |
| Full-triangle | Capacity shaped around the whole opening | Frames with a long, unobstructed triangle | Day-ride tools, food and spare clothing |
| Large | Extended-ride and overflow capacity | Spacious frames without conflicting batteries, cables or suspension parts | Bikepacking supplies and multi-hour ride equipment |
Choose the smallest useful load
Compact bags make sense when you want pockets off your back but still need a bottle inside the frame. A mid-size bag adds room for clothing, although a bulky waterproof jacket can occupy more space than the rest of your repair kit combined.
Full-triangle bags suit an open gap between the seat tube and head tube. They often displace bottle storage, so extra carrying capacity can create a separate hydration problem.
The New Zealand Transport Agency's 2024 Walking, Cycling and Micromobility Monitor reported that 52% of conventional push-bike riders and 67% of e-bike riders cycled at least weekly. For regular riding, accessible tools, keys and snacks can be more useful than expedition-sized storage.
Practical rule: Choose a provisional size class from your actual kit, then prove the shape fits. Capacity alone doesn't establish compatibility.
How to Measure Your Frame for a Bag
Use a tape measure, cardboard, a pencil and masking tape. Measure the bike as you ride it, with its bottle cages and accessories installed, rather than measuring an empty frame and discovering the conflicts afterwards.
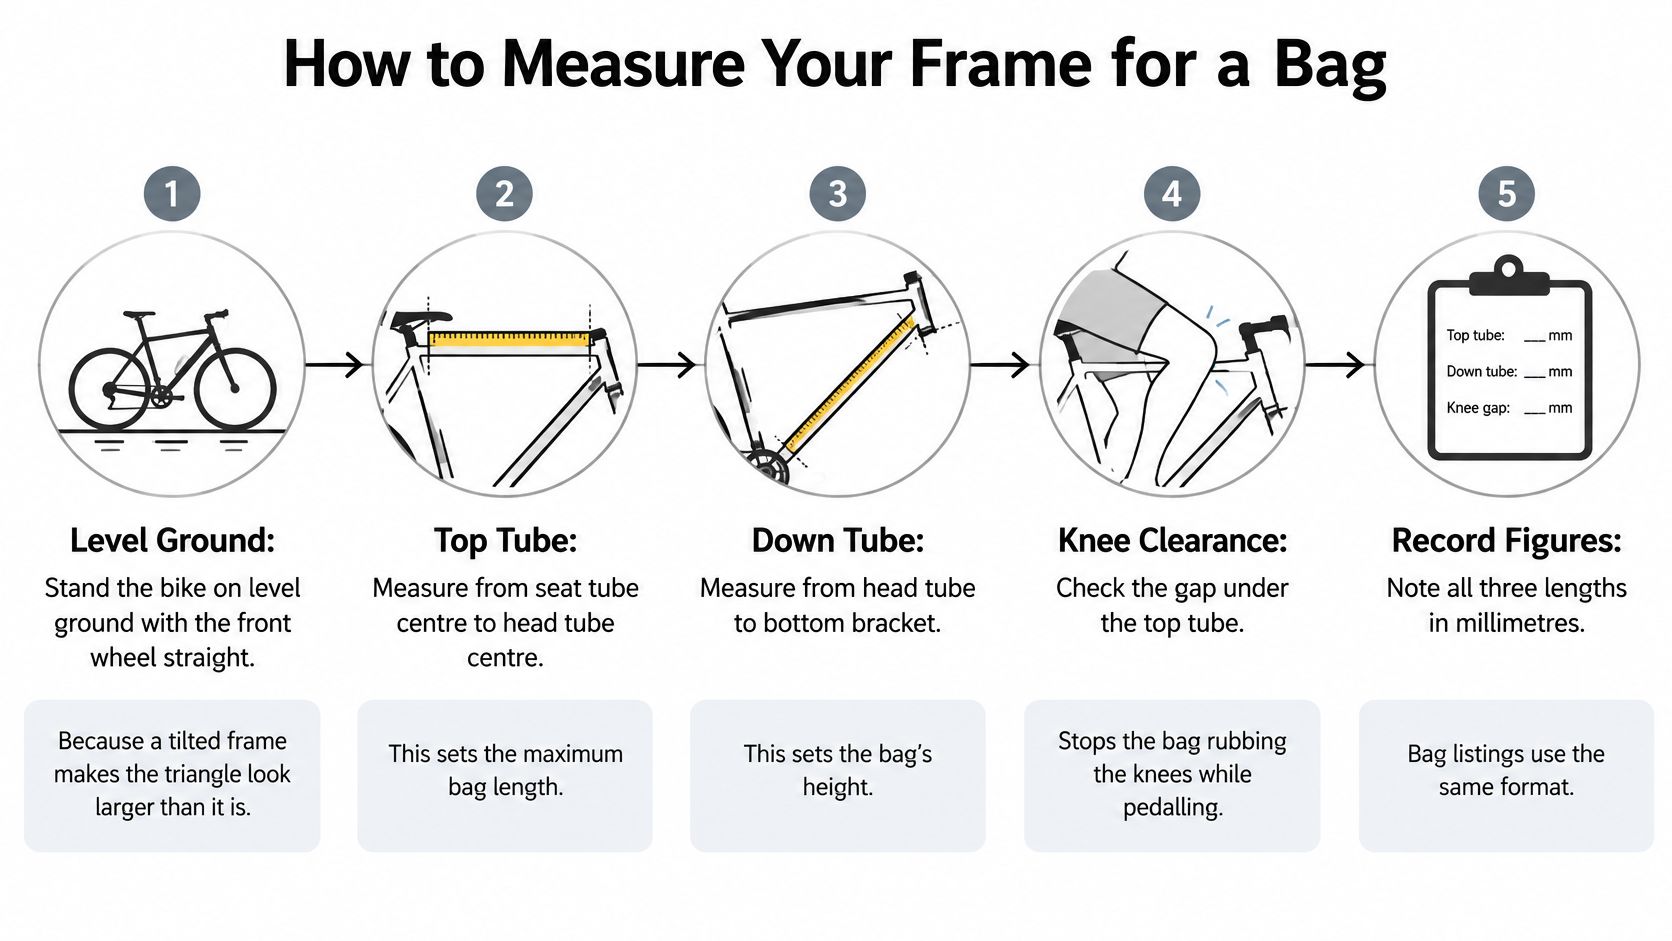
The measuring graphic provides a starting sequence. For buying a bag, use the inside faces of the tubes as your final boundaries, not their centre lines.
Record the usable opening
- Stand the bike upright. Put it on level ground with the front wheel straight. This makes it easier to hold the tape in the frame's plane instead of measuring diagonally across the opening.
- Measure beneath the top tube between the seat-tube and head-tube junctions. Record the clear span, excluding welds, cable stops and any protruding hardware that would push into the bag.
- Follow the down-tube boundary. Measure the inside edge towards the bottom bracket and note any curve or battery mount. A straight-line measurement won't describe a curved tube accurately, so trace awkward shapes onto cardboard.
- Check the front-to-rear space at the height where the bag will be deepest. Bottle cage bosses, a fitted bottle and the shape of the seat tube can reduce this opening substantially.
- Measure the available depth. Check the distance from the underside of the top tube towards the down tube through the middle of the triangle. Repeat wherever the proposed bag changes shape rather than assuming the opening is symmetrical.
- Allow a visible margin around the outline for seams, straps and movement. Don't buy a bag whose empty dimensions require you to force it between the tubes; packed fabric bulges rather than remaining perfectly flat.
- Compare shape before capacity. Transfer the manufacturer's dimensions to cardboard and hold the template inside the frame. Confirm whether listed measurements describe the complete exterior, the main body or an expandable section.
Check width as well as the side profile
A cardboard template shows length and depth, but it doesn't show knee clearance. Hold a loosely rolled towel inside the proposed outline and pedal backwards while someone steadies the bike, checking both seated and standing positions.
Frame size labels aren't a substitute for this work. The bike frame size chart helps with overall bike sizing, but the actual triangle opening determines bag fit.
The video offers another visual reference for the measuring process.
Keep your measurements and template together when comparing products. Check usable length first: a bag with the right capacity still fails if its front corner has nowhere to sit.
Clearance and Compatibility Checks
A bag pressing against cable housing can look harmless on the workstand. Once loaded, it can pull the housing out of its natural line, rub through its outer surface or interfere with a moving cable.
The triangle isn't empty storage space. Work through every component that shares it, including parts that move away from their parked position.
Frame components to check before fitting a bag
| Component | Clearance to aim for | Problem if missed |
|---|---|---|
| Bottle cage bosses | Bag and straps clear of bolt heads, with bottle removal unobstructed | Abraded fabric, awkward mounting or sagging |
| Brake and gear cables on top tube | Housing follows its natural route without pressure | Rubbing, restricted cable movement or altered shifting |
| Dropper post hose or housing on seat tube | Unrestricted routing throughout operation | Sticky actuation, noise or abrasion |
| Rear shock or linkage | Clear throughout the suspension's travel | Bag pinched or struck during compression |
| Downtube battery | Casing, vents and removal path unobstructed | Pressure against the battery or blocked removal |
| Fork crown at full steering lock | No contact in either steering direction | Impact against the bag or straps |
Test the loaded shape
An empty bag can conceal a poor fit. Ask whether you can trial the bag, then pack it with a rolled towel to reproduce its working shape without putting sharp tools against the frame.
Turn the bars fully in both directions. Watch the fork crown, cable loops and strap tails, not just the front corner of the bag.
Suspension needs a separate check through its travel. Follow the bike manufacturer's procedure or ask a mechanic to do this; bouncing on the saddle doesn't demonstrate full-compression clearance.
For a frame without suitable mounting bosses, a strap-mounted bag can work well. Check that the straps reach around the actual tube profiles, particularly oversized e-bike down tubes, and that their positions don't land on cable ports or bolt heads.
- Protect contact areas. Clean the frame and apply suitable protective film beneath straps. Grit trapped under a secure strap can still damage paint.
- Reject forced routing. Don't pull a brake hose aside just to make the bag fit.
- Record every conflict. Any unintended contact with a moving part or vulnerable component needs resolving before riding.
Keeping Contents Dry in Real Rain
The most waterproof bag isn't automatically the best commuter bag. A sealed roll-top can protect well but make a frequently used lock awkward to reach, particularly when the opening is tucked beneath the top tube.
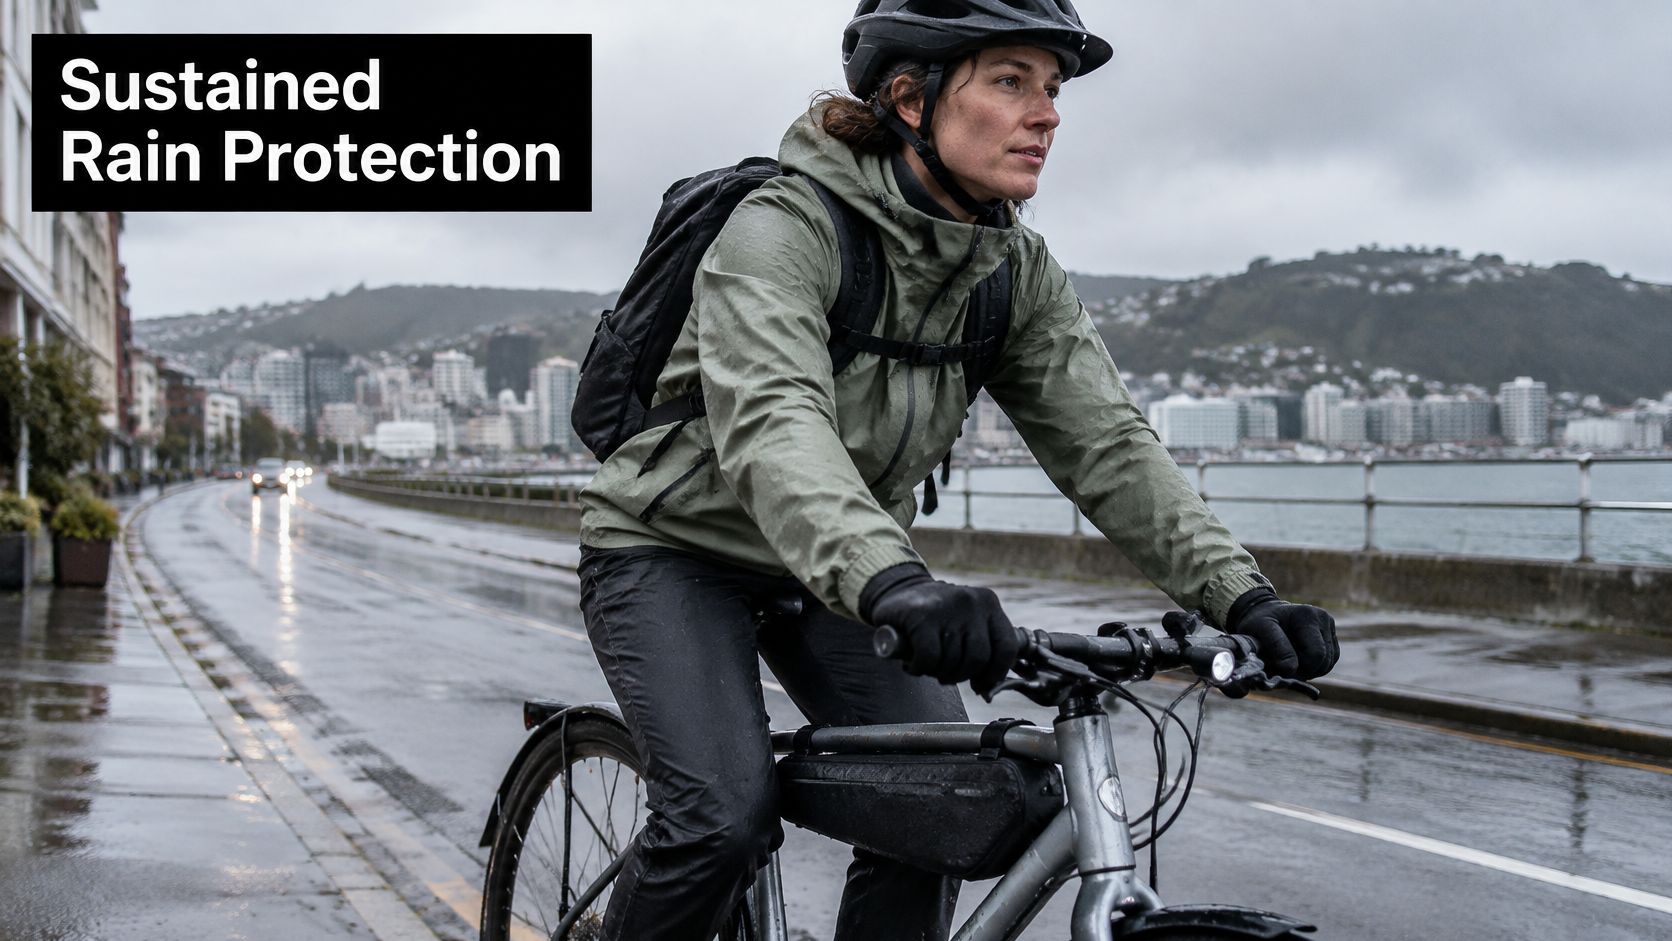
Choose protection for sustained exposure, not just the shower you expect on the way home. NIWA's climate information includes 1991–2020 rainfall normals, which provide a regional reference for the route and season you're planning around Nelson or elsewhere in New Zealand.
Wet-weather packing also has to account for spray from below, not just rain falling onto the top tube.
Frame bag protection types for wet riding
| Protection type | What it handles | Weak point | Best for |
|---|---|---|---|
| Water-resistant zip and coated fabric | Light spray and brief showers | Zip and seams can admit water during sustained rain | Short urban trips |
| Welded seams and roll-top closure | Sustained rain and road spray when properly closed | Slower access and awkward packing around rigid items | Multi-hour wet rides |
| Internal dry pouch | Separately protects phones, medication and electronics | Adds bulk and must be closed correctly | Any bag carrying vulnerable contents |
| Clip-on rain cover | Extra protection during occasional rain | Can flap, collect mud or obstruct bottle cages | Occasional supplementary use |
Match protection to the ride
For short urban trips, a water-resistant bag with a sealed pouch for vulnerable items can be a sensible compromise. On exposed rail trails, favour welded construction and a closure that remains protected from wheel spray.
For prolonged wet riding, use a sealed bag with internal protection rather than expecting a cover to compensate for leaky seams. Keep dry clothing separate from wet gloves or a damp jacket.
Radio New Zealand's wet-weather commuting guide reports that only about 3% of urban New Zealanders are committed bike riders, with fewer riding in wet weather. That doesn't determine your waterproofing needs: your own willingness to ride through rain does.
A waterproof fabric panel doesn't make a waterproof bag. Check the seams, closure and instructions for closing it.
Phones, moisture-sensitive medication and chargers belong in sealed internal pouches. Clean grit from closures and let the bag dry open after wet rides, because contamination and repeated flexing can compromise sealing surfaces.
E-Bike Battery and Heat Rules
A frame bag is accessory storage, not battery protection or a substitute for safe battery handling. Trail Hub's Otago trails guidance identifies wet-weather clothing, water, tools, spare tubes and a phone as essential ride equipment, which makes a useful starting load without filling the triangle with dense cargo.
The fitting question is whether you can carry that equipment without changing access, cooling or cable routing around the electrical system.
Pack around the system
- Pad hard objects. Wrap tools or a power bank so they can't hammer against the battery casing over rough ground. Secure them inside the bag rather than relying on tightly stretched outer fabric.
- Keep weight low and central. Use internal dividers or a tool roll to prevent heavy items sliding into a corner and pulling the bag sideways.
- Leave wiring unstressed. Don't sandwich electrical leads between a strap and the frame. Repeated pressure and movement can damage insulation or fatigue wiring.
- Preserve service access. Leave charging ports, connectors, motor interfaces and any ventilation openings unobstructed. The bag must not become an insulating wrap around the battery.
- Follow transport instructions. Remove the battery for vehicle transport where the battery or bike manufacturer directs it, and secure the removed battery appropriately.
E-bike electrical systems are generally water-resistant, not waterproof. A sealed frame bag doesn't make deep-water riding safe, and wet equipment shouldn't drain onto electrical connections.
Use the electric bike batteries guide alongside your system's manual when checking battery care and removal.
Before a long ride, practise releasing the catch and removing the battery with the bag loaded. Support the battery as instructed rather than forcing a one-handed removal, and don't assume that feeling the outside of the fabric proves the system is running cool.
Matching the Bag to How You Ride
New Zealand's Household Travel Survey cycling report for 2011–2014 found that 43% of cyclists travelled less than 5 kilometres on their travel days, 29% travelled 5–10 kilometres, and 28% travelled 10 kilometres or more. The same survey found that 69% of families with children owned or had access to at least one bicycle.
Those historical figures describe different carrying jobs, not a single ideal bag. Pack for the journey you really make.
A roadside adjustment is much easier when the repair kit is accessible without unloading everything else.
Everyday and family riding
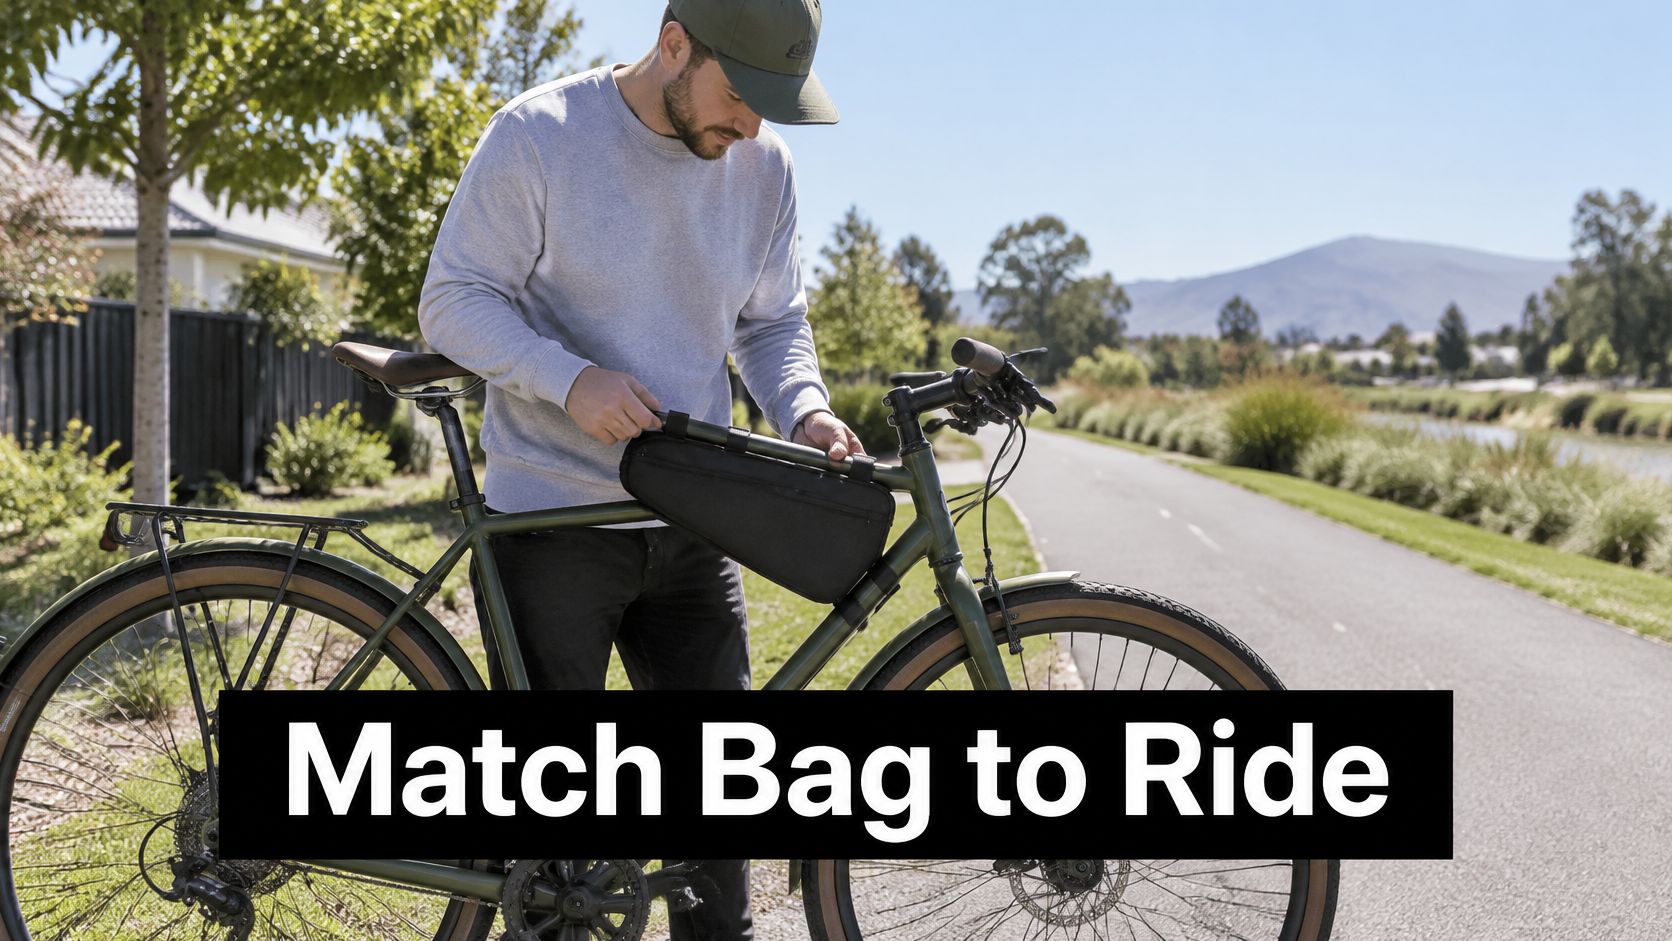
The commuter stopping at a bike rack needs the lock first, not buried beneath a jacket. A compact or mid-size bag suits a phone, spare tube and light layer, but a substantial lock may belong on its own frame bracket.
For a parent accompanying a child, the useful cargo is different: snacks, a spare layer and repair equipment that fits the family's bikes. A mid-size bag works if those items remain organised rather than mixed into a loose pile.
Longer loops and loaded travel
A gravel rider leaving the sealed road needs tools, food and a jacket without sacrificing drinking water. A mid-size or full-triangle bag makes sense only after deciding where the bottles will go.
A bikepacker can use a large frame bag for dense, compact equipment while distributing bulky sleeping gear elsewhere. Carrying every available item in the triangle makes access harder and can exceed the bag's intended load.
The bags for biking guide helps compare frame storage with other positions. A frame bag doesn't need an expedition to justify itself; it needs a clearly defined job.
Real NZ Frame Bags Compared by Capacity
These are historical New Zealand listings, not current stock or price promises. Unknown means the figure isn't established here, so confirm the missing specification before ordering.
NZ frame bags listed in 2025 by capacity, weight and price
| Product | Capacity | Weight | Listed price (NZ$) | Listed by |
|---|---|---|---|---|
| ULAC Neo Porter Nomadpak Touring Pro | 1.5 L | 170 g | 69.90 | Chain Reaction Cycles NZ, 2025 listing |
| PRO Discover Compact | 2.7 L | Unknown | 110 | The Cyclery, 2025 listing |
| ULAC Neo Porter Nomadpak Touring GT | 3.5 L | Unknown | Unknown | Evo Cycles NZ, 2025 listing |
| Blackburn Outpost Elite | 6.76 L | 306 g | Unknown | Evo Cycles NZ, 2025 listing |
| Restrap Race Frame Bag Small | Unknown | Unknown | 184.99 | Papanui Cycles, 2025 listings |
| Restrap frame bags, starting price | Unknown | Unknown | From 149.99 | Papanui Cycles, same collection |
Read beyond the capacity column
The ULAC Touring Pro is the compact starting point here for essentials. The PRO Discover Compact offers more packing room, but its name doesn't prove it will preserve bottle clearance on your bike.
The ULAC Touring GT sits between those smaller options and the much larger Blackburn. Don't assume it fills the triangle just because of its capacity; its outline still needs checking against your template.
The Blackburn belongs on the shortlist only when you have substantial usable space. The Restrap entries establish price context, but missing capacity and weight prevent a fair size comparison without checking the specific model.
Use the comparison graphic as a visual aid, then confirm specifications with the retailer.
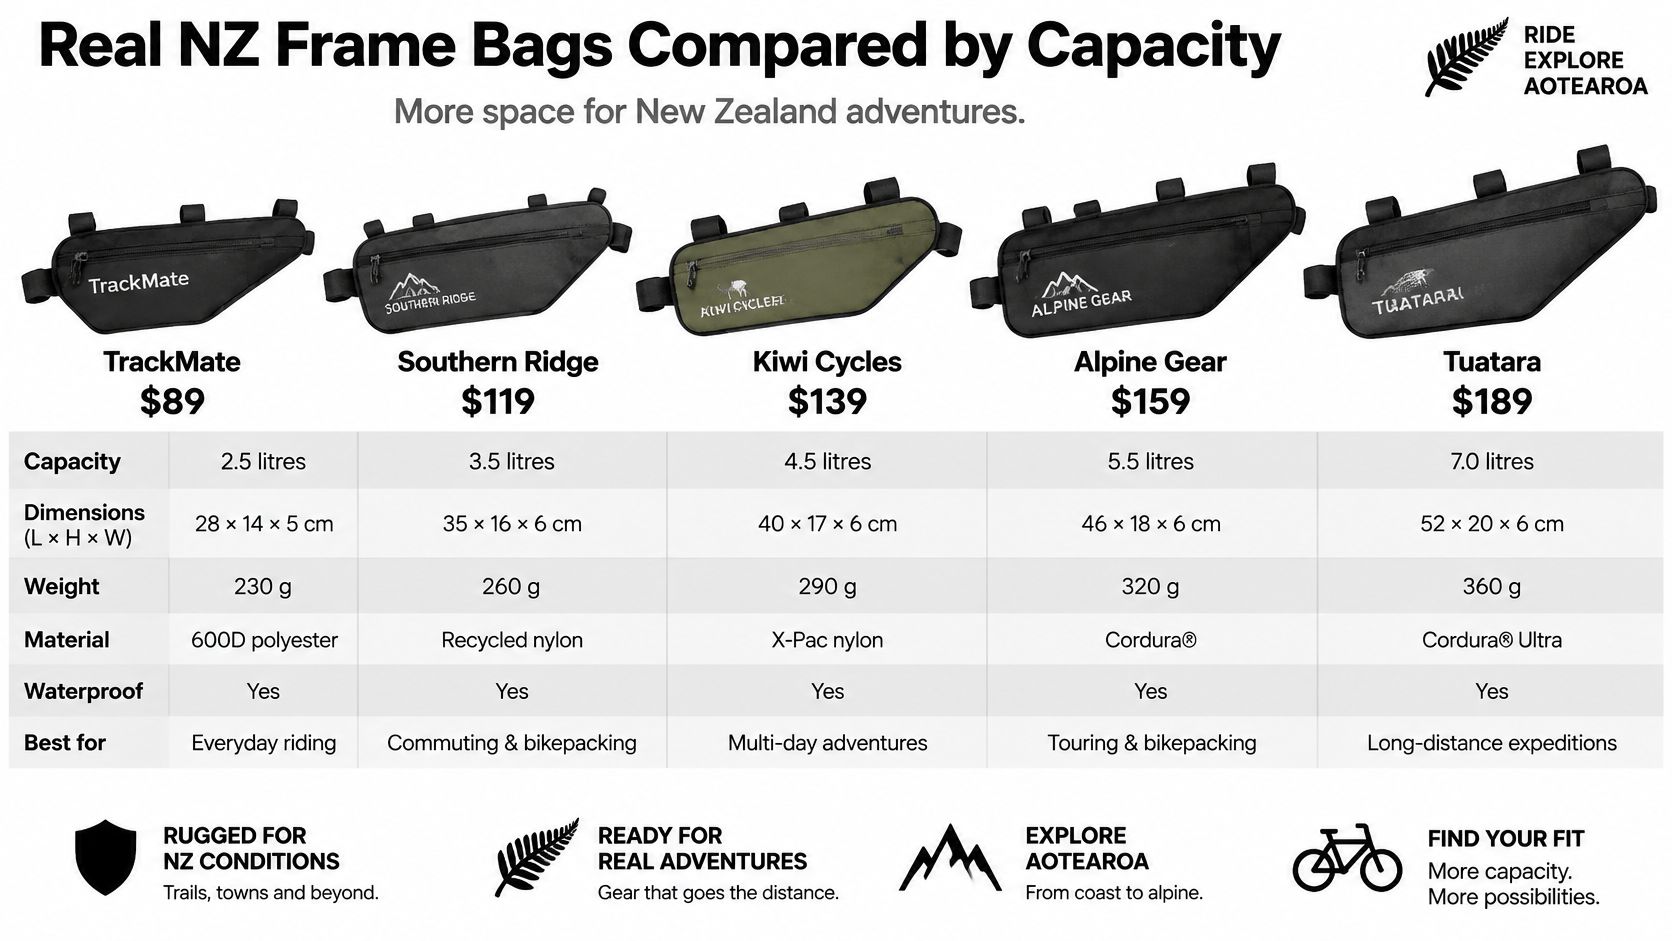
Buying judgement: Filter by shape, mounting and protection first. Compare weight once the bags are genuinely interchangeable, then use price to choose between suitable options.
Confirm the Fit Before You Buy
A good purchase decision ends with a loaded test, not a successful checkout. Keep packaging intact and check the retailer's trial and return conditions before mounting anything that could mark the bag.
Use this routine to turn a shortlist into a sensible choice.
- Define the job. Set out the actual kit and choose the size class and weather protection that suit it. Remove items you already carry securely elsewhere.
- Compare the bag's outline with your measurements and cardboard template. Ask the retailer about unclear dimensions, strap positions and packed width rather than estimating from a product photograph.
- Resolve component conflicts. Check bottle access, cable routing, steering movement and any suspension or battery requirements. Don't buy on the assumption that a strap can be moved when the attachment point is fixed.
- Load the bag at home and complete the movement checks before riding. Open the zip, retrieve your repair kit and operate every access point you expect to use on the road.
Make the first ride a shakedown
Start with a local ride where you can stop and adjust the mounting. Afterwards, inspect the frame protection, strap edges and bag corners for fresh rub marks, and check that the contents haven't migrated.
Rider 18, a Nelson-based bike shop, is one option for talking through triangle measurements before an online order, alongside advice from the bag manufacturer or your local mechanic. Have your measurements, bike details and intended load ready so the conversation is specific.
The bag must fit the frame and the riding before the litres matter.
Rider 18 offers cycling accessories, workshop services and advice for everyday riders, families and e-bike owners. Visit Rider 18 with your frame measurements and packing list to discuss a bag that leaves the bike's controls, bottles and battery access working properly.


Please upload banner from store admin blog pages