

Mountain Bike Equipment Guide: What You Need and Why
- by Nigel
-

You rolled up to the trailhead with a borrowed hardtail, a cycling cap, and a half-empty bottle rattling in the cage. The group is already clipping in. Nobody has asked whether your brakes bite, whether the helmet on the rack is actually yours, or whether you can fix a flat before the light drops. That gap is what most riders feel on their first proper outing, and it is the gap this guide closes. Mountain bike equipment is not a catalogue you buy in one hit. Each piece earns its place by the speed, the surface, and the consequence it faces.
Essential Mountain Bike Equipment at a Glance
A first-timer at a Nelson trailhead on a borrowed bike, cap on and no water packed, is one loose bolt or one sharp rock away from a walk out. The priority list below puts the gear in the order a mechanic would hand it over, not the order a sale rack displays it.
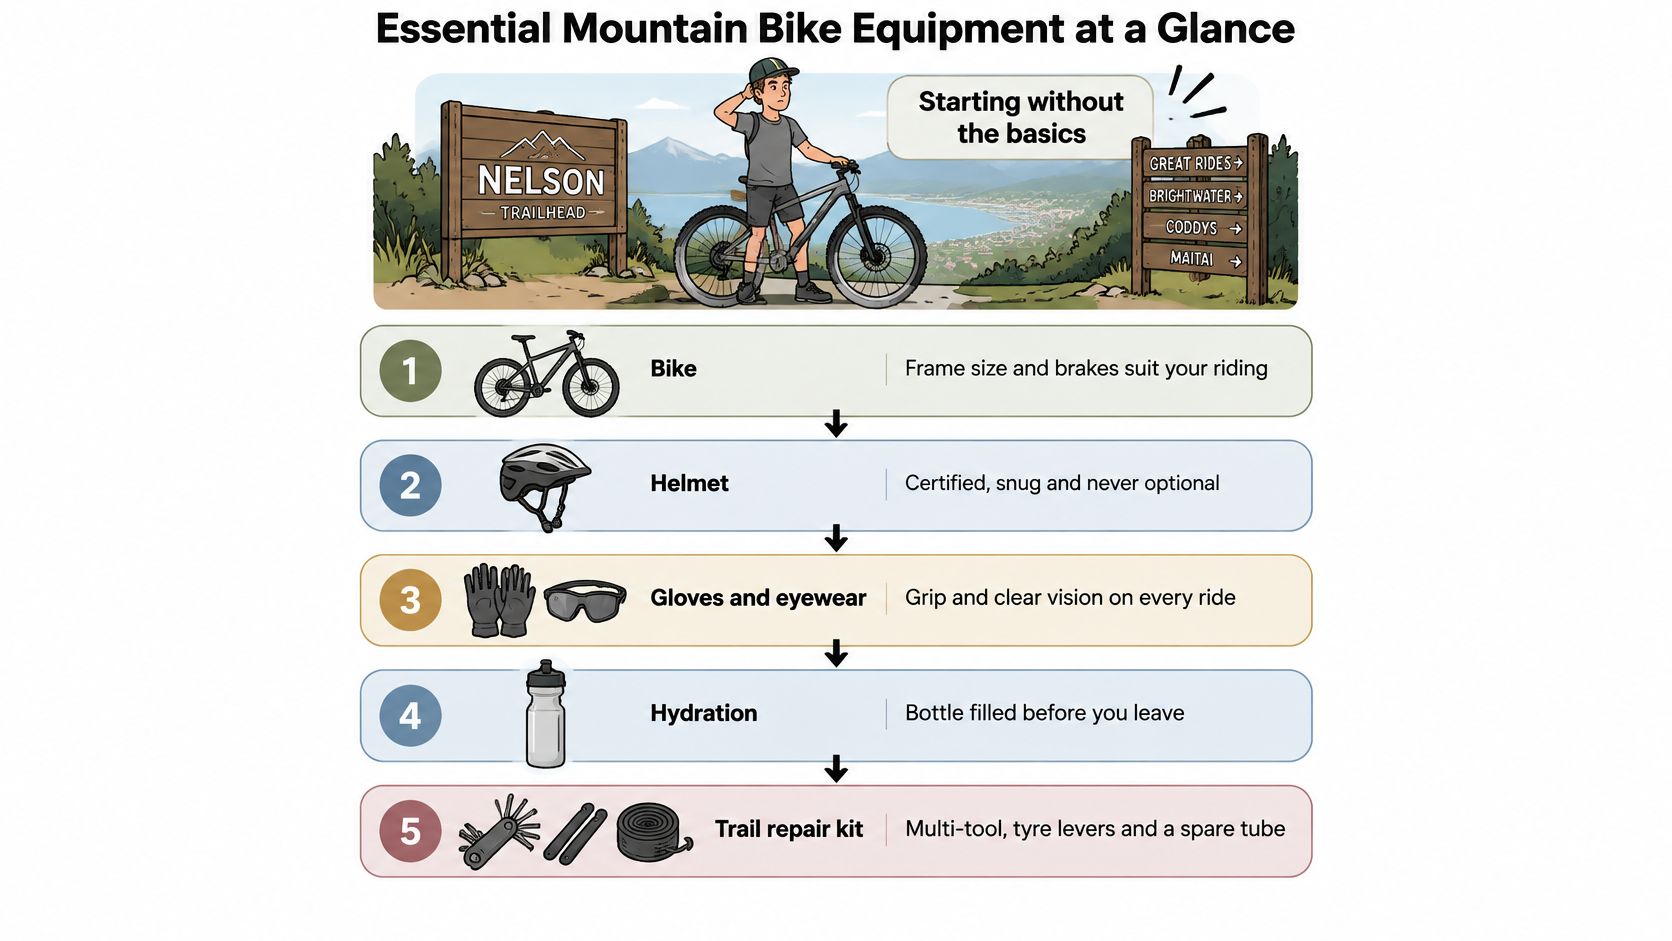
| Category | Core items | Priority | When it matters most |
|---|---|---|---|
| Bike | Hardtail or full-suspension frame sized to height, working brakes and drivetrain | Must have | Every ride |
| Helmet | Certified MTB helmet, full-face for jumps or fast descents | Must have | Every ride |
| Repair kit | Multi-tool, spare tube or tubeless plug kit, tyre levers, mini pump or CO2 | Must have | Every ride |
| Hydration | Bottle cage with 500-750 ml bottle, or 1.5-3 L pack | Must have | Rides over one hour |
| Gloves | Padded palm gloves | Strongly recommended | Falls and long descents |
| Eyewear | Impact-rated glasses or goggles | Strongly recommended | Dust, branches and wet days |
| Knee and shin pads | Pads that stay in place under bibs or shorts | Recommended | Technical trails and racing |
| Clothing | Layered, quick-dry tops and shorts, flat or clip-in shoes | Recommended | Changing weather and terrain |
A certified helmet and a repair kit sit at the top because every rider meets a crash or a flat sooner or later. Gloves and eyewear come next. They stop the low-drama injuries, a palm graze on gravel and a branch or a dust strike in the eye. Pads, clothing, and tyre choice then follow the trail and the weather, not a generic shopping list.
Sport New Zealand's 2013–14 cycling profile estimated that 8.8% of New Zealand adults aged 16 and over, approximately 292,000 people, participated in mountain biking in the previous 12 months, according to the New Zealand Medical Journal. The same national picture recorded 29,818 cycling claims in 2013 with the Accident Compensation Corporation, and about 20% of those injuries were attributed to mountain biking. Protection is foundational, not a later upgrade.
Tick the must-haves before the next ride. If you already track rides on a Garmin watch, a spare Garmin Forerunner band is a small fix that keeps the strap from failing mid-descent. Use the terrain and experience sections after this to refine what you still need.
The Bike Components and Setup That Set Your Terrain Limit
Suspension travel works like the shock absorbers on a car. Short travel soaks up chatter and small holes. Longer travel swallows bigger hits, and you pay for that in weight and in a softer feel when you are trying to pedal.
Travel against the trail you actually ride
Find the row that matches your usual Saturday, then buy that spec. Stretching one bike across every row is how frames and forks wear out early.
| Terrain | Suspension travel | Tyre width and tread | Front rotor |
|---|---|---|---|
| Smooth cross-country and gravel trail | 80-100 mm hardtail | 2.2-2.35 in, fast-rolling tread | 160 mm |
| Mixed trail | 120-140 mm | 2.3-2.5 in, mixed tread | 180 mm |
| Enduro and steep technical trail | 150-170 mm | 2.4-2.6 in, aggressive tread | 200 mm |
| Downhill and bike park | 180-200 mm | 2.5-2.6 in, soft compound, deep knobs | 200-220 mm |
An 80-100 mm cross-country hardtail is light and efficient on smooth climbs and gravel connectors. It feels nervous once the trail turns into a root staircase, because the fork runs out of stroke and the front tyre skips. A 120-140 mm trail bike is the honest all-rounder for mixed Nelson and Tasman singletrack, climbs you can still spin and descents with the odd drop.
A 150-170 mm enduro bike suits steep, rooty descents. The 200 mm front rotor in that row is there for a reason. You are carrying more speed into tighter corners, and a larger rotor gives the pads more braking force before they fade on a long descent. 180-200 mm bike-park bikes are built for lift-served runs, repeated hits, and casing that can take a case. They pedal poorly on a fire-road climb, and that is the trade-off, not a setup error.
A 130 mm trail bike will cope with one bike-park day. Repeated lift runs wear the bushings, the linkage bearings, and the tyre sidewalls faster than the same hours on a trail loop.
Wheels, pressure, and the grip you can actually feel
29-inch wheels roll over roots and hold speed on rolling trail. 27.5-inch wheels are lighter to flick, and they often fit shorter riders without an oversized reach. Neither size fixes a bad tyre.
Wider tyres at lower pressure grip better because the carcass conforms instead of bouncing. For a rider around 75 kg, a tubeless setup often starts in the low-to-mid 20s psi. Treat that as a starting point, not a target. If the bike feels harsh or skittish on loose corners, drop pressure a couple of psi at a time until the tyre squirms slightly in a turn, then add a little back. Too low and you pinch the rim or fold the sidewall. Too high and the tyre skates.
When a seal, a rotor, or a worn cassette is what's holding you back, sort mountain bike parts before you spend on a new frame. A fresh brake rotor and a chain in spec change how the bike stops and shifts more than a colour-matched stem.
Sizing and the fit checks that finish the buy
Buying by height alone ignores reach and stack. A long reach feels stable at speed and cramped if your arms are short. A tall stack sits you upright, which helps on steep climbs and can make the front end wander if you are already nervous.
Test ride until the bike feels calm at the speed you really ride, with room to move on the saddle and no locked elbows.
Set saddle height so the knee bends about 25-35 degrees at the bottom of the pedal stroke. A saddle set too high makes the hips rock and loads the knee on every stroke. Too low and you lose power and bash the saddle on drops. I would fix saddle height and bar roll before I touched travel or wheel size. Those two adjustments are free, and they decide whether the spec in the table actually works for your body.
Rider Protection Matched to Speed and Terrain
Protection should follow speed and consequence, not a generic checklist. A fire road and a bike-park jump line do not deserve the same helmet, the same pads, or the same argument about what is "enough".
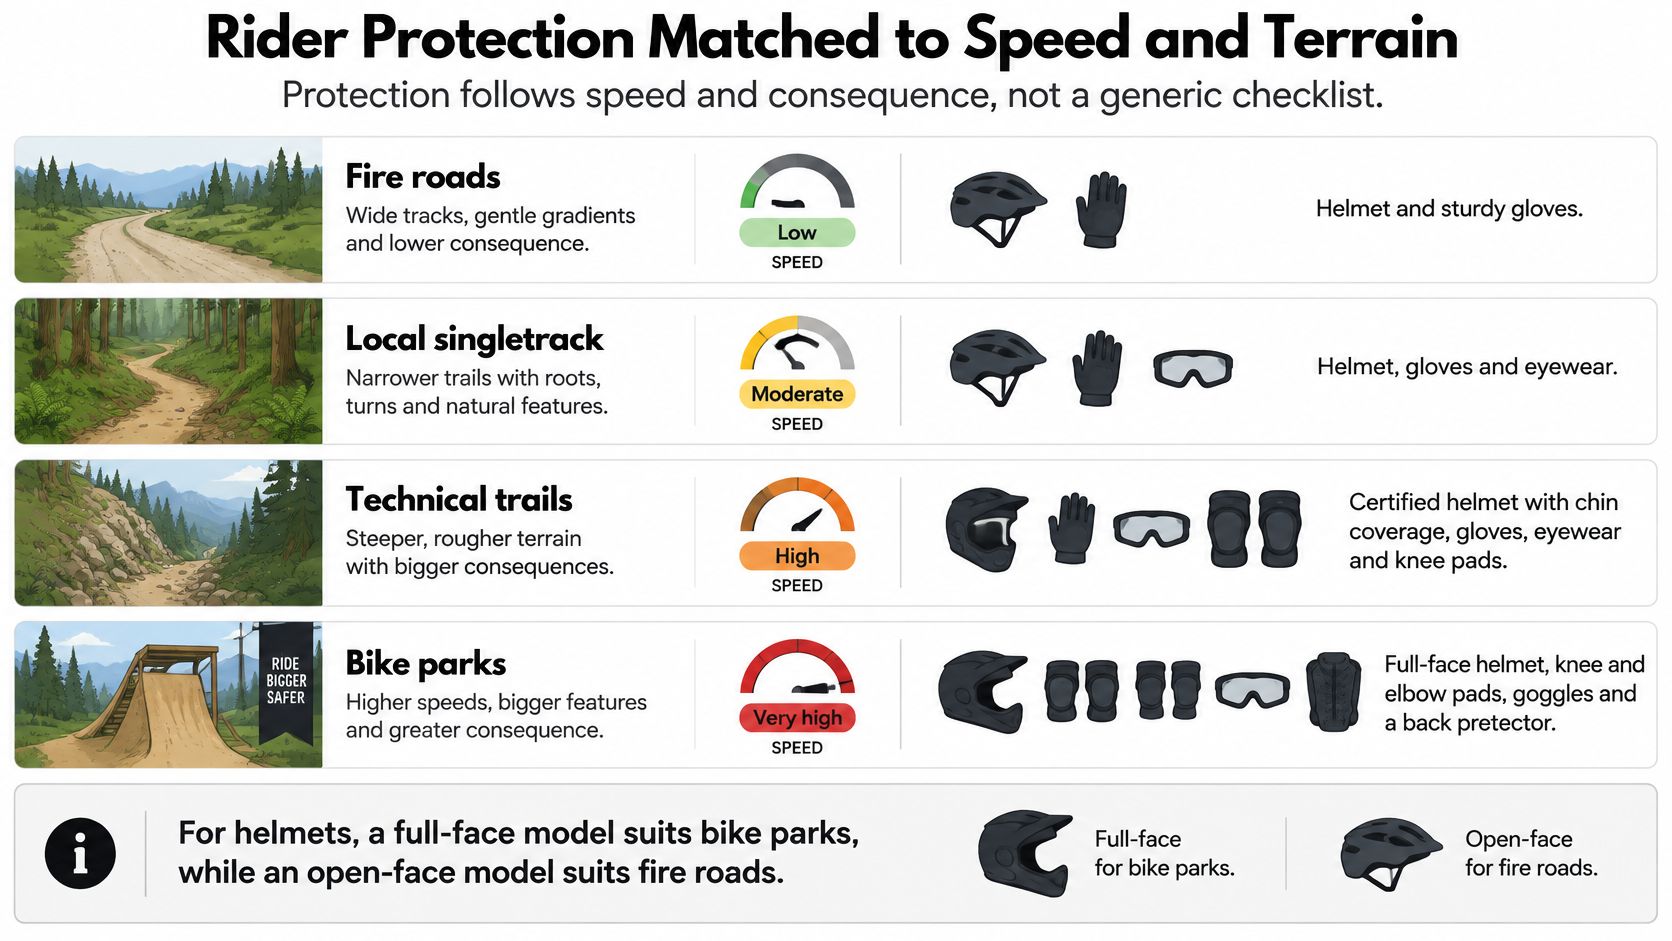
| Riding context | Helmet | Knee and shin | Gloves and eyewear | Torso armour |
|---|---|---|---|---|
| Mellow fire roads and easy trails | Certified trail helmet | Optional | Gloves and glasses | Not needed |
| Technical trail and small jumps | Trail helmet or full-face | Recommended | Gloves and glasses or goggles | Optional |
| Enduro and race | Full-face or enduro-rated helmet | Strongly recommended | Full gloves and goggles | Recommended on steep runs |
| Downhill and bike park | Full-face, downhill-rated | Required | Full gloves and goggles | Recommended |
Helmets, then everything that moves with you
A certified trail helmet covers most riding. A full-face is worth the extra weight and the extra heat once jumps, drops, or downhill speed put your chin and teeth in the impact zone. Brand and vent count are the wrong argument. Fit and retention are the right one.
The helmet should sit about two finger-widths above the eyebrows. Straps should form a V under the ears. Shake your head. If the shell rocks, it is the wrong size or the cradle is loose. A loose helmet fails at the moment you bought it to work.
A useful walk-through of how coverage changes with the trail is in this short fitting clip.
If you are comparing shells, read across mountain bike helmets with the table above in mind, not a single "best" pick.
Knee and shin pads trade pedalling freedom for coverage. Try them on the bike, in the shorts you wear, before you keep them. Pads that twist on the first climb get left in the car. Gloves save palms in the falls you will have. Glasses stop dust, twigs, and wet spray. Goggles earn their place on rainy or dusty days when glasses fog or let grit in at the sides. Torso armour covers spine and ribs on steep runs. It is worth packing for enduro and bike-park days, and it is dead weight on an easy loop.
A beginner on flat trail does not need a full-face. The same beginner who starts jumping does, on that day, not after the first over-the-bars.
Ask two questions before you leave the pads at home. How often do you fall on this terrain, and what would the worst fall hit?
Clothing and Hydration for Ride Length and Weather
A rider working at a steady trail pace often needs roughly 0.5-1 litre an hour, and more in heat or on long climbs. Carry capacity should follow the longest regular ride, not the bottle that happened to be on the bike.
| Ride length | Fluid to carry | Carry setup | Electrolytes |
|---|---|---|---|
| Under 1 hour | 500-750 ml | One bottle cage | Not usually needed |
| 1-2 hours | 1-1.5 L | Two bottles or a 1.5 L bladder | Optional in heat |
| 2-4 hours | 2-3 L | Hydration pack with 2 L bladder and bottle | Recommended in heat |
| Over 4 hours or bikepacking | 3 L or more | Pack plus frame bag and water filter | Recommended |
How the fluid actually gets drunk
A bottle cage is enough under an hour. You can see what is left, and you are not wearing a pack for a short loop. Past that, a 1.5-3 L bladder lets you sip on the climbs instead of gulping at the top. Gulping late is how riders arrive dizzy with a full bottle still in the cage.
Add electrolytes in the heat or once the ride runs past about two hours. Plain water alone on a hot climb leaves you drinking and still cramping. On rides over four hours, pack a filter if the only top-up is a stream, and do not count on a single bladder.
Food sits in the same pocket as the bottle. On a long day I would rather have a couple of low-sugar options that do not melt than a pocket full of sticky gels. If you are packing for work and the ride, it helps to find low-sugar snacks for busy days that survive a jersey pocket.
Layers, not a single jacket
Treat clothing as three jobs, not one product.
- Base layer: Merino or a synthetic that still moves sweat when you are climbing. Cotton stays wet and cold on the descent.
- Mid layer: A light fleece only when the start is cold. Stuff it once you are warm. Riding in it all day cooks you.
- Shell: A packable wind or waterproof layer, often in the 100-200 g range. This is the piece that stays in the pack.
Above about 15°C, a short-sleeve jersey and chamois shorts are usually enough. Below about 10°C, add a long sleeve, leg warmers, and a thin helmet liner. On a wet day the shell and waterproof gloves matter more than another insulating layer, because soaked gloves kill grip on the levers.
Nelson weather turns on the hills even when the forecast looked settled. Carry the shell on a sunny start. Match the fluid row to your longest regular ride, then pack one layer warmer than the car park feels.
Maintenance Tools Every Rider Should Carry
The trail kit is a roadside breakdown kit. The workshop tools are the garage. Mixing them up means either a heavy pack or a bike you cannot finish a ride on.
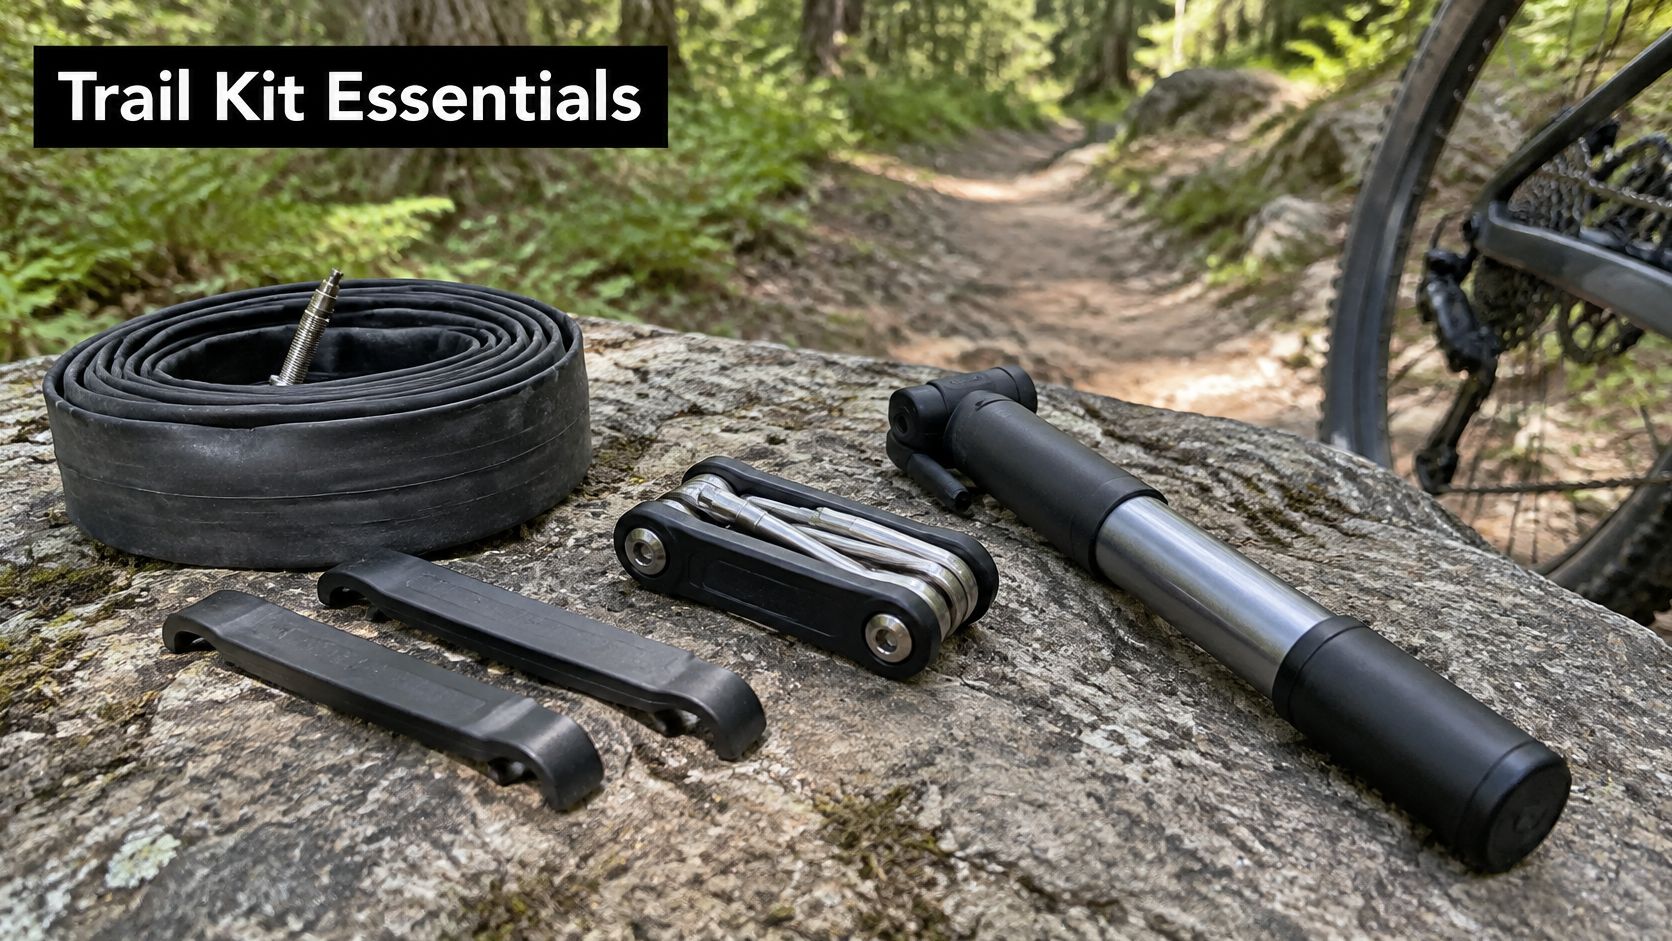
What rides with you
Carry a multi-tool with 4, 5, and 6 mm hex keys and a T25 Torx bit, tyre levers, a spare tube or a tubeless plug kit, and a mini pump or a CO2 cartridge. That set fixes a puncture and snugs a loose bar or a rattling lever. Add a chain tool and a spare quick link. A broken chain stops the ride wherever it happens, and no amount of fitness walks a single-speed you did not plan.
Plugs suit small tread holes on a tubeless tyre. A spare tube is the backup when the sidewall is split or the plug will not hold. If you want the pocket version of that choice laid out, a tyre repair kit is the right place to start, then add the chain tool beside it.
The ten minutes after you get home
The post-ride routine is the bridge between the trail pocket and the bench.
- Wipe the chain. A dirty chain wears the cassette faster than a clean one, and it shifts late.
- Check tyre pressure before the next ride, not after you have already left. Tubeless tyres seep overnight.
- Look for loose stem, axle, and rotor bolts. Wiggle the bars.
- Listen on the next warm-up lap. A new click is information. Ignoring it turns a washer into a walk.
Jobs that belong on the bench
Chain lube and degreaser keep the drivetrain quiet. Wipe excess lube off or it becomes grinding paste. A torque wrench tightens bolts to the figure printed on the stem, the bar, or the rotor lockring. Feel is how carbon and aluminium get crushed or left loose. A bike stand makes cleaning and gear indexing possible without the bike falling on you. A brake bleed kit is for a spongy lever.
Top up tubeless sealant every few months, sooner if you ride dry, dusty trails that cook the liquid out. A spongy brake lever usually means air in the hydraulic line. Bleed the brake. Pumping the lever harder does not put fluid back.
Split the kit in two. Trail pack for anything you can fix with one tool and dirty hands. Workshop shelf for anything that needs a stand and a torque wrench. Book the second list rather than improvising it on the driveway.
Choosing Gear by Experience Level
A rider who loves their first flat trail often spends the budget on carbon wheels and skips the helmet fit check. The bike feels heavy on the climbs they already enjoyed, and the helmet rocks because nobody set the cradle. Level comes before the shiny part.
Beginners ride flat to moderate trails and are still learning braking and cornering. Intermediate riders take on steep roots and drops up to about a metre. Advanced riders jump, race, or ride bike parks. Buy in that order, and delay anything that does not change the consequence of a fall.
What to buy first, and what to leave
Beginners should buy a certified helmet, gloves, a repair kit, and hydration first. Add eyewear and knee pads once the trails steepen. Delay carbon wheels and a dropper post. A dropper is lovely. It does not stop a head impact, and it does not fix a flat.
Intermediate riders should buy a full-face for jump days, knee pads, and a dropper first. Add a tubeless setup and stronger brakes next. Leave full torso armour unless you are racing or stepping into bike-park laps.
Advanced and race riders should buy a race-fit full-face, pads, torso armour, and goggles first, then wheel and suspension tuning. Skip accessories that add weight and do not add protection. A heavier bike that keeps you riding beats a light bike that puts you off for a month.
A study of 263 riders eligible through New Zealand mountain-bike races in the 2016–17 season, published as a New Zealand Medical Journal paper (PDF), makes the mismatch obvious. In races, 211 riders (80.2%) reported always wearing gloves, and 152 (57.8%) always wore knee or shin protection. Full-face helmets were always worn by only 19 riders (7.2%). Outside racing, only three riders (1.1%) always wore a full-face.
Riders protect hands and knees once the tape goes up, and they drop the chin bar the moment the ride feels ordinary. That is backwards if your ordinary ride now includes speed. Experienced riders should buy the protection that matches the speed they actually carry. Beginners should not copy the "I never fall" kit of someone who has already learned how to fall.
A beginner who books a bike-park day should move straight to the advanced protection list, even if the riding still feels new. The jumps do not care about your seasons.
If you are unsure whether fitness or fatigue is the thing holding the riding back, Telomyx health and performance testing can separate a training limit from a gear limit before you spend on another upgrade.
Confirm Your Kit Before Your Next Ride
Run this list at the car, not at the first corner. Each line takes seconds. Skipping one is how a good trail turns into a phone call.
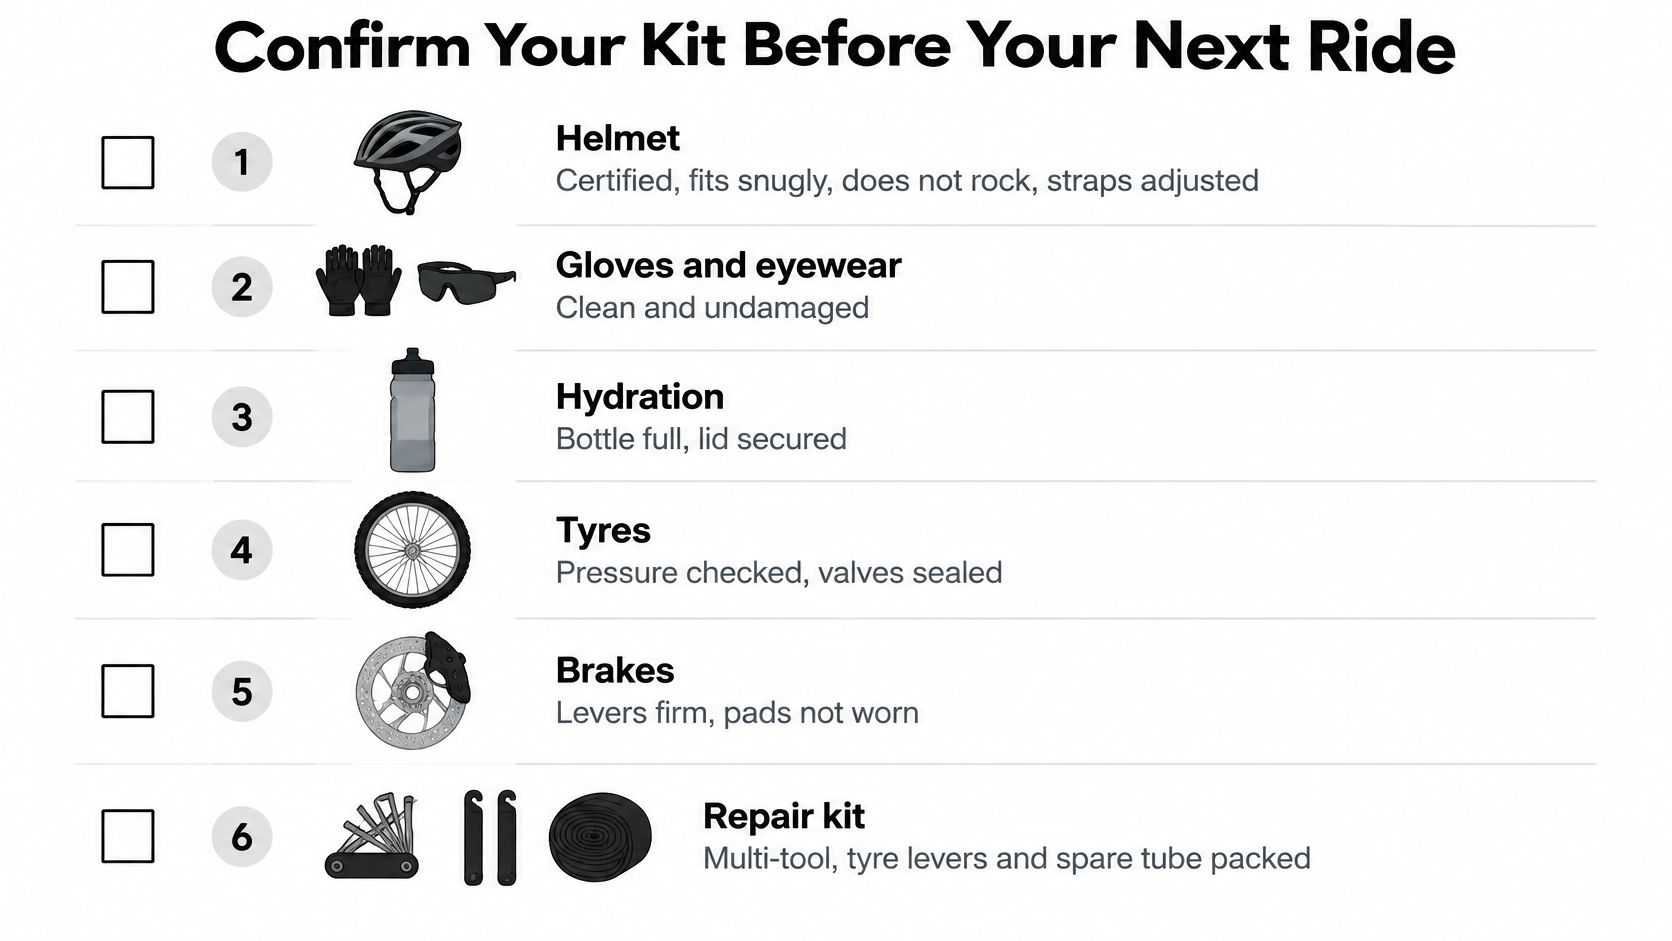
- Helmet. Certified, snug, does not rock, straps set.
- Gloves and eyewear. Clean lenses, no cracked frame, palms not worn through.
- Hydration. Bottle or bladder full, lid or bite valve shut, cage bolts tight.
- Tyre pressure. Set for your weight and the trail, valves closed, sealant not hissing.
- Brakes. Levers firm, not spongy, pads biting before the lever meets the grip.
- Wheels. Quick-release or thru-axle tight, wheels spinning without a rub.
- Repair kit. Spare tube or plugs, levers, and a pump or CO2 that still has charge.
Why the label and the fit beat the marketing
A review of New Zealand helmet-law evaluations, summarised on SciSpace, reported estimated head-injury reductions of 28% among adults in non-motor-vehicle crashes, alongside 24% among primary-school cyclists and 32% among secondary-school cyclists. Another included analysis estimated a 19% reduction in the law's first three years. That evidence has methodological limits and it concerns on-road cycling, so it is not a mountain-bike performance score.
What it does support is simple. Choose a helmet with an approved compliance label, then set the fit so it stays put. Ventilation, grams, and logos come after that. Move to a full-face when speed, jumps, or steep trail put your face in the fall. If a line on the list fails, fix it before you roll. A workshop can set helmet fit, bleed a spongy brake, and confirm the axle is actually tight.
Rider 18, at 60 Vanguard Street in Nelson, fits helmets, services brakes, and stocks the trail kit this guide keeps coming back to, with free nationwide delivery over $100 and 14-day returns on gear you order ahead of the weekend. If your next ride is a borrowed bike or a step up in terrain, take the checklist to the counter and sort the one item that would stop the day. Visit Rider 18 before you clip in.


Please upload banner from store admin blog pages