

MTB Body Armour NZ: Choose the Right Protection
- by Nigel
-

Mountain biking accounted for 20% of cycling injuries in a year when ACC recorded 29,818 cycling-related injury claims costing NZ$55.2 million, according to the New Zealand Medical Journal study on protective equipment use. That's the starting point for choosing MTB body armour in NZ. Your legal helmet protects your head. It certifies nothing about your spine, chest, knees, elbows or hips.
Buy for the hardest descent you'll ride, then buy the version you'll keep on through a hot Nelson climb. A higher-rated vest in the car has a protection rating of zero. Match coverage to crash energy, check the label, measure properly, and reject anything that gaps, twists or cooks you before the descent starts.
Why New Zealand Riders Still Need Body Armour
The ACC outdoor recreation injury data recorded 5,686 mountain-bike injury claims in 2020 and 4,226 in 2024. The later figure isn't evidence that crashes have become rare. It was still about 81% of the 2021 level of 5,296. Thousands of riders still needed accepted injury claims in a single year.
| Year | National claims | Tasman Region claims |
|---|---|---|
| 2020 | 5,686 | 704 |
| 2021 | 5,296 | 712 |
| 2022 | 4,609 | 612 |
| 2023 | 4,121 | 665 |
| 2024 | 4,226 | 705 |
Tasman matters if you ride around Nelson and the Top of the South. The region recorded 704 claims in 2020 and 705 in 2024, almost unchanged while the national total fell. Local risk hasn't followed the national trend down.
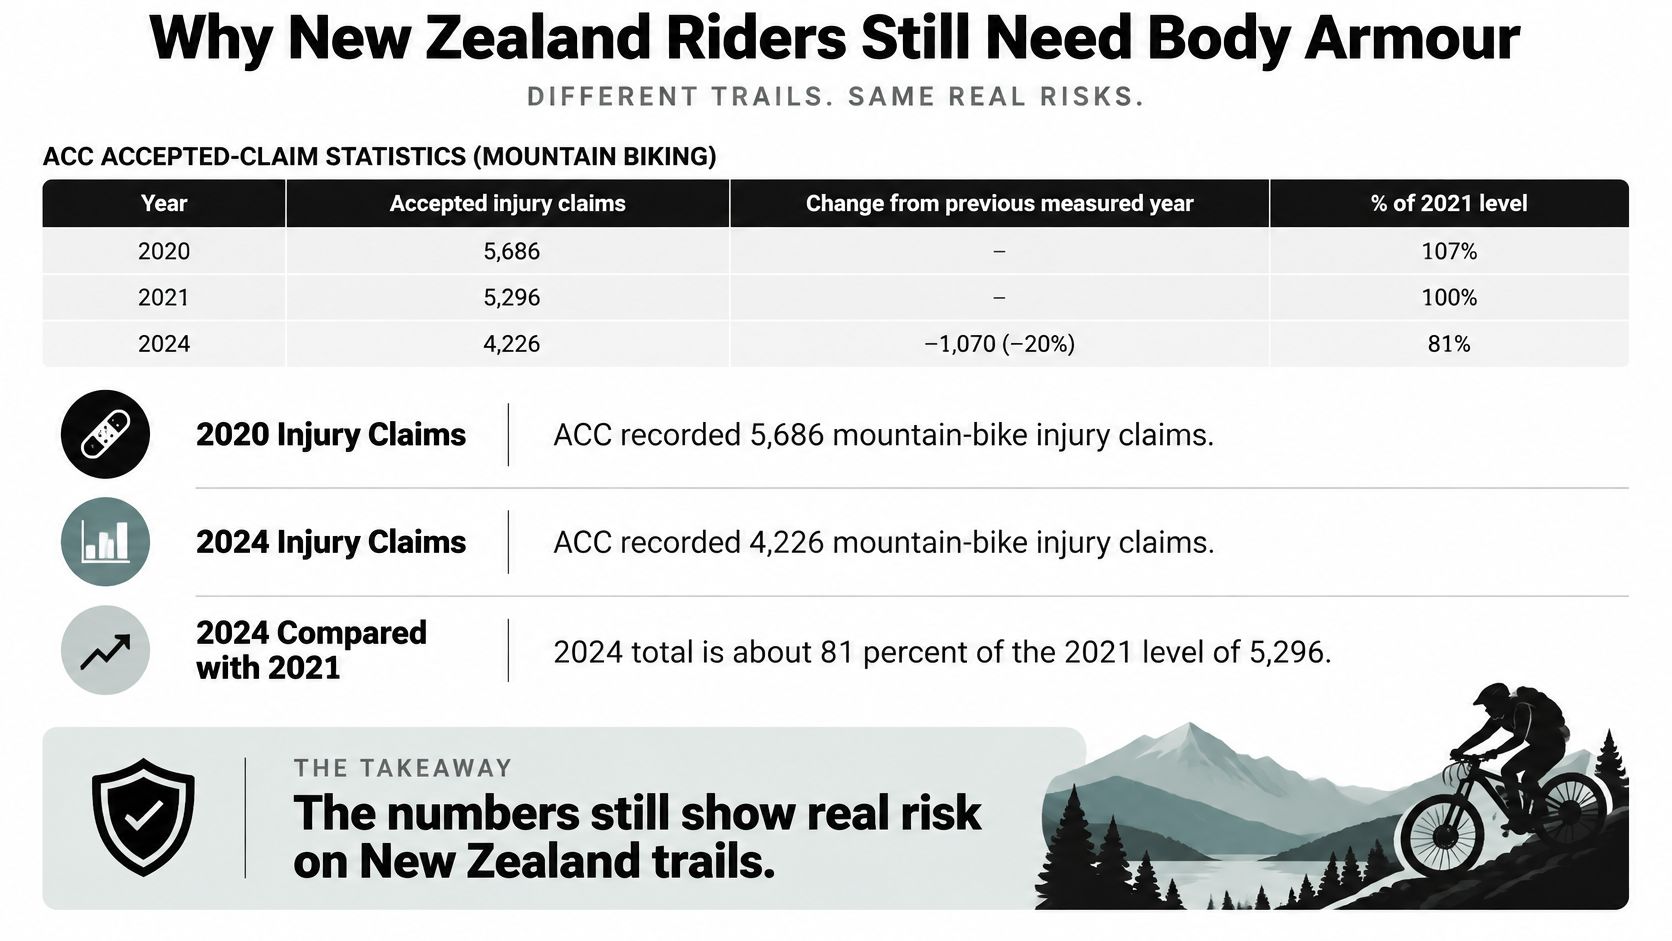
These are accepted claims, not every crash, slide or near miss. They understate exposure because plenty of riders limp home without lodging anything. They still prove a persistent injury burden on steep, technical, jump and enduro terrain.
Treat knee, elbow, back, chest and hip protection as one layer beside a proper helmet, maintained brakes and speed you can stop from. Armour limits damage when a line fails. It doesn't choose the line, correct poor braking or make an unfamiliar drop safe.
Match Armour to the Riding You Actually Do
| Riding situation | Primary armour | Minimum to insist on | Why this row |
|---|---|---|---|
| Easy recreational trail | Light knee pads; elbows optional | Pads that stay put while pedalling | Lower speed and long climbs punish bulky kit |
| Technical trail with rock and roots | Knees and elbows; back protector if steep | Separate limb pads; add EN 1621-2 back when exposure rises | Limbs hit first; spine risk grows with speed |
| Enduro | Knees, elbows and full-length back protector | EN 1621-2 back from shoulder blades toward the tailbone | Race and stage speeds raise crash energy |
| Downhill and bike park | Half or full suit with spine, chest and shoulders plus limbs | EN 1621-2 back plus chest and shoulder coverage | Repeated jumps and high speed |
| E-bike trail | Back protector and knees; elbows on technical descents | EN 1621-2 torso on faster descents | More mass and speed than the same pedal line |
| Family or newer riders | Comfortable knees; elbows if the track is rocky | Stable closures and ventilation over maximum bulk | Gear left in the car protects nobody |
Use the hardest descent of your month, not the easiest trail on today's loop. If you mostly ride mellow singletrack but once a month you drop a steep, rocky line at pace, that line sets the row. If two rows seem to fit, pick the higher one only if you'll wear it on the climb to that descent. Otherwise choose the lighter row and ride the harder feature slower, or walk it.
Reading the Six Rows
Easy recreational riders usually need stable, light knee pads first. Add light elbows if the surface is gravelly or you're still clipping trees and banks. A bulky torso suit for a flat riverside loop is wasted money and wasted heat, and most riders stop wearing it within a month. Our guide to choosing MTB knee pads that stay put while pedalling covers the pedal-friendly end of that choice in detail.
Technical trails change the calculation because knees and elbows meet rock and roots first. Separate limb pads earn their place there. Add a back protector when the trail gets steep, the landing zones get rough, or you're carrying genuine speed into compressions. The trigger isn't distance. It's consequence.
Practical rule: Pick the row for the descent, then wear that row's kit for every descent that day. Don't downgrade because the last run feels familiar.
Where Riders Underbuy
Enduro riders underbuy the torso most often. Timed stages encourage race speed on tired legs, often on lines you've barely sighted. That's exactly when a full-length EN 1621-2 back protector stops being optional in my view. Downhill and bike-park riders should go further. Repeated uplift laps remove the climb as a reason to shed kit, and repeat exposure means the crash is a matter of timing. A half or full suit with spine, chest and shoulder coverage, such as a Troy Lee Designs Rockfight style chest protector paired with proper limb pads, suits that pattern.
E-bike riders make a different mistake. They dress for the trail name instead of the speed they now carry on it. The same corner on an e-bike arrives faster, the bike weighs more, and you hit the ground with more behind you. Move torso coverage up a row from your pedal-bike setup.
Think of armour like a seatbelt. A seatbelt doesn't steer the car, read the road or stop you driving too fast into a corner. It manages the consequences when something goes wrong. Armour does the same job, and it fails the same way if you leave it unbuckled.
Two edge cases sit beside the table. On a hot climb, a heavy vest gets unzipped, then removed, then strapped to a pack and forgotten at the top. On a wet root and rock day around Nelson and Tasman, limb abrasion and a sliding hip injury can matter as much as spine protection. Plan for both before you leave the carpark.
What Each Piece Does and Which Labels Count
The kit is a set of separate tools, not one magic garment. Read what each piece covers before you look at any certification stamp.
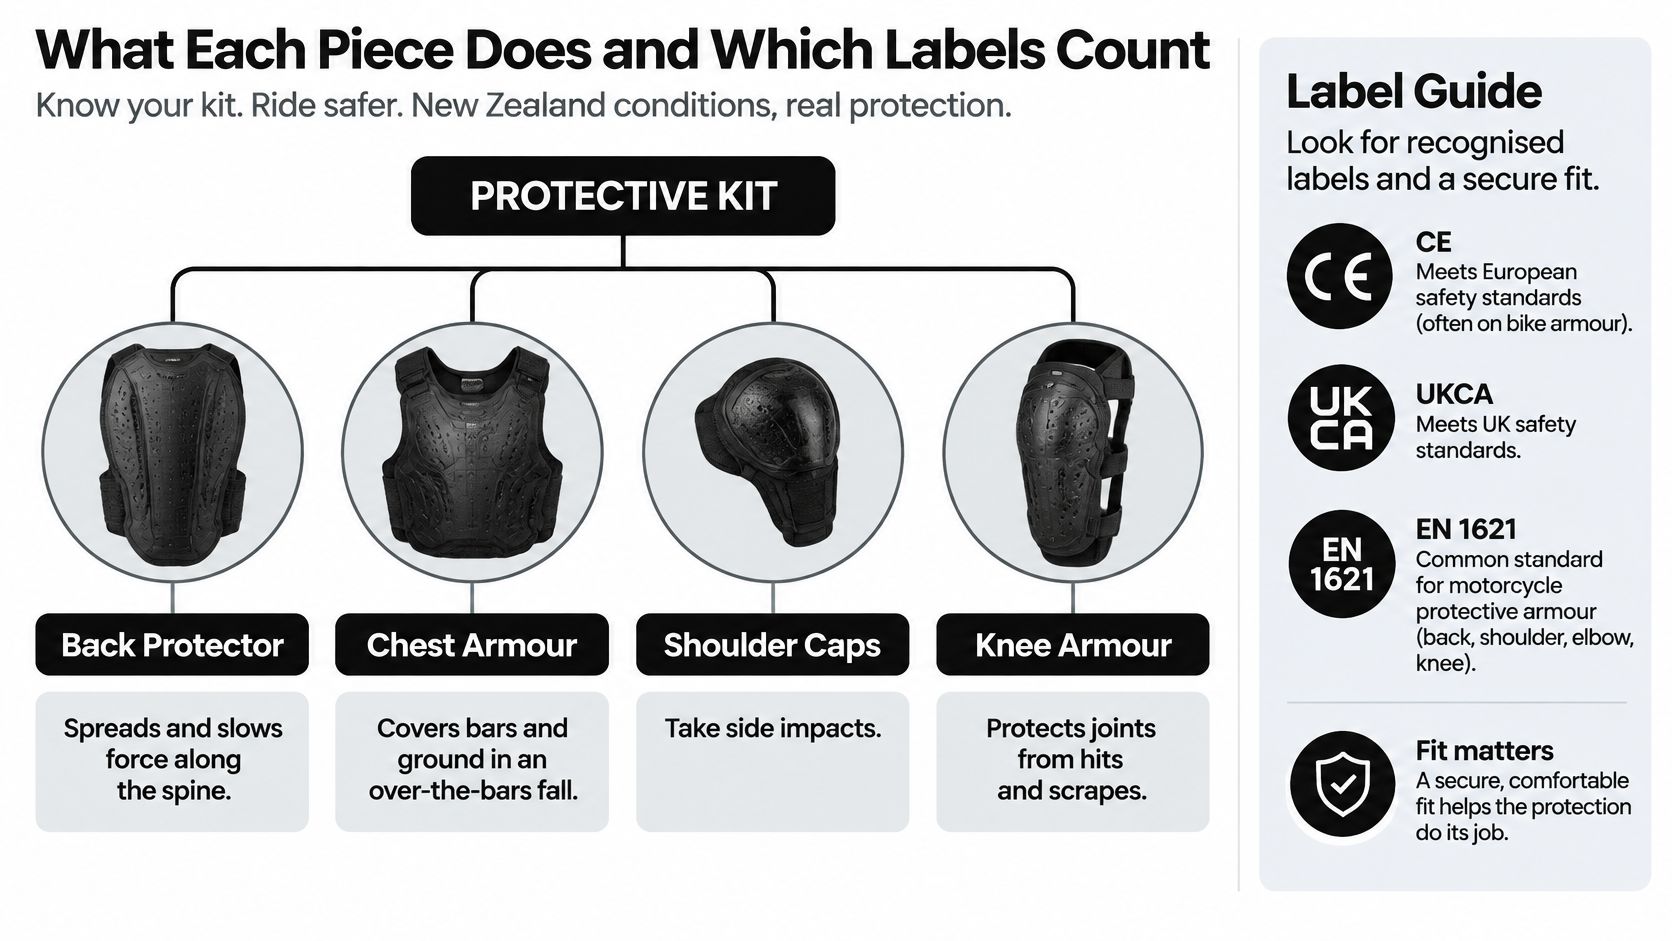
- Back protector: spreads and slows force along the spine when you land backwards on rock, roots or hardpack
- Chest armour: puts material between your sternum and ribs and the bars, stem or ground in an over-the-bars fall
- Shoulder caps: take the side impact when the front wheel washes and you land on your point of shoulder
- Knee and elbow pads: absorb the first hit and save skin when limbs strike or slide
- Hip pads under shorts: cushion the hip bone in the sideways slide that ends most low-speed washouts, as on SHRED style protective MTB shorts
Impact foam and abrasion fabric are not interchangeable. Impact material crushes or stiffens under a blow to absorb energy. Abrasion fabric resists tearing so you keep your skin in a slide. A tough outer shell with thin foam saves skin and does little for your spine. Thick soft foam with a flimsy cover can shred in one gravel slide. You need to know which job each layer is doing.
Think of a loose insert like gear rattling in a backpack. A soft padded jacket can feel protective in the shop while the back insert has already slid sideways off the spine. In a crash it protects your kidney and leaves the vertebrae exposed. Check the armour pedalling upright, then check it again hinged forward in a crash tuck with your arms reaching for the bars. If you run a hydration pack, confirm the pack straps don't drag removable inserts off centre.
Watch how the panels sit and move on a rider before you judge coverage from a product photo.
The Helmet Label Trap
Don't transfer helmet compliance to everything below your neck. The Waka Kotahi cycle factsheet lists approved cycle helmet standards including AS/NZS 2063:2008, EN 1078 and ASTM F1447, but those requirements don't certify MTB body armour. A compliant helmet says nothing about a padded vest. Keep the two purchases separate, and use our rundown of the best mountain bike helmets for NZ riding for the head side of the decision.
Parents fall into this trap most often. They buy a correctly certified helmet, then add a soft fashion vest and assume the whole upper body is covered to a similar standard. It isn't. Padding you can compress flat between two fingers is comfort foam, not certified spinal protection.
What the NZ Rules Actually Require
For organised competition, the MTBNZ technical regulations specify that back protection must meet EN 1621-2 and cover the full length of the back, either standalone or as part of a full or half-body suit. Mountain Bike New Zealand's downhill policy adds that spinal protection must self-fasten and cover from between the shoulder blades to the tailbone. Use that as your minimum spec for enduro, downhill and bike-park torso armour even if you never race. It's a clear, testable line in a market full of vague padding claims.
| Specification | What it asks for | What it does not guarantee |
|---|---|---|
| EN 1621-2 | Impact performance for a back protector | Fit, ventilation, or that the rider will wear it |
| MTBNZ back protection | Full-length back coverage meeting EN 1621-2, standalone or in a suit | Protection for chest, shoulders, knees or elbows |
| Downhill spinal coverage | Self-fastening protection from between the shoulder blades to the tailbone | That a soft fashion vest meets the same rule |
| Impact foam | Energy absorption by crushing under a blow | Abrasion protection by itself |
| Abrasion fabric | Resistance to skin loss in a slide | Spinal or chest impact protection |
| Lower-limb pads and gloves | Associated with fewer injuries in an ACC and AUT review | Proof from a controlled trial that every product works |
That ACC and AUT review reports associations between lower-limb armour and fewer lower-limb injuries and between gloves and fewer injuries, while cautioning that controlled intervention evidence remains limited. Treat that with care. It's a reason to wear well-fitting knee pads and gloves, not proof that any specific product prevents a specific injury.
A certificate tests a panel under set conditions. It doesn't test whether that panel is still centred on your spine after forty minutes of climbing with a pack on.
Buy by exposure, not stamp alone. Insist on EN 1621-2 full-length back coverage for enduro, downhill and bike-park use. Add shoulder and chest coverage where collision and over-the-bars risk is high. Run separate knee or elbow pads, such as a RaceFace Ambush style knee pad, when the route includes rock, roots or jumps. A THOR MX Sentinel style chest protector suits riders who want a structured torso shell, but check its back panel length and label against the table rather than trusting the motocross look.
Measure and Size Armour Before You Try It
Measure before you order. A medium in one brand can fit like another brand's large, and letter sizes tell you nothing about torso length, which is the measurement that decides whether a back protector reaches your tailbone.
- Take two numbers first: chest circumference and torso length in centimetres, then match them to the brand's own size chart rather than trusting the letter on the tag
- Sit on the bike wearing your pack: the back protector should run from between your shoulder blades toward your tailbone without folding at the top or gapping off your lower back
- Check the shoulder caps: they should overlap the top of your arm and still let you reach the bars, weight the front wheel and look through a corner
- Pedal the limb pads: knee and elbow pads must stay centred over the joint after a few hard pedal strokes and one firm stop, not just while you stand still
- Locate the hip pad: on protective shorts it must sit over the hip bone itself, because a pad sitting behind it only cushions your glute in a slide
If you fall between sizes, choose the one that stays flat against your back in a forward crash tuck. Don't choose the roomier one because it feels nicer standing upright in the shop. Extra room becomes movement, and movement becomes a gap at the moment of impact.
Retighten closures and straps after the first climb. Elastic and hook-and-loop straps creep as you warm up and the garment settles. Thirty seconds at the top of the first ascent is part of wearing the kit properly, not a sign you bought the wrong size. If you're retightening every ten minutes, that's different. That piece doesn't fit you.
Fit and Comfort That Keep Armour On
Certificates don't decide whether armour gets worn in February. Comfort does. The New Zealand Medical Journal prospective cohort study of 263 riders competing in 2016 to 17 NZ Enduro Crown races found 55% had experienced an injury requiring at least one week away from work. Nearly 20% reported an absence of a month or more, and more than 40% had ongoing symptoms from a mountain-bike injury.
That same cohort is the useful part for shoppers. Equipment uptake was influenced more by perceived benefit, comfort, cost, riding skill and previous injury than by perceived danger alone. Telling a rider a trail is dangerous doesn't put armour on them. Giving them armour they can climb in does.
Run the Two-Position Check
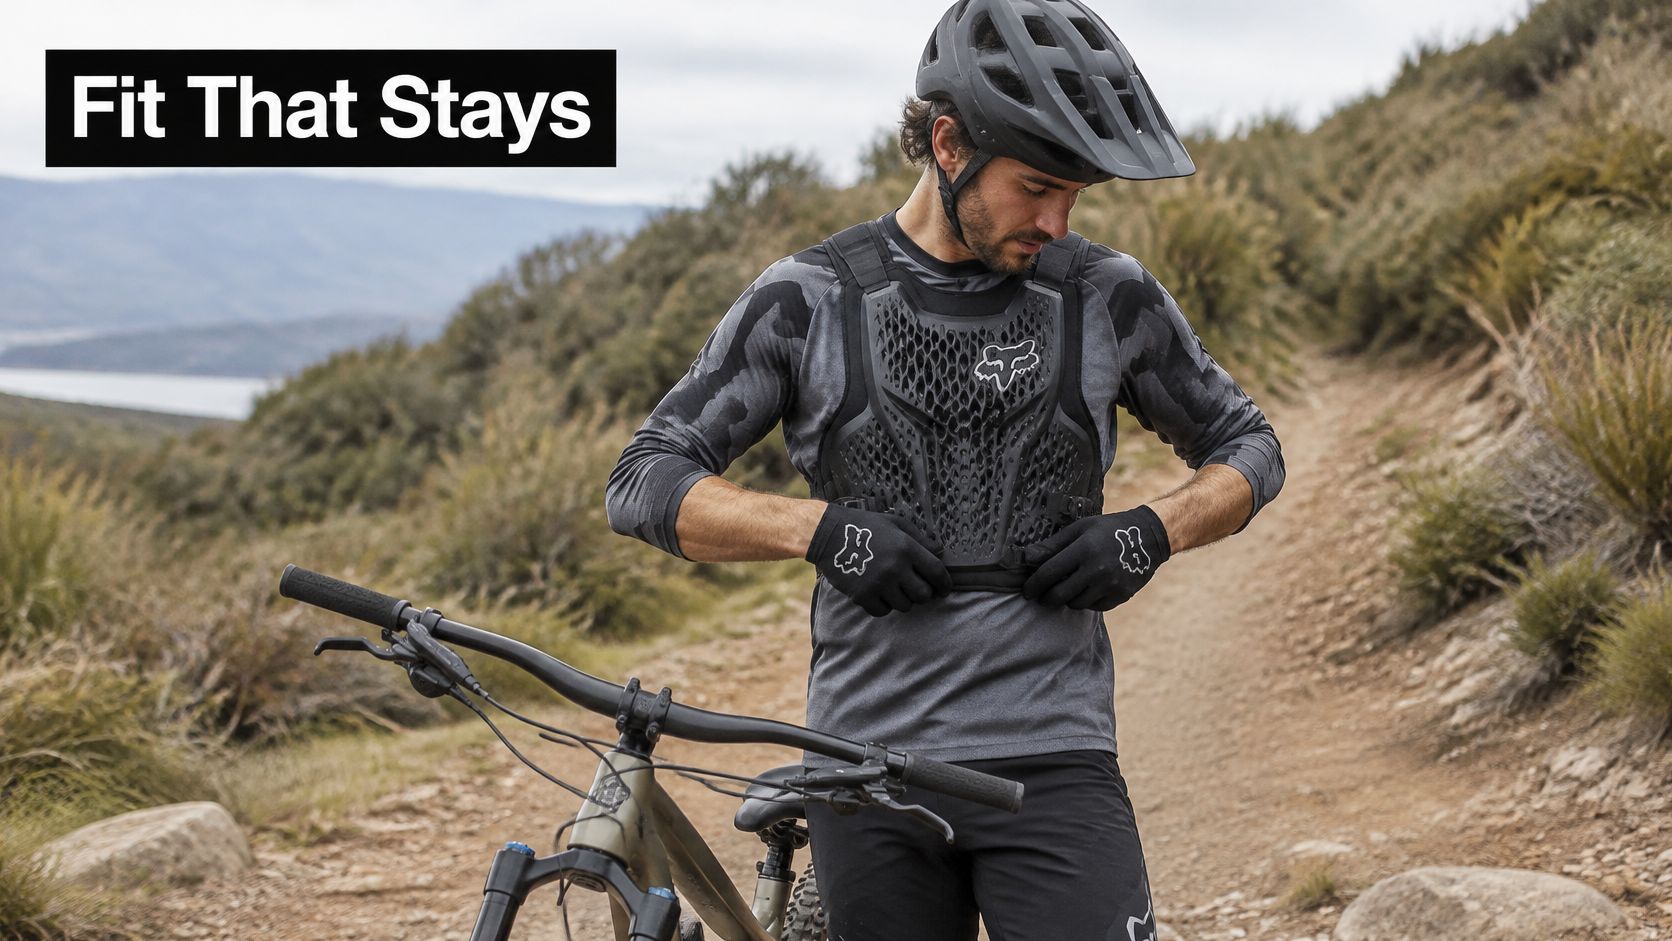
Pedal seated for a minute in the full setup, jersey and hydration pack included. Breathe hard on purpose. If the chest panel fights your breathing on a shop floor, it'll win that fight on a real climb and you'll unzip it.
Then hinge into a crash tuck, arms forward as if you're going over the bars. The back protector should still track your spine toward the tailbone with no gap opening at the lower back. Shoulder caps should stay on the shoulder, not rotate onto your upper arm. Removable inserts must not migrate under pack straps in either position.
Ventilation, Movement and Hardware
New Zealand riding punishes sealed garments. Long climbs build heat slowly, then rain arrives and a soaked, heavy vest gets taken off at exactly the point the trail turns slippery. Look for open mesh where there's no impact panel, perforated foam, and a cut that lets air move at the sides of the torso.
Shoulder movement is essential on technical descents. You need to drop your heels, extend through compressions and correct a drifting front wheel without the garment pulling across your chest. Closures must not creep, and bulky buckles shouldn't sit where a pack's hip belt or sternum strap lands. On an e-bike, check the cuffs and torso hem against your normal riding position and reach to the controls. Nothing should snag or pull when you stand and sit repeatedly.
Shop test: If you're already tugging at a strap or pulling a panel back into place during a two-minute try-on, walk away. It'll be worse at minute forty.
Care decides whether the fit survives the season. Rinse grit out of straps and closures after muddy rides, because grit chews elastic and stops hook-and-loop gripping. Hang armour to dry fully after rain so foam doesn't stay soaked and heavy. Retire crushed foam that doesn't recover its shape, cracked plastic shells, torn insert pockets and straps that no longer hold tension. A compressed panel has already spent its impact absorption.
Uncomfortable armour is the product that fails, even when the label is correct. A lighter, slightly less extensive set worn on every descent protects you more in practice than a stiff, highly rated vest that lives in the car from November onwards. Be honest about which rider you are before you pay.
Four Local Rides and the Kit Each One Needs
A Warm Nelson Loop After Work
Say you're riding a familiar Tasman loop in warm evening air, one long climb and one steep descent you've done fifty times. Light knee pads go on at the car and stay on. The decision the style table can't make for you is the back protector. Wear it for the climb if you want it for the descent. If your honest plan is to strap it to your pack and put it on at the top, test that plan once. Most riders skip the stop when their mates drop in. A lighter protector worn the whole way beats the heavier one riding on your pack.
An Enduro Race Weekend
Say you're racing stages on unfamiliar lines with liaison climbs between them. You run the full enduro row, knees, elbows and full-length back. The extra decision is chest protection for the stages with drops and blind landings, plus a spare dry layer for the start-line climb if rain arrives. Wet, cold riders rush transitions and skip kit checks. Build the strap check into your stage-start routine, every stage, not just the first. It's worth scouting the kind of terrain on our guide to mountain bike paths and trails worth riding before you decide a race venue is mellow.
A Bike-Park Uplift Day
Say you're lapping uplift trails all day with your mates. The suit goes on at the carpark, not after a warm-up lap. There's no climb to justify shedding it, lap three is where fatigue starts, and lap six is where someone cases a jump they cleared in the morning. Repeated laps also loosen straps and shift pads gradually. Recheck knee pad position and torso closures at lunch. That's the decision this scene adds, because a pad that has rotated below the kneecap by afternoon is decoration.
An E-Bike on a Familiar Trail, and a Parent With Kids
Say you're riding your regular pedal loop on an e-bike for the first time this season. Every corner arrives sooner and the bike pushes wider. Move torso coverage up a row and confirm your shoulders stay free to steer out of trouble, because you'll be making more corrections at higher speed.
Say you're a parent riding behind your children on a rocky family trail. Your own crash is most likely a slow, awkward topple while watching them instead of the trail. Knees that don't twist when you dab a foot down, and elbows on rocky surfaces, matter more than maximum torso bulk. Treat the climb back to the car as part of the ride, because tired kids and a distracted parent is a genuine crash recipe.
The weather rule closes all four scenes. If heat or rain would make you remove the piece you've chosen, you haven't chosen it. Pick the lighter option you'll keep wearing and adjust your speed to match. Talk these scenes through in store with your own bike, pack and gloves if your riding doesn't match any of them neatly.
Try the Armour Before You Commit
Do these five checks in one shop visit or one careful online order. Skip step one and the rest is guesswork.
- Name the hardest trail type you'll ride this month, out loud, before you touch a product
- Take that row from the style table and ignore kit aimed at a harder discipline you don't ride, however good the discount looks
- Confirm the torso spec if your row calls for a back protector, meaning EN 1621-2 and full-length coverage that self-fastens from between the shoulder blades toward the tailbone
- Pedal and lean in the full setup with your hydration pack, jersey and gloves on, then run the two-position check from seated pedalling into a forward tuck
- Leave behind anything that fails by gapping at the lower back, riding up, blocking your shoulders, or feeling like it'll come off on the first hot climb
Bring the bike you ride. At Rider 18 at 60 Vanguard Street, Nelson, you can try your chosen row on your own bike, e-bikes included, so pack straps, reach to the controls and standing clearance are part of the test rather than a surprise at the trailhead. That's the one place in this process where a shop visit beats a size chart, because torso length and pack interference don't show up in a chest measurement.
Keep the hierarchy straight on the way out. Armour sits beside a compliant helmet, maintained brakes, tyres suited to the surface and a speed you can stop from. It replaces none of them.
The right purchase is the set that's on you for the next descent. Not the thickest vest on the wall, and not the lightest pad that lets you pretend you've dealt with the problem.
Bring your bike, pack and gloves into Rider 18 in Nelson and run the two-position fit check on the exact row your hardest descent demands, with staff who'll tell you plainly if a panel is gapping or a pad will twist. If you're ordering from elsewhere in the country, browse the armour range and sizing advice at Rider 18 before you commit, so the kit that turns up is the kit you'll still be wearing at the top of the climb.


Please upload banner from store admin blog pages