

Balance Bike with Training Wheels: A Parent's Guide
- by Nigel
-

Most parents are told to buy a bike with training wheels because it lets a child start pedalling straight away. That advice confuses early movement with useful riding skill. A child can make a bicycle travel while still having no feel for leaning, steering corrections, or controlled stopping.
A balance bike with training wheels can work, but it isn't the ultimate learning machine. It combines two systems that teach different behaviours. Used carelessly, it gives a child a stable platform that feels easy at first, then leaves the hardest part, balancing a moving bicycle, until later. Used deliberately, it can provide a temporary bridge between foot-powered balance practice and pedal control.
New Zealand evidence supports a staged approach. In the 2012–2013 financial year, recognised cycle training reached 27,935 children, equal to 4.9% of New Zealand children aged 5–14. The same research recorded 66% of cycling accidents as “cycle only” crashes, while 42% of injuries occurred during play rather than transport, which is a useful reminder that private practice still needs structure and supervision. (Waka Kotahi research on cycling safety)
The Reality of Combining Balance Bikes and Training Wheels
A true balance bike is simple by design. The child sits low, places both feet on the ground, and learns to move by walking, scooting, then gliding. That sequence develops steering, balance, speed control, and the instinct to put a foot down when the bicycle starts to tip.
Training wheels do the opposite mechanically. They support the bicycle from the sides, so the child doesn't need to make constant corrections with their hips, arms, and steering. The bicycle can remain upright without the rider learning how a two-wheeled machine responds to weight shift.
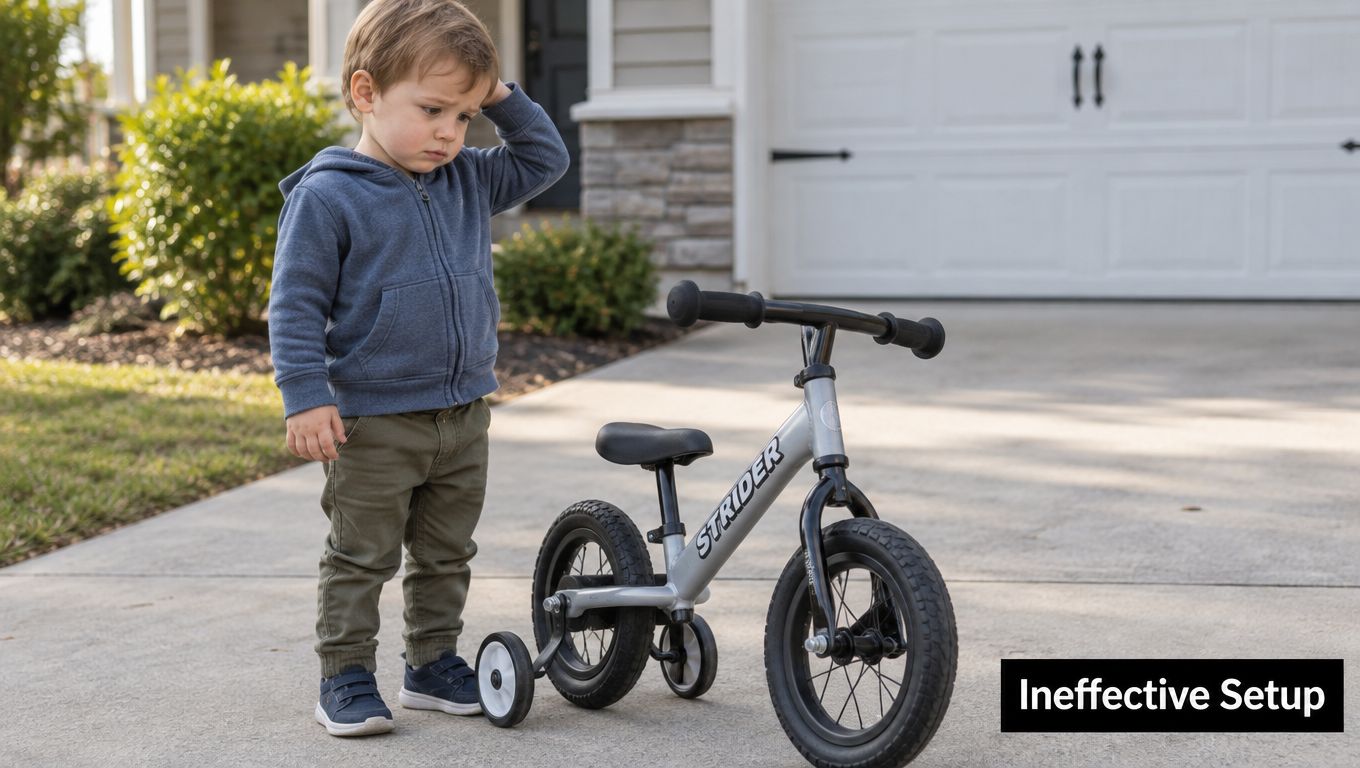
What the hybrid actually is
The phrase usually describes one of three arrangements:
- A convertible model: The frame accepts a balance-bike configuration first, then pedals and stabilisers later.
- A small pedal bicycle without pedals: Parents remove the cranks and pedals so the child can scoot, then reinstall them.
- A pedal bike with stabilisers: The child pedals from the start, but the side wheels carry enough load to prevent normal leaning.
The first two can be useful because parents can remove support as the child develops. The third is the least effective for balance learning if the stabilisers sit firmly on the ground. It teaches forward pedalling while postponing the corrections that make independent riding possible.
Auckland Transport's guidance makes the distinction clear. A balance bike should let a seated child place both feet on the ground and progress from walking to gliding. Its guidance also warns that training wheels can slow balance development because they reduce the need for lateral corrections. If stabilisers are used, they should sit slightly off the ground, so the bicycle can lean a little and the rider has to begin correcting it.
Workshop rule: Training wheels are a temporary aid for pedalling practice, not a replacement for learning balance.
When the setup earns its place
I'd recommend the hybrid arrangement only when it has a clear job. It may help a child who is physically ready to pedal but still lacks confidence, or a family that needs one adjustable bicycle rather than separate machines. It can also provide a gentle introduction to brake levers, crank movement, mounting, and dismounting.
It becomes a poor choice when the stabilisers stay fitted indefinitely, the saddle is too high, or the child is encouraged to ride on public routes before mastering basic control. The bicycle should change as the rider changes. Once the child can scoot, glide, steer around obstacles, and stop reliably, remove the training wheels rather than waiting for the child to outgrow them.
Comparing the Three Paths to Riding
There are three sensible learning routes, and none should be chosen by the marketing label on the box. Choose according to the child's present control, confidence, and physical fit.
| Setup Type | Primary Skill Focus | Transition Difficulty | Best For |
|---|---|---|---|
| Pure balance bike | Balance, steering, gliding, foot braking, and weight shift | Pedalling must be added later, but balance is already familiar | A child who can reach the ground securely and is ready to practise control |
| Pedal bike with training wheels | Pedalling, mounting, forward movement, and basic braking | Balance and cornering can feel unfamiliar when stabilisers are removed | A child who strongly wants pedals and needs temporary lateral support |
| Convertible balance bike with training wheels | Balance in one mode, pedalling with support in another | Depends on whether the family actively changes the configuration | Families prepared to adjust the bike as skills improve |
The pure balance route
A balance bike isolates the hardest control problem first. The child doesn't have to coordinate pedalling with steering, so they can concentrate on keeping the bicycle underneath their body. Once gliding becomes comfortable, a pedal bike introduces leg power without requiring the child to learn balance from the beginning.
The trade-off is that the first sessions can look slow. A child may walk the bike rather than ride it, and parents may mistake that for failure. It isn't. Walking, scooting, lifting the feet briefly, and stopping with the soles are the building blocks of independent control.
The traditional stabiliser route
Training wheels offer immediate reassurance. The child can push the pedals, move forwards, and experience the satisfaction of riding without the bicycle falling sideways. That early success matters for confidence, but it can create a misleading expectation that the bicycle will always remain upright without active balance.
The transition can therefore arrive as a shock. Removing the stabilisers changes the rider's job, not just the bike's appearance. The child must learn to lean into turns, correct a wobble, and stop without relying on side support. If the stabilisers have been carrying the load continuously, those skills have not had much practice.
The hybrid route
The hybrid is useful only if parents treat it as a sequence rather than a permanent compromise. Start with the lowest, most controlled setting that matches the child's ability. Use the balance configuration to practise gliding and steering, then add pedals when the child can control the bicycle's direction and stopping.
Don't assume that a conversion feature automatically creates a smooth progression. Check whether the saddle height, crank position, brake reach, and wheel alignment remain suitable in both modes. A poorly designed conversion can leave the child perched too high in balance mode or struggling to reach the controls after the pedals are fitted.
My preference is straightforward. If the child can sit securely with both feet flat, choose a genuine balance-bike setting first. If confidence is the immediate barrier, use stabilisers briefly and set them to encourage, rather than eliminate, leaning.
Sizing Setup and New Zealand Safety Standards
Age printed on a carton is a weak buying guide. Maximum saddle height tells you far more about whether the bicycle fits and which New Zealand compliance category applies. A bike that is technically the right age range but too tall, heavy, or awkwardly proportioned will make every practice session harder.
Set the riding position before judging the bike
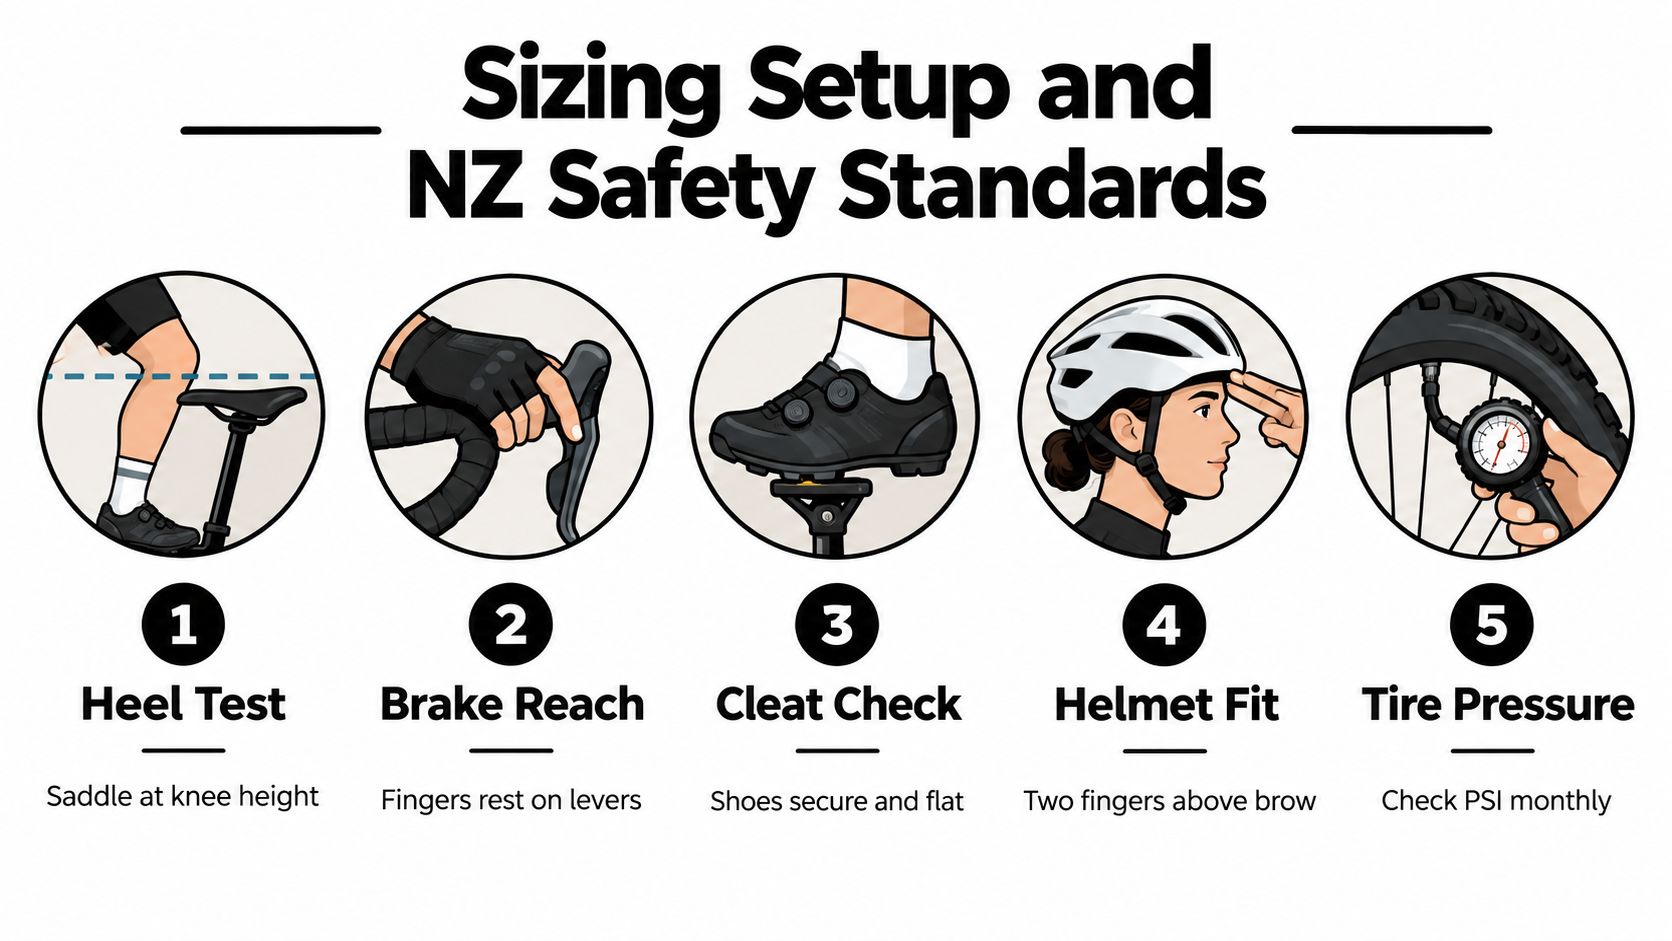
Put the child on the bicycle in balance mode, wearing the shoes they'll use. Lower the saddle until both feet can contact the ground securely. The child should be able to sit, push away, glide briefly, and stop without stretching for the surface or dropping the body sideways.
Check the controls next. Small hands should rest naturally on the brake levers, with enough reach to apply the brake without twisting the wrist or pulling the fingertips away from the grip. Confirm that the rear-wheel brake works correctly. A child moving between coasting and pedalling may instinctively back-pedal or lose control, so a reliable brake gives you a second stopping method.
For a broader explanation of fit measurements and how to compare a child's proportions with a bike, use the SYCLR guide to bike sizing. Helmet fit deserves the same attention as frame fit, and this practical guide to choosing a balance-bike helmet is useful when checking coverage and adjustment.
Set stabilisers to assist, not carry
Fit the training wheels so they sit slightly off the ground when the bicycle is upright. The exact gap depends on the frame and hardware, but the principle is consistent: both stabilisers shouldn't carry the bicycle's weight continuously. A small amount of lean should make the child steer and shift weight rather than sit between two side supports.
Check the nuts, brackets, axle washers, and wheel alignment after adjustment. Don't use a universal aftermarket kit on a frame unless the manufacturer permits that combination. Altered wheel loading or ground clearance can affect stability, braking, and the way the bicycle responds to bumps.
Match the safety category to the product
Standards New Zealand identifies ISO 8098:2023 for fully assembled young children's bicycles with a maximum saddle height greater than 435 mm and less than 635 mm. The standard addresses design, assembly, testing, safety performance, and user-care instructions. Products at or below 435 mm may instead fall under toy-bicycle requirements in AS/NZS ISO 8124.1:2023, which covers mechanical and physical hazards for toys used by children up to 14 years. (Standards New Zealand information on ISO 8098:2023)
Ask the seller for the manufacturer's instructions and confirm the complete assembled bicycle matches its intended category. Don't combine a small balance frame with unrelated stabilisers just because the axle appears to fit.
Building a Staged Practice Routine
The driveway isn't automatically a good training ground, and grass isn't automatically safer. A smooth, traffic-free hard surface makes steering, rolling, and braking easier to observe. Grass slows the bicycle, but it can also resist the wheels and make balance corrections less predictable.
BikeReady recommends beginning away from traffic, using places such as a playground or court. Auckland Transport's practical skills include stopping with the feet, gliding, avoiding obstacles, and changing speed. The practice surface should reduce distractions while still allowing the bicycle to roll properly.
Stage one teaches control before distance
Start with mounting and dismounting. The child should learn where to place the feet, how to hold the handlebars straight, and how to stop without jumping away from the bicycle. Keep the first exercises short enough that concentration doesn't collapse.
Next, ask for slow scooting and short glides. Use visible markers, cones, or chalk to create a simple lane. Don't push the child from behind. A push hides whether they can start, steer, and stop independently.
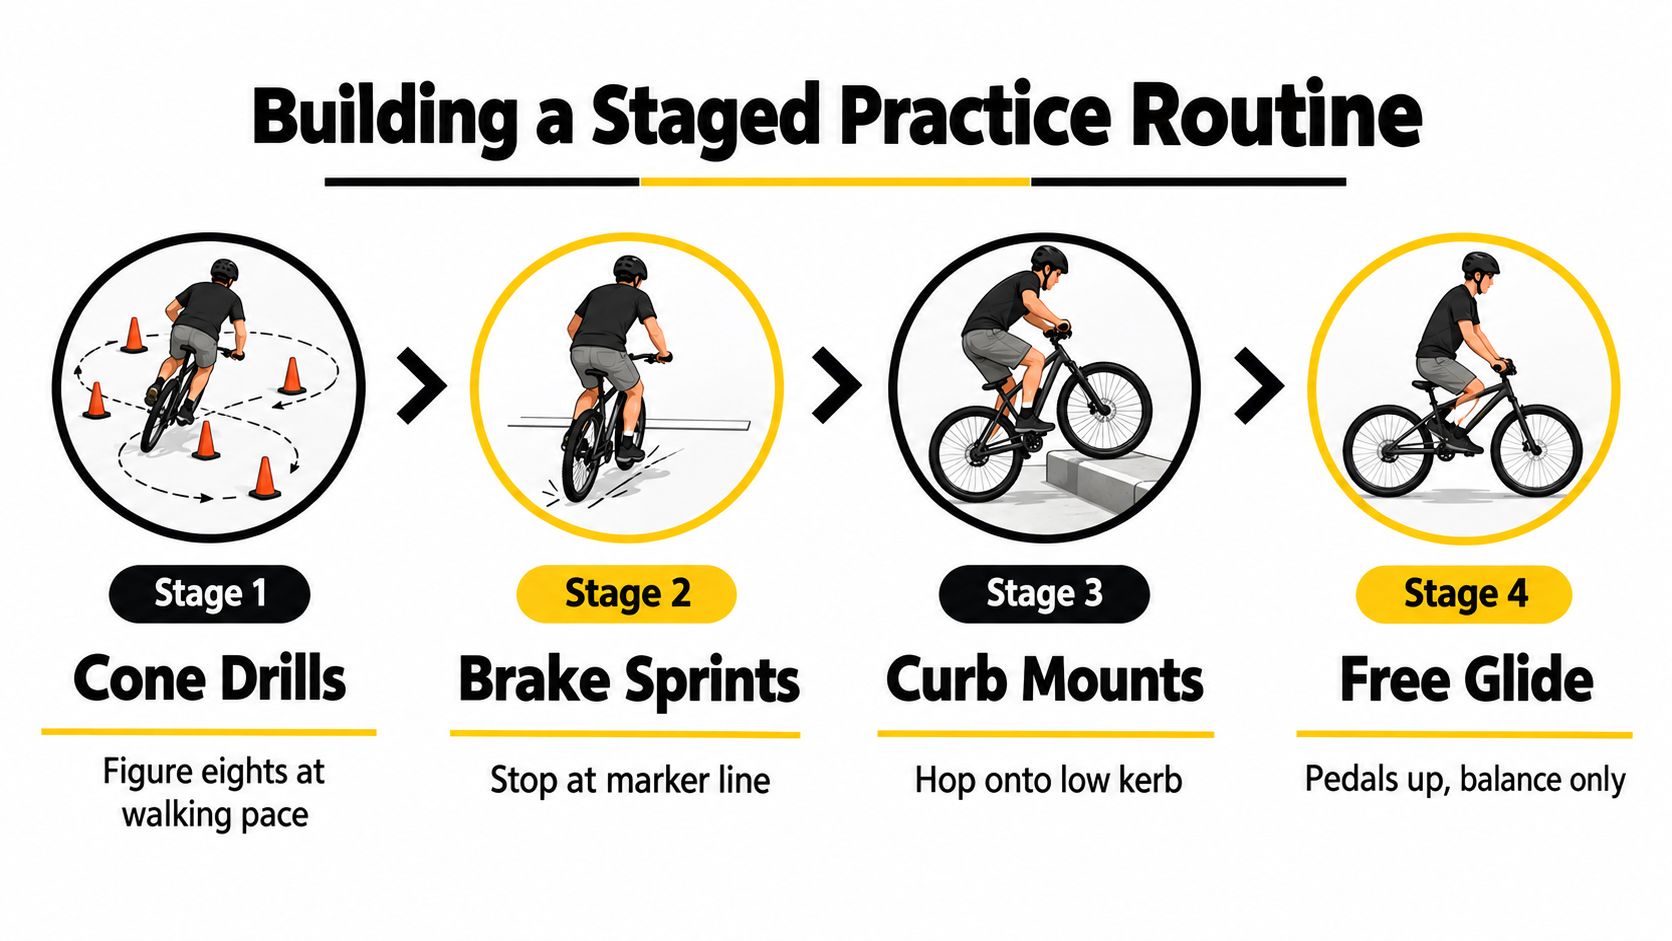
Stage two adds direction and braking
Once the child can glide, introduce gentle turns around a wide marker. Figure eights at walking pace reveal whether the child looks through the turn or stiffens the arms. Add stopping points and ask the child to stop before a line rather than after it.
If pedals are fitted, practise starting on a flat surface and using the rear brake. Keep the training wheels slightly raised as described earlier, so the child experiences a little lean while still having a margin for confidence. The goal is controlled movement, not speed or distance.
A useful progression looks like this:
- Mount and stop: Repeat until the child can start and finish without help.
- Scoot and glide: Encourage longer periods with both feet lifted, but never demand them.
- Steer around markers: Use wide turns first, then bring the markers closer.
- Brake on command: Call “stop” at random points and check that the child responds calmly.
- Change configuration: Remove stabilisers only when the child can balance and control direction rather than merely pedal forwards.
Stage three moves into public space
A shared path isn't the place to discover that a child can't stop. Before leaving private practice, check that the rider can look ahead, slow down, avoid a stationary obstacle, and dismount when asked. An adult should stay close enough to intervene, not trail behind at a distance.
Safekids NZ advice included in the BikeReady cycle skills training guidance says children under 10 shouldn't cycle on the road unless accompanied by a competent adult, with the child's skills, traffic conditions, and road-rule knowledge considered. New Zealand's helmet law applies to all cyclists, so a properly fitted helmet is required for on-road cycling. Helmet use rose above 90% after the law was introduced, according to the same national guidance.
The 2024 Walking, Cycling and Micromobility Monitor found that 77% of New Zealanders could ride a bicycle, but only 46% owned or had access to one, and 22% had cycled during the previous year for transport or recreation. It also reported that only four in ten New Zealanders believed it was safe for children to cycle to school. These figures make the practice environment more than a convenience. It shapes whether a child develops confidence to keep cycling. (Waka Kotahi Cycling Action Plan)
For the next transition step, this guide to moving from a balance bike to a pedal bike can help you decide when the pedals should become the focus.
Maintenance and Local Workshop Support
Children test bicycles in ways adults rarely do. They drag them by the handlebars, drop them on the drive, ride into edges, and use training wheels to bridge gaps against kerbs. That treatment doesn't automatically make a bike unsafe, but loose hardware and damaged controls can turn a minor impact into a loss of steering or braking.
The most vulnerable parts on a convertible setup are the interfaces. Pedal threads can be damaged when a crank is fitted at the wrong angle. Training-wheel brackets can loosen after repeated side loading. Coaster brakes can lose effectiveness, while hand-brake cables can develop excessive slack or become difficult for a small hand to operate.
Run the same check before every ride
You don't need a workshop stand for a basic inspection. Hold the front wheel between your knees and gently turn the handlebars. They shouldn't move independently of the fork. Squeeze each brake and check that the lever feels firm and the wheel responds.
Then work down the bicycle:
- Axles and wheels: Check that the wheels sit straight and the axle nuts are tight.
- Training-wheel brackets: Look for movement at the frame connection and confirm both side wheels are aligned.
- Handlebars and saddle: Test for rotation or slipping before the child rides.
- Tyres: Look for cuts, embedded stones, and a visibly soft casing.
- Pedals and cranks: Turn the cranks by hand and check for roughness, wobble, or a pedal that isn't fully seated.
- Fasteners: Inspect any conversion bolts after the bicycle changes mode.
Don't rely on a child's ability to describe a fault. A loose saddle may feel like poor balance, and a weak brake may look like reluctance to stop.
Practical rule: If a conversion requires force, improvised washers, or a bracket that never sits square, stop fitting it and get the bicycle checked.
Know when home maintenance has reached its limit
A competent workshop can inspect the complete bicycle rather than treating each accessory as a separate purchase. That matters when a frame has been converted between balance and pedal modes, because the mechanic can check wheel loading, ground clearance, brake operation, and fastener security together.
Local support also solves the parts problem. Cheap online models often use unusual brackets, proprietary wheels, or hardware that becomes difficult to replace after a small failure. A local specialist can identify compatible components, order the correct part, and tell you when a replacement is unsafe because the geometry has changed.
Book a professional inspection if the frame, fork, axle, or handlebar has bent; if a training wheel repeatedly loosens; if a brake doesn't hold the wheel securely; or if the crank threads feel damaged. Don't straighten structural components at home or continue riding while waiting for a part. The cost of a check is small compared with teaching a child that an unpredictable bicycle is normal.
Making the Right Purchase Decision
Don't buy the heaviest children's bike because it looks sturdy. A young rider has to lift, steer, start, stop, and recover that mass every time the bicycle wobbles. A bulky frame with a high saddle can make a capable child appear uncoordinated, while a light, adjustable bicycle gives them room to practise the actual skill.
The best balance bike with training wheels is not the one with the longest feature list. It is the one that fits in balance mode, accepts stable pedal components, and can be adjusted without compromising the frame or brake system.
The non-negotiable checklist
Start with the minimum saddle height. Ignore the age range until you know the child can sit securely and place both feet down in the intended configuration. A lower starting point gives the rider an escape route when balance disappears.
Check the brake reach. Levers designed for adult hands are a bad match for a small rider. The fingers should reach the lever without the child losing their grip on the handlebar, and the rear brake should operate consistently.
Inspect the conversion hardware. The pedals, cranks, stabiliser brackets, axle nuts, and washers should be designed for that frame. Don't assume a universal kit is safe because it can be attached.
Choose useful adjustability. Look for a saddle and handlebar range that supports growth, plus training-wheel height adjustment that allows the bicycle to lean slightly. Adjustability is valuable only when the parts remain secure at every setting.
Value serviceability. A recognised brand and a local specialist are safer bets than an anonymous listing with no clear parts support. You should be able to obtain tyres, tubes, brake components, and conversion hardware when the original pieces wear out.
Parents comparing bikes alongside helmets, protective equipment, and other youth gear may also find this parents guide to sports equipment useful for building a sensible kit without buying every accessory on the shelf.
Buy for the next skill, not the current photograph
A child sitting happily on stabilisers isn't proof that the bicycle is teaching balance. Ask what the next configuration will be, how the stabilisers come off, and whether the saddle can drop low enough for independent practice. If the answer depends on a future aftermarket modification, choose a different bicycle.
A compact balance bike that supports gliding may be a better first purchase than a pedal model overloaded with plastic accessories. For families comparing specific balance-bike formats, this overview of the Cruzee balance bike provides another product-focused reference point.
Treat the purchase as equipment for a staged skill, not a toy that gets replaced when the child becomes frustrated. The right geometry, reachable controls, sound standards information, and access to maintenance will do more for progress than a flashy conversion promise.
Rider 18 can help families choose a properly sized balance bike, check conversion hardware, fit helmets, and set up the brakes and stabilisers for safe practice. Visit Rider 18 for kids' bikes, safety gear, workshop support, and practical advice from a New Zealand cycling team.


