

Saddle Bags NZ: The Complete Buyer's Guide
- by Nigel
-

You're ten minutes into a commute through Nelson drizzle when the rear tyre starts hissing. The puncture kit is at home, your wallet is in a jacket pocket, and the walk back looks longer with every turn of the pedals. A small saddle bag under the seat would have kept the tube, tyre levers and multi-tool out of your pockets and ready for exactly this sort of morning.
That's the useful idea behind saddle bags in NZ. They're a compact storage pod attached beneath the saddle, close to the bike's centreline and mostly out of the way. The compromise is simple: the smaller the bag, the less it interferes with handling, but the harder it can be to access while riding. The larger the pack, the more carefully you need to manage weight, clearance and movement.
Why a Saddle Bag Earns Its Spot on Your Bike
A saddle bag is your bike's glovebox. You don't reach for it every minute, but when a valve core loosens, a chain drops or the weather turns, you'll be pleased it's there.
New Zealand commuter guidance describes a saddle bag as a low-interference storage option that attaches under the seat. It's suited to small, frequently needed items such as keys, wallets, tools and puncture repair kits, although the compact shape can make access fiddly while you're moving. The Auckland Transport cycling gear guidance makes that capacity-versus-access trade-off clear.
For a daily ride, pack the things that solve a problem rather than the things you might use someday. A spare tube, tyre levers, a multi-tool, a small pump or inflator, and your house key are a sensible starting point. Keep heavier objects secured so they don't rattle against the saddle rails.
Practical rule: If you need to open the bag while pedalling, it probably belongs in a jersey pocket or handlebar pouch instead.
The bag works especially well because it leaves your back clear and doesn't take up bottle space. It also keeps repair essentials on the bike, so you won't accidentally leave them in a different jacket. For a short commute, that low-profile arrangement is usually more useful than a large pack swinging behind the saddle.
A small bag won't replace a pannier or backpack when you're carrying groceries, wet-weather clothing or a laptop. It isn't designed for that job. If you're planning a longer ride, the bike ride packing guide can help you separate emergency equipment from items you need easy access to.
The best first purchase is often the least exciting one. Fit a compact saddle bag, put the repair kit inside, and practise removing it at home. When the next puncture happens in the rain, you'll know exactly where everything is.
Types of Saddle Bags and Seat Packs
You are halfway along a gravel road near Nelson when the temperature drops. A compact wedge bag may carry the tools you need, while a larger seat pack can take a jacket and food. Both sit behind the saddle, but their size changes how the bike feels and what you can pack safely.
The compact end of the NZ market includes bags around 0.41 to 1.97 litres, while larger off-road packs can reach 10 to 14 litres and weigh around 330 to 390 grams, according to NZ saddle bag listings from Evo Cycles. Compact bags usually hold a tube, tyre levers, a multi-tool, patches and a few personal items. They sit close to the saddle, fit quickly and usually have the smallest effect on handling.
Mid-size seat packs suit rides where a tool bag is too restrictive but a full bikepacking pack would be excessive. They can carry a spare layer, gloves, food or extra repair equipment. Judge them by their loaded shape rather than the litre label. A bag that grows tall or hangs loosely can sway on corrugations, brush your thighs or strike the rear tyre when the bike moves through rough terrain.
Large packs generally use a harness with a separate dry bag. The harness holds the load against the bike, while the dry bag compresses clothing and camping equipment into a bundle. This arrangement gives you storage without putting a backpack on your shoulders, but filling every corner with dense items can affect steering and make the pack move.
Why attachment points matter
A single strap works well for a light, compact load. As the pack becomes taller, softer or unevenly filled, three-point attachment spreads movement between the saddle rails and seatpost area. That helps on rough gravel and technical trails, though it does not remove the need to pack carefully.
Keep heavier tools and food low and close to the saddle. Place soft, lighter clothing around them. On a dropper-post bike, a large pack may limit how far the saddle can lower, so storage capacity has to be weighed against body position and control. E-bike frames can also leave less room around wiring, batteries or bulky seatpost hardware.
Choose by the job, not the biggest capacity
For a tube and tools, compact is usually the sensible choice. A mid-size pack gives a day ride room for food and a layer. Multi-day riding calls for a compressible bikepacking pack, provided the load stays stable and does not cause heel strike or handling loss.
The bike bags guide can help compare saddle storage with bottles, pockets and frame bags. Choose the smallest pack that carries the job comfortably, then leave spare capacity for changing NZ conditions.
Sizing, Fit and Compatibility Checks
A bag can have the right capacity and still be wrong for your bike. The saddle shape, rail position, seatpost exposure and tyre clearance all decide whether it will sit properly.
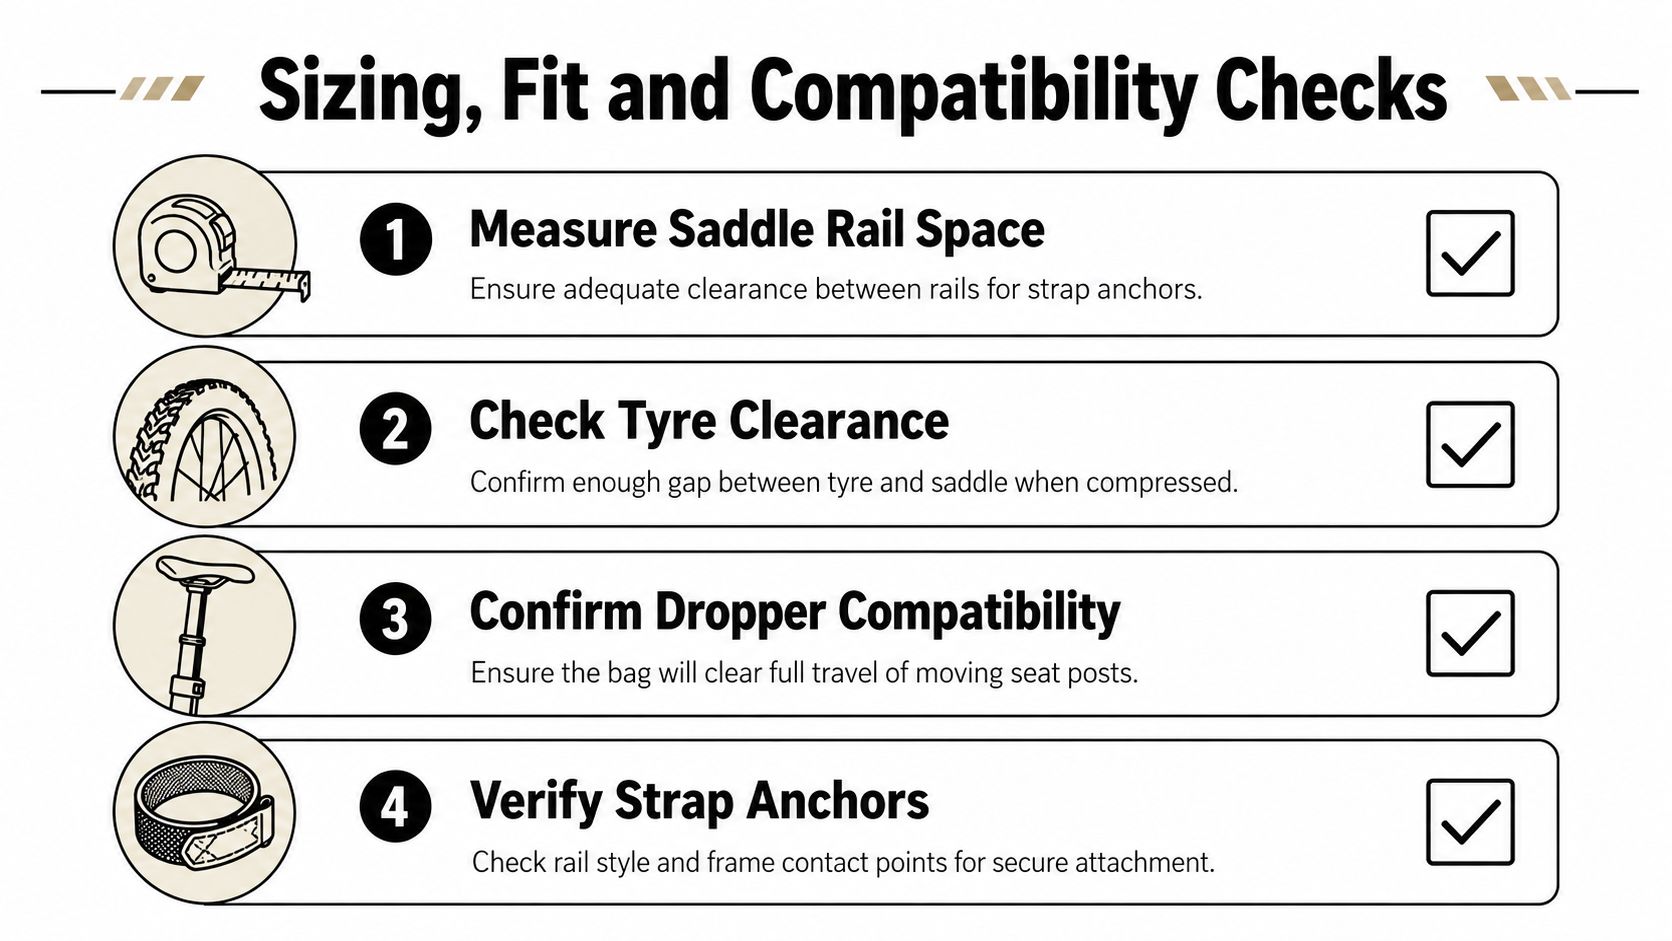
Start with the saddle rails. Look at the space available for the bag's anchor straps and check whether the rails are exposed enough for the attachment system. Some saddles have broad shells, short rails or unusual rear profiles, so a strap that works on a traditional saddle may not sit neatly on another model.
Four checks before you buy
- Measure the rail space. Check where the anchors can sit without rubbing the saddle shell or pressing on the rails at an awkward angle.
- Check the tyre gap. Measure the space between the underside of the bag position and the tyre. Allow for suspension movement, rider weight and a tyre that may be larger than the one currently fitted.
- Confirm seatpost movement. If you use a dropper post, the bag must not block the post from lowering. A large pack may need an adapter or a different mounting position.
- Inspect the contact points. Make sure straps won't rub brake hoses, e-bike wiring, dropper cables or painted frame surfaces. Add a protective film only where the manufacturer allows it, and don't trap a cable under tension.
Saddle compatibility has become a specialised design problem. NZ company Cyckit says its Aeroclam products were developed with market validation from 125 road cyclists and designed to fit more than 342 saddle model combinations, with interchangeable lower sections in small, medium and large sizes that can swap in about 10 seconds. Those details appear in Cyckit's Aeroclam saddle bag listing.
That doesn't mean every bag fits every saddle. It means you should treat fit as a primary buying decision rather than an afterthought.
Before ordering online, take a photo from the side and rear of your bike. Note the saddle rails, tyre size, seatpost type and any cables near the seat tube. Compare those details with the mounting diagram, not just the product photograph.
Materials and Waterproofing for NZ Weather
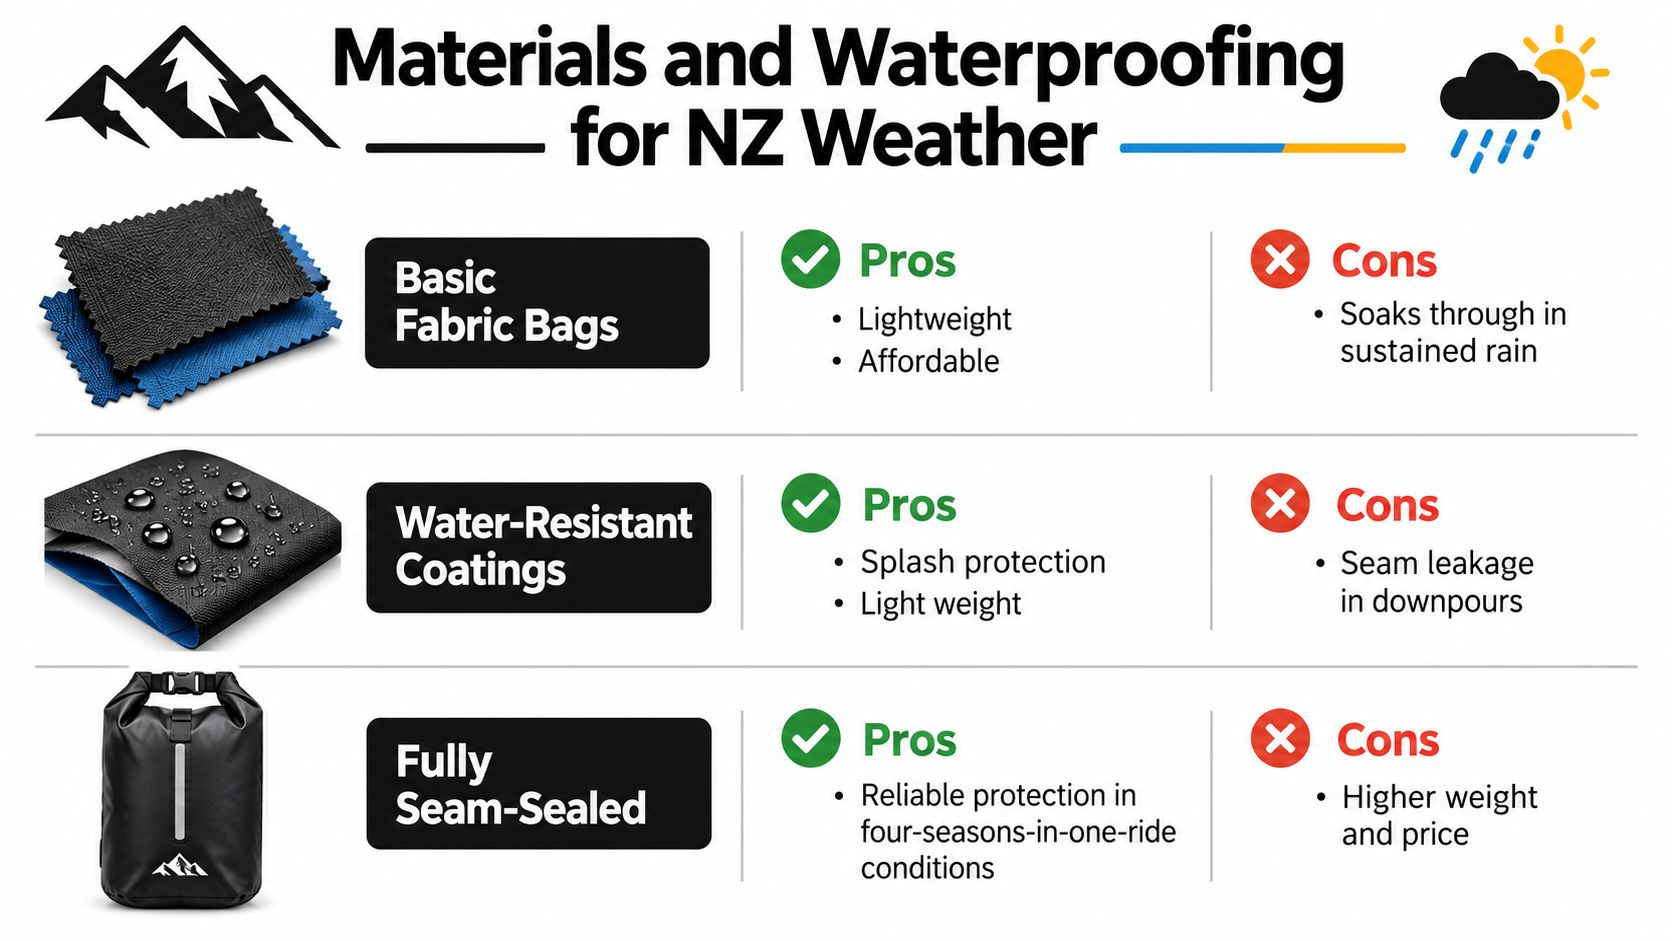
A bag described as “water-resistant” isn't necessarily waterproof. That distinction matters when a quick shower becomes a long ride through persistent rain.
Basic fabric bags can be light and practical for dry commutes. A coated fabric improves splash protection and handles ordinary showers more confidently, but water can still enter through zips, openings and unsealed seams. A fully seam-sealed dry-bag design offers more reliable protection for clothing and other items that must stay dry, though it can add weight, cost and bulk.
Match protection to the contents
If the bag only carries a multi-tool and tyre levers, some moisture may be tolerable. A phone, spare layer or paper map deserves a separate waterproof pouch even inside a water-resistant bag. Don't assume a roll-top closure makes the entire system waterproof if the outer harness or exposed seams can collect water.
NZ stock ranges from small 0.5-litre saddlebags to 10 to 14-litre harness systems, and local saddle bag listings from Rouleur Cycles include a NZ brand marketing seam-sealed dry bags for long rides. That spread shows why there isn't one universally correct level of protection.
The larger issue is what happens when wet-weather confidence encourages you to carry too much. A full pack can sway behind the saddle, brush your heels or change how the bike feels when you stand and corner. A bigger bag isn't automatically a better solution.
Load rule: Use the smallest bag that carries the equipment you actually need, then add weather protection inside it rather than filling spare space.
For mixed-surface trips, pack dense items low and close to the seatpost. Use the compression straps to remove slack, and test the bike over bumps before leaving home. If the pack moves when you pull the saddle sideways by hand, it needs better attachment or a lighter load.
A compact bag is usually the sensible choice for a repair kit. A larger dry-bag system earns its place when you need spare clothing or touring equipment and can secure it tightly. The right question is not “Which bag is best?” It's “How much can this bike carry before the storage starts affecting the ride?”
Installing Your Saddle Bag on MTB, Gravel and E-Bikes
Installation should take a few minutes, but a rushed fitting can create rubbing, sway or a blocked dropper post. Start with an empty bag and set the attachment points before packing anything.
Mountain bike fitting
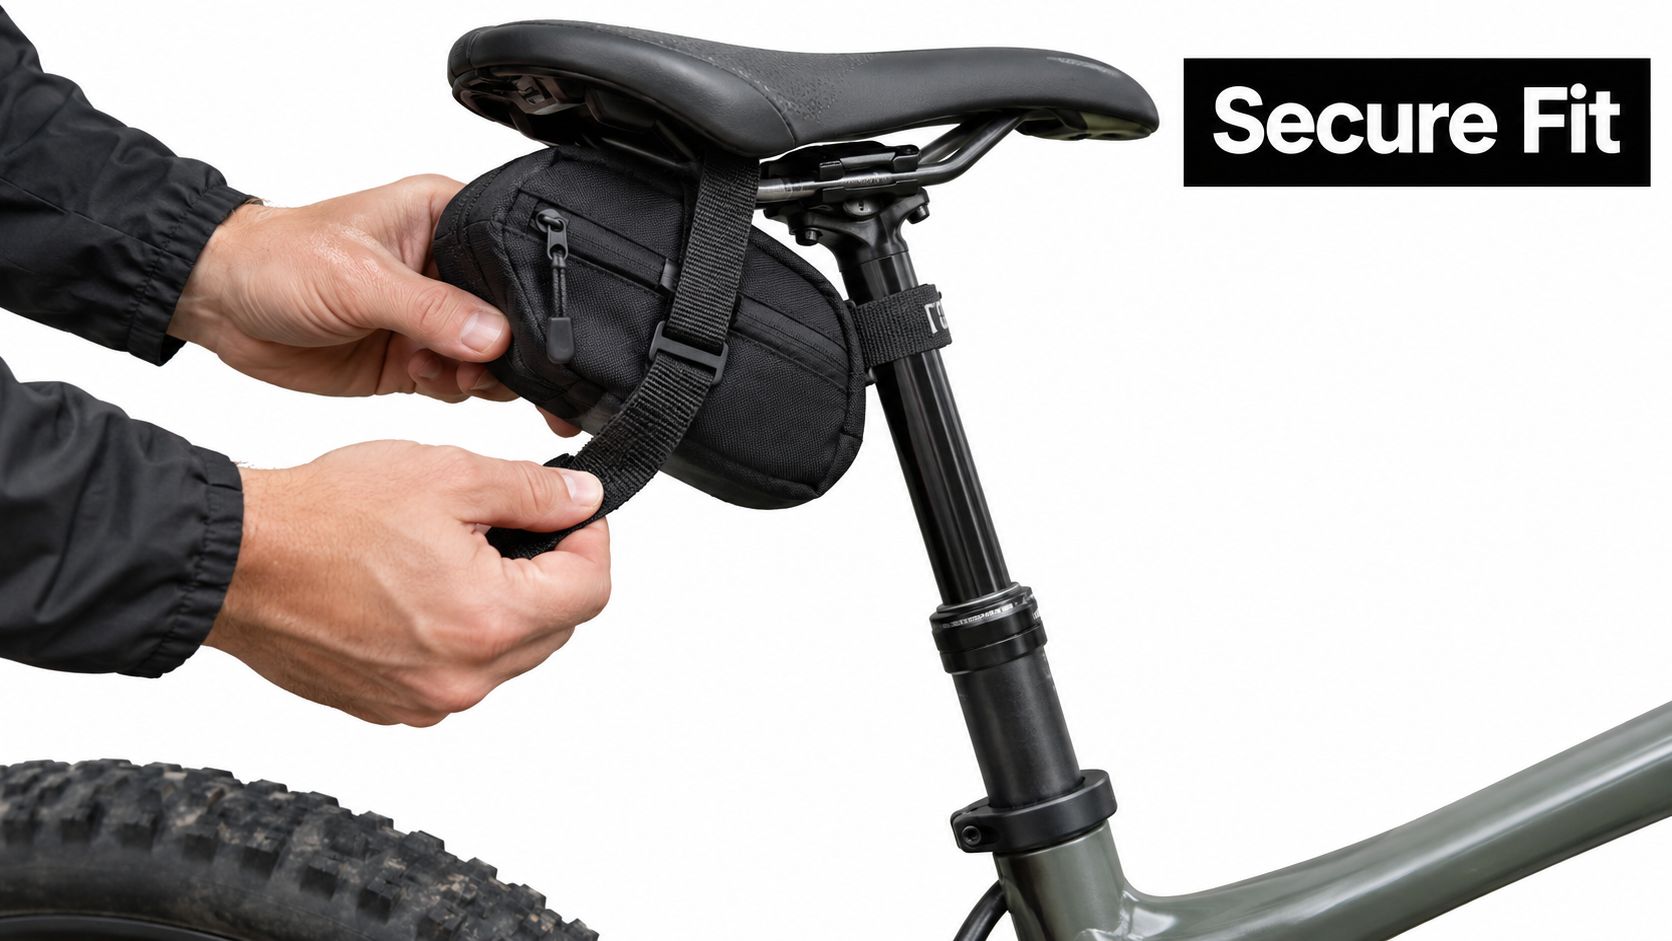
For a compact MTB saddle bag, loop the straps around the appropriate saddle rails and keep the bag centred behind the seat. Tighten the straps until the bag can't swing, but don't crush the saddle cover or force the rails sideways.
On a dropper-equipped bike, lower the post slowly after fitting the empty bag. Watch the pack as the saddle moves towards the frame. If the bag enters the tyre's path or catches the rear shock area, use a compatible adapter, shorten the pack or choose a smaller design.
The common MTB mistake is fitting the bag too low. It may look tidy when the bike is stationary, but suspension compression can bring it into the tyre. Check clearance with the suspension set in its normal riding position.
Gravel bike fitting
Gravel bikes usually give you more predictable clearance, but tyres, fenders and saddle shapes vary. Place the bag so it doesn't touch the rear tyre when the bike is loaded and the rider is seated. A larger pack should be compressed before you ride, with the closure rolled or folded consistently.
Keep a pump or multi-tool from pressing directly against the bag's fabric. A small cloth or separate pouch can stop sharp edges from working through the material over time.
E-bike fitting
E-bike frames often have more cables, battery hardware and heavier components around the seat tube. Route straps away from wiring and don't clamp a cable tightly against the frame. Check that the bag won't interfere with a seatpost battery, charging port or seat-clamp mechanism.
On a heavier e-bike, a loose bag can produce an irritating pendulum effect over bumps. Use all intended attachment points and test the loaded bike at low speed before a longer ride.
This short fitting demonstration is useful for seeing how tension and positioning affect stability.
After installation, pull the pack sideways, turn the cranks and compress the seatpost or suspension where applicable. Nothing should touch the tyre, rub a cable or restrict moving parts. Recheck the straps after the first rough section, because fabric and webbing can settle once the load starts moving.
Choosing the Right Bag for How You Ride
The easiest way to choose is to describe the ride before you look at the product. A Wellington commuter, a Nelson trail rider and someone preparing for a multi-day trip may all search for “saddle bags NZ”, but they need different solutions.
| Rider type | Capacity | Attachment | Priority features |
|---|---|---|---|
| Daily commuter | Compact | Saddle-rail straps | Tube, multi-tool, keys, low interference |
| Weekend gravel rider | Mid-size | Rail and seatpost straps | Room for a layer, food and repair equipment |
| Bikepacker | Large, compressible pack | Harness with multiple attachment points | Dry-bag closure, load control, tyre clearance |
| Trail rider with a dropper | Compact to modest | Adapter-compatible mounting | Clearance during saddle movement, secure straps |
| Parent setting up a kids' bike | Small | Simple rail or seat mounting | Light load, easy access, tube and snacks |
A commuter usually benefits from restraint. Carry the repair essentials and leave the spare space at home. If the lock, lunch and wet-weather jacket need to travel too, a pannier or backpack may distribute that load more comfortably than a bag behind the saddle.
A gravel rider often wants flexibility rather than maximum volume. A mid-size pack can carry a layer and food, but only if the load is compressed and the bag remains clear of the tyre. Keep the items you may need during a stop near the top, and put dense repair tools at the bottom.
For a bikepacking trip, the important features are not just capacity. Look for a stable harness, a compressible dry bag and attachment points that match your saddle and seatpost. The larger formats described in this saddle bag and bottle bag selection work as part of a wider carrying system, where bottles, frame space and pockets share the load.
A dropper-post trail rider should start with clearance, not litres. If lowering the saddle is central to your riding, a compact adapter-mounted bag is often more practical than a large pack that must be removed before every descent.
For a child's bike, keep the bag light and simple. A small tube, snack and perhaps a basic tool are enough for many family rides. Heavy storage can affect a small bike's balance, so don't treat unused capacity as a reason to add more gear.
Caring for Your Saddle Bag and Buying in New Zealand
A saddle bag lasts longer when you treat the attachment system as seriously as the fabric. After a wet ride, empty it and let it dry before storing it. Brush grit from zips, wipe mud from straps and check that buckles still close cleanly.
Water-resistant fabric can lose performance as dirt and abrasion build up. Follow the manufacturer's cleaning instructions, and use a compatible re-proofing treatment when the fabric starts wetting out. Don't put a seam-sealed dry bag through a harsh cleaning routine that could damage its coating.
A simple maintenance habit
- After wet rides: Empty the bag, open every compartment and dry the contents separately.
- Before longer trips: Inspect the rail straps, stitching and compression points for fraying or stretching.
- Between seasons: Store the bag clean, dry and off the bike, with the closure relaxed rather than tightly rolled.
- Before every ride: Check tyre clearance, cable contact and strap tension, especially after changing saddles or tyres.
Buying locally gives you a chance to compare the bag with the bike rather than guessing from a product photo. Online ordering is useful when you already know the required mounting style, while a shop visit helps when the saddle rails, dropper post or e-bike wiring create uncertainty.
Rider 18 offers nationwide shipping, free delivery over $100, and easy 14-day returns, according to the store information supplied for this guide. Its Nelson workshop can also help riders check fit and mounting details before a bag becomes a source of rubbing or movement.
A good saddle bag should disappear while you ride and appear when you need it. Choose capacity around your actual load, protect the contents for the weather you ride in, and test the fit before heading far from home.
Visit Rider 18 in Nelson or browse online to compare saddle bags and carrying options for commuting, gravel, MTB and e-bike use. Bring your bike or a clear side photo if you're unsure about tyre clearance, dropper-post movement or strap placement, and the team can help you choose a practical setup.


Please upload banner from store admin blog pages