

MTB Chest Protector: How to Choose and Fit One
- by Nigel
-

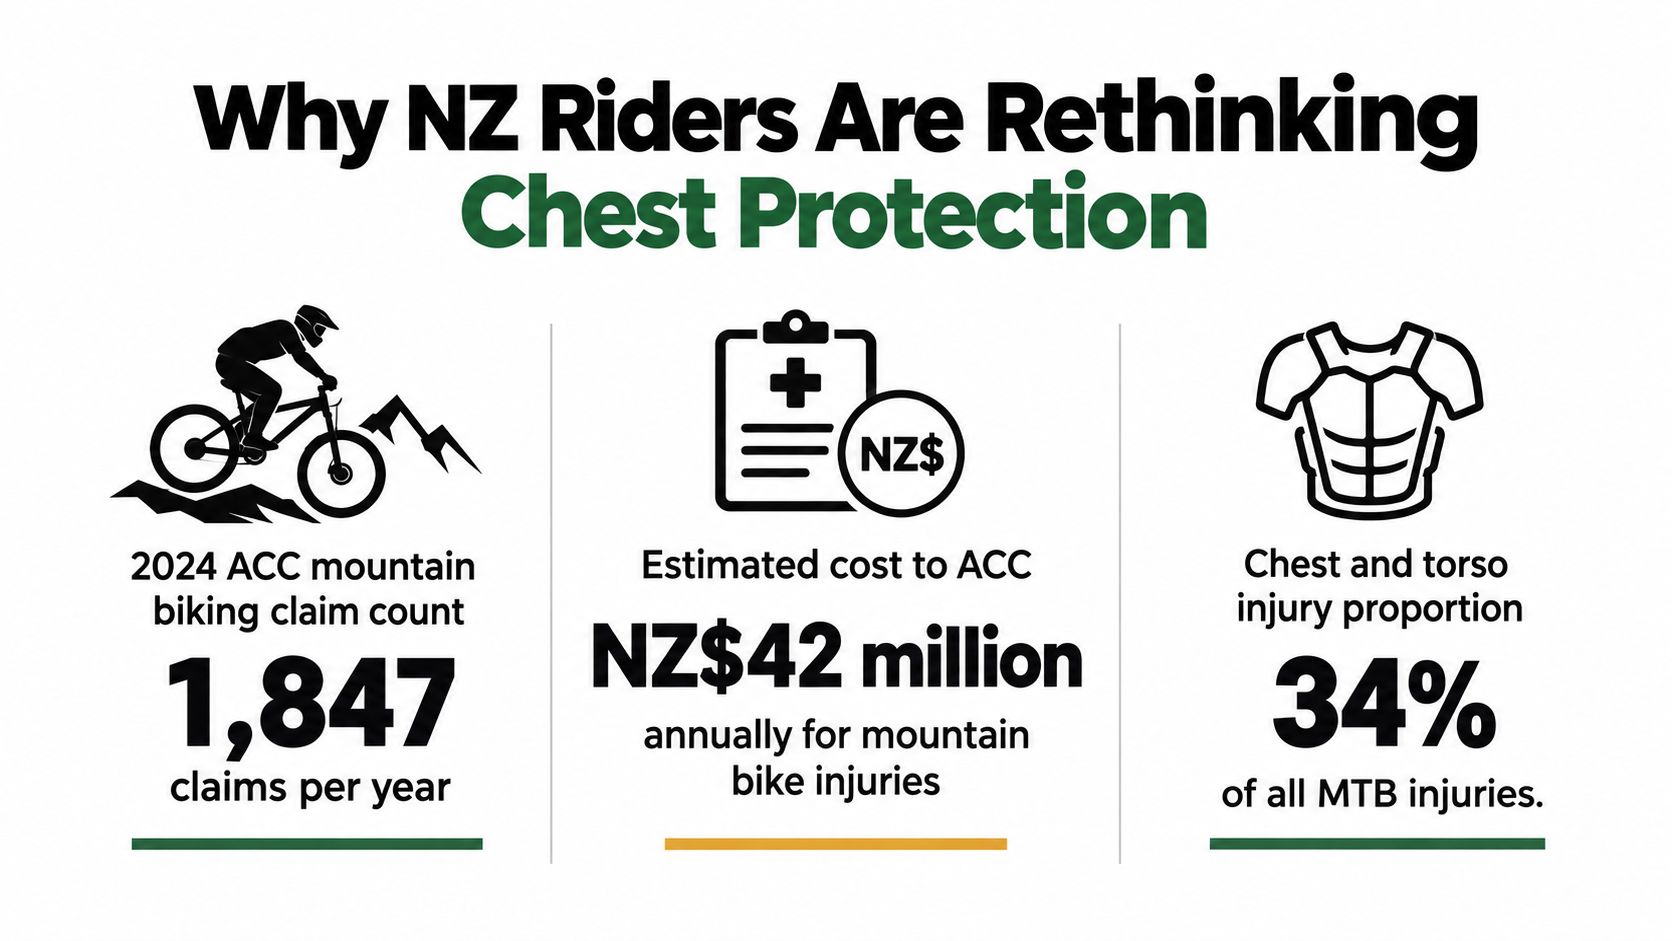
In 2024, mountain biking led to 4,239 ACC injury claims and NZ$22.2 million in recovery costs in New Zealand. Those figures sit behind a simple buying mistake I see all the time. Riders choose the most protective option they can afford, then stop wearing it once the climb starts, the day gets hot, or the fit annoys them.
A chest protector only helps when it is on your body and properly fastened. For a lot of riders, that means a lighter, lower-profile piece they will wear for every lap beats a bulkier model that spends half the season in the garage.
That trade-off matters in New Zealand. Long fire road climbs, muggy summer days, wet winter trail centres, and rough tracks lined with roots, rock, and timber all punish gear that rubs, traps heat, or shifts around. Good protection still matters, but wearability decides whether that protection is there when you hit the ground.
Why NZ Riders Are Rethinking Chest Protection
4,239 ACC mountain-biking injury claims and NZ$22.2 million in recovery costs in 2024 make this a real-world issue quickly. Chest protection is no longer a niche downhill purchase for New Zealand riders. It is a practical gear decision for trail riders, e-bike riders, enduro racers, and anyone spending time on fast, rough tracks.
New Zealand terrain is a big part of that shift. A mellow local loop can still end in a handlebar strike or a fall onto hardpack. Step up to Nelson rock, Rotorua roots, Queenstown speed, or a winter day on greasy clay, and torso impacts become easier to picture. Add an e-bike's extra mass, or repeated bike-park laps, and the case for upper-body protection gets stronger.
The local evidence changes the buying decision
The New Zealand Medical Journal study looked at 263 riders from the 2016 to 2017 NZ Enduro Crown series and found a heavy injury history. Fifty-five per cent reported an injury that kept them off work for at least a week. Nearly 20% reported an injury that kept them off work for a month or more. More than 40% reported ongoing symptoms from a mountain-biking injury.
Those numbers do not prove a chest protector prevents any specific injury. They do show why more riders are looking harder at torso coverage instead of treating it as race-day-only kit.
I see the same change on the shop floor. Riders who once bought knee pads and stopped there are now asking better questions. Not "what is the burliest thing on the wall?" More often, "what will I still wear on a two-hour pedal in January?" That is the right question.
Wearable beats impressive
The best chest protector is the one that stays buckled on from the first climb to the last descent. That sounds obvious, but plenty of riders still get caught by the wrong trade-off. A heavy hard-shell rig can look reassuring in the stand. If it cooks you on a long fire-road climb, chafes under the arms, fights with a pack, or makes breathing feel restricted, it starts spending more time in the garage than on your body.
That is why lighter chest-and-back vests have become more common for everyday riding here. They give up some coverage and some outright burly feel, but many riders tolerate them far better on long, mixed rides. For trail, all-mountain, and a lot of e-bike use, regular wear usually matters more than chasing maximum bulk.
There is still a place for larger armour. Riders doing jump lines, downhill tracks, shuttle days, and faster enduro stages often benefit from added shoulder or flank coverage, even if it runs hotter and feels less tidy on the climb. The honest answer depends on how and where you crash, not on what looks toughest on the hanger.
Start with your real riding. Speed. Trail difficulty. Climbing time. Pack use. Heat tolerance. Whether you ride alone. Then choose the most protection you will actually wear every time the trail gets serious.
What an MTB Chest Protector Actually Does
An MTB chest protector manages impact rather than eliminating it. Its panels can spread loading across a wider area, while foam or viscoelastic materials absorb and dissipate some energy before it reaches the body. That matters when a rider goes over the bars, clips a tree, lands on a rock, or slides sideways into uneven ground.
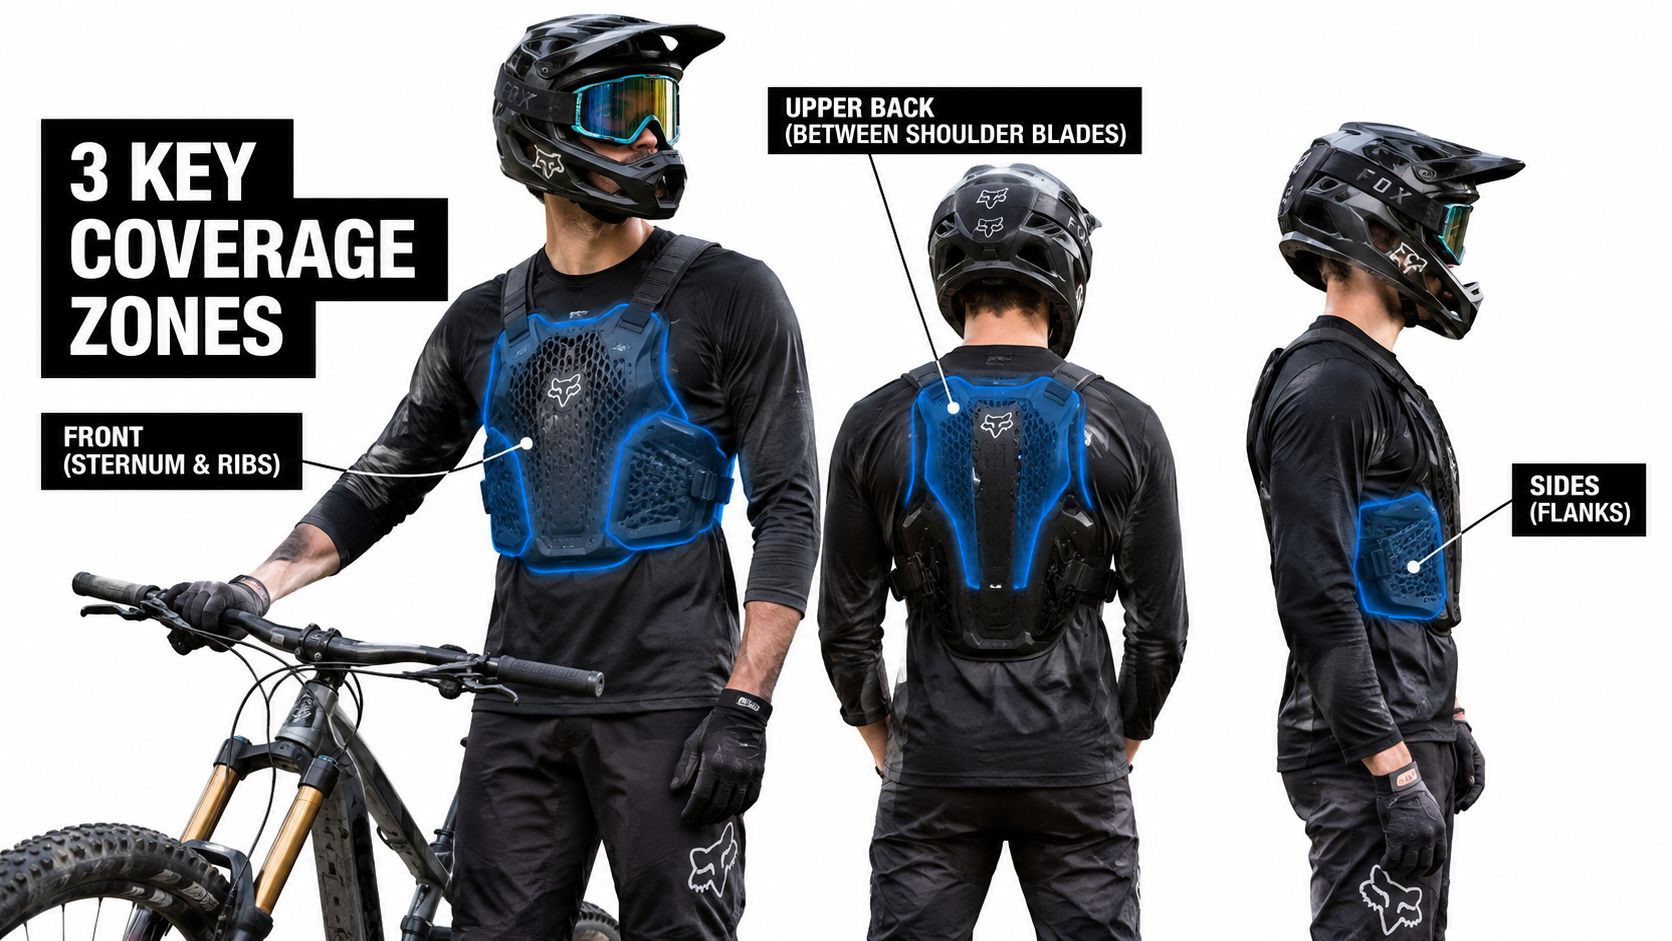
Most designs divide protection into three useful zones:
- Front coverage protects the sternum, ribs, and upper chest from direct contact with the ground, handlebars, or bike.
- Rear coverage sits between the shoulder blades and down the upper spine, helping manage contact during a backward fall.
- Shoulder and side coverage adds protection to the deltoid, collarbone area, and lateral torso, which can matter in a side impact.
A hard shell behaves like a broad shield. It can spread contact and slide over a hard surface, but it usually brings more stiffness and can feel intrusive during climbing. A soft foam or viscoelastic vest conforms more closely to the body and often pedals better, though it may offer a different response to sharp or concentrated impacts.
Coverage must stay where it belongs
A protector only works over the area it covers. If the front panel rides up when you stand on the pedals, or the rear pad shifts away from the spine when you reach for the bars, the advertised coverage becomes less relevant.
A New Zealand review of hospitalised major-trauma cycling patients reported chest injuries in 22% of cases, although the figure covers cycling broadly rather than mountain biking alone, as described in the New Zealand Medical Journal trauma review. That supports taking chest contact seriously, but it doesn't establish that every chest protector prevents thoracic injury.
Know what armour cannot do
Chest protection can't guarantee protection from rib fractures, spinal injury, internal injury, or a bad landing. It won't correct a loose headset, worn tyre, poor suspension setup, or a decision to ride beyond your current skill level.
A sensible system pairs torso armour with a properly fitted cycle helmet, suitable eye protection, gloves, knee protection where appropriate, and regular checks of the bike. Armour can help manage impact energy, but it can't remove the energy created by speed, height, terrain, or a collision.
Protection Levels, Standards, and What Labels Really Mean
Certification labels help, but they're easy to misread. NZTA's bicycle guidance lists AS/NZS 2063:2008, EN 1078, ASTM F1447, and Snell standards for cycle helmets. Those are helmet standards, not certification for an MTB chest protector, and NZTA's bicycle guidance doesn't provide an equivalent approved New Zealand chest-protector standard.
EN 1621-3 is a motorcycle chest-protector standard. Level 1 and Level 2 describe different laboratory impact-performance thresholds, with Level 2 requiring lower transmitted force under the relevant test conditions. The label tells you that a product met a defined test, not that it will prevent a fracture in a real rock garden.
Read the label by body zone
A vest may have one certification for the chest and another for the back. Some products carry Level 1 chest protection with Level 2 back protection, while others use a soft, non-certified roost panel. Don't assume a label on the product means every panel has the same rating.
| Standard | What it tests | Typical use | Limitation |
|---|---|---|---|
| EN 1621-3 | Motorcycle chest-protector impact performance | Chest panels used in some MTB and motorcycle armour | A laboratory test doesn't reproduce every trail crash |
| EN 1621-2 | Motorcycle back-protector impact performance | Back and spine panels | It doesn't certify the chest, shoulders, or elbows |
| AS/NZS 2063:2008 | Cycle-helmet performance | Bicycle helmets | It doesn't certify torso armour |
| EN 1078 | Cycle-helmet performance | Bicycle helmets | It isn't an MTB chest-protector standard |
| ASTM F1447 | Cycle-helmet performance | Bicycle helmets | It doesn't describe chest coverage or retention |
A Level 2 motorcycle chest protector can be a reasonable option for a rider prioritising impact performance, but it isn't automatically the best MTB choice. Heavy panels may interfere with pedalling, hydration packs, neck clearance, or body position. Motorcycle competition rules also shouldn't be presented as universal mountain-bike recommendations.
For helmet pairing and full-face coverage, use the full-face helmet guide as a separate fit reference rather than assuming torso armour and helmet sizing solve the same problem.
A certification is evidence of a test result. It isn't a promise about every crash.
Look for the exact standard, the certified body zone, the protection level, and the manufacturer's care instructions. Then check whether the protector remains centred while you ride. A slightly less aggressive rating in a vest you wear consistently may be more useful than a higher rating in armour that restricts movement enough to stay in your gear bag.
Matching Protection to Your Riding Style
The right chest protector is the one you will still be wearing two hours into the ride, on the last lap, or halfway through a wet climb in Rotorua. Riders often buy more armour than they will tolerate. That sounds sensible in the shop and fails on the trail.
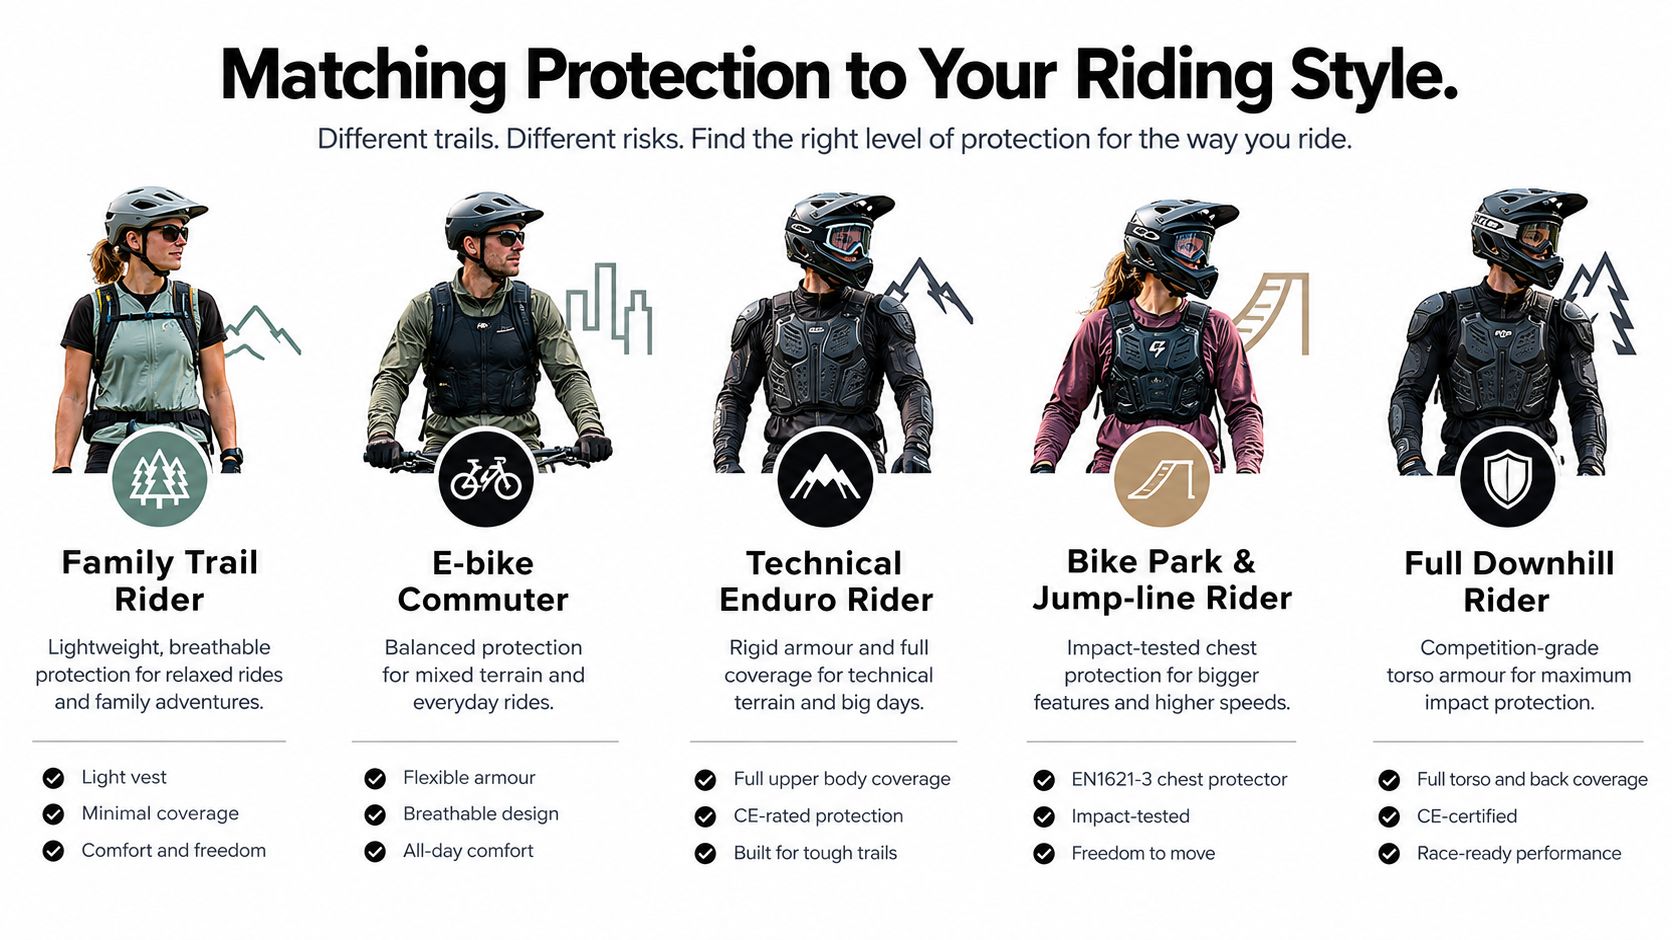
Match the protector to how you ride in New Zealand. Trail speed, climb time, humidity, shuttle access, and how often you wear a pack all matter as much as the label on the box.
Family trail riding
For cruisy trail rides, school-holiday missions, and lower-speed singletrack, a light vest with front and back coverage is often enough. The aim is simple. Keep the protector comfortable enough that you leave it on all ride.
Low bulk helps more than extra panels here. If the chest piece snags on your chin when you look down the trail, or if it feels sweaty after ten minutes, it will end up in the car. A slimmer vest that stays centred usually makes more sense than a bulky pressure suit for this kind of riding.
Trail grade does not remove the risk. Wet roots, bar-width trees, and surprise stops still put ribs, sternum, and upper back in play.
E-bike commuting and exploration
E-bike riders are a mixed group. Some are linking cycleways, gravel roads, and easy singletrack. Others are using the motor to reach rougher terrain faster and with less fatigue before the descent starts.
That changes what works.
A good option is a protector with stable side retention, moderate coverage, and a shape that stays comfortable in a more upright position. Hard, race-style shells can dig into the stomach or sternum on flatter bars and taller front ends. Check it with the pack you use, too. Some protectors sit fine on their own and become awkward once a hydration pack presses them forward.
Technical enduro
Enduro riders need a harder balance to strike. Climbs punish hot, bulky armour. Descents punish flimsy gear that shifts on impact.
This is the category where a well-fitted chest-and-back vest usually earns its place. Look for coverage that stays put, vents that still work on slow fire-road grinds, and enough freedom through the shoulders to move the bike underneath you. Shoulder caps can be worthwhile on tighter tracks with trees or rocky side hits, but only if they stay in place and do not catch under a pack.
As noted earlier, the Enduro Crown findings underline that the consequences of racing and hard descending can be serious. That does not mean every rider needs the heaviest suit on the wall. It means higher-speed, higher-consequence riding justifies more coverage, provided you will keep it buckled on for the whole day.
Bike park, jump lines, and downhill
Park laps and downhill runs shift the trade-off. Pedalling comfort matters less. Coverage matters more.
A fuller protector with chest, back, shoulder, and often elbow or flank coverage is easier to justify here because the riding includes repeated descending, bigger compressions, harder landings, and less time grinding uphill in the same gear. For jump lines, I would prioritise panel stability and shoulder protection before worrying about shaving a few grams.
Full-body armour can be the right call for shuttle days or lift-access laps. It is warmer, slower to take off, and less pleasant if you end up pedalling home, but those drawbacks are easier to live with when the riding is mostly down. For lower-body protection on the same kind of terrain, this guide to knee pads for NZ riding helps sort out the trade-offs.
If you are stuck between two categories, buy for the rides you do most often, not the one big day you have planned next month. Consistent use beats occasional maximum coverage every time.
Getting the Fit Right in Riding Position
Fit should be tested on the bike, not judged while standing in front of a mirror. A protector can feel comfortable in the shop and still ride up your chest, cut into your neck, or pull its shoulder caps away from the deltoids once your arms reach for the bars.
Use this shop-floor test
- Set the torso first. The front panel should sit over the sternum and upper ribs without pressing painfully into the throat. The rear panel should cover the upper back and remain centred when you rotate your shoulders.
- Assume the attack position. Bend the elbows, lower the chest, and shift your hips as though you're descending. The protector shouldn't climb towards the neck or leave a gap over the upper chest.
- Breathe fully. Take several slow, full breaths. If the straps compress your ribs or the front panel restricts expansion, the fit is too tight or the shape doesn't suit you.
- Reach and rotate. Move each arm forwards and across your body. Shoulder caps should stay over the shoulder rather than sliding towards the upper arm. If they lift, try another size or chassis shape.
The most important detail is retention. A chest protector that shifts during a crash can expose the impact zone, so stable torso retention and continuous front and rear coverage matter more in real use than peak impact numbers on a spec sheet.
Check packs, helmets, and children's sizing
Put on the hydration pack you ride with. Check whether its straps interfere with the protector's shoulder retention, whether the rear panel creates pressure, and whether you can reach the pack's hose or pockets without twisting the armour.
An upright e-bike posture changes the relationship between the front panel and the handlebars. Test the protector seated as well as standing. A full-face helmet should also move freely without the helmet edge or neck roll catching the protector's upper rear section.
Children need their own fit. Don't buy adult armour just because it offers more adjustment or costs less. An oversized protector can leave gaps, move during a fall, and place the panels away from the areas they're intended to cover.
For neck and helmet interaction, use this MTB neck-brace guide as a separate compatibility reference.
A short video can help you visualise the riding-position checks before visiting a shop:
Materials, Construction, and Breathability
Material choice changes how a protector rides over a three-hour climb, how it sits under a pack, and how likely you are to keep wearing it once the day turns warm and sticky. In a New Zealand shop, that matters as much as the protection insert itself. Plenty of riders come in focused on the foam name and miss the bigger factor, which is how the whole chassis handles sweat, movement, and repeated use.
EVA foam is light, common, and easy to shape. It works well in lower-profile protectors and roost-style pieces, but density and thickness matter more than the label alone. A thin EVA panel can disappear under a jersey, though it usually gives less structure than a thicker multi-layer design.
PU foam often feels a bit more supported and a bit less airy, especially once it's wrapped inside a heavier vest. That can suit riders who want a more substantial feel across the chest and ribs, but heat build-up is a real downside on long fire-road climbs.
Viscoelastic polymers stay flexible while you're moving and stiffen under impact. In practice, that usually makes them easier to live with in a fitted vest because they follow your torso instead of fighting it every time you bend over the bars. The catch is simple. If the carrier fabric is thick, the vents are token, or the cut traps sweat under a pack, the protector will still feel hot.
Hard-shell plates spread force well and hold their shape better after repeated knocks. They make sense for bike park laps, downhill, freeride, and rough shuttle days where the chance of a harder hit is higher. They also add bulk, can catch on layers, and are less pleasant to pedal in all day.
Construction matters more than the foam brochure
A good insert inside a poor vest still rides badly. Look at the full build: vent channels, perforations, mesh placement, strap width, side closure design, and whether the protector bunches under a jacket or pack.
A few shop-floor patterns show up again and again:
- Minimal trail vests suit riders who pedal a lot and want something they'll forget about after ten minutes.
- Mid-coverage protectors work best for enduro and e-bike use, where you still need airflow but want better stability and more wrap around the ribs.
- Heavier chassis designs suit park and downhill riders who accept more heat in exchange for more structure and coverage.
- Modular systems help mixed-use riders, but the extra zips, removable panels, and joins can create pressure points if the fit is only average.
Breathability is not just vent holes in the chest panel. The hottest parts are often the back panel under a hydration pack, the sternum where sweat pools, and the side straps where salt and grit build up. Open mesh helps, but only if it sits in places that get airflow on the bike.
Soft vests also age differently from hard-shell units. Repeated washing, UV, sweat, and winter mud can flatten foams, stretch fabrics, and reduce how securely the protector stays put. Hard plates resist abrasion better, while their straps and mesh sections still wear out first.
The best material setup is usually the one you'll keep buckled on for the whole ride. A lighter, cooler protector worn every ride does more real-world good than a hotter, bulkier one left in the van once the climbing starts.
After a hard impact, check more than the outer fabric. Foam can stay compressed, polymer inserts can crease, and hard shells can crack around mounting points or vents. If the panel no longer sits flat or the chassis has lost shape, replace the damaged part or retire the protector.
Care, Maintenance, and Common Questions
Wash the protector according to its care label, preferably by hand when the pads or chassis aren't designed for machine washing. Rinse sweat and trail grit from straps, use mild detergent, and dry the vest away from direct heat. Don't put foam against a heater or leave it baking in a closed vehicle.
After every hard crash, inspect the front and rear panels, seams, buckles, elastic, and adjustment points. Look for cracks, permanent creases, torn retention straps, loose stitching, or a pad that no longer sits flat. If the protector has taken a significant impact, replace the affected protection rather than trusting it for another season.
Questions riders ask
Is a chest protector overkill for a Grade 2 trail? Not necessarily, but maximum armour isn't automatically the right answer. Choose coverage you can wear comfortably and match it to speed, surface, confidence, and how serious a fall would be for you.
Can I wear one with a hydration pack? Yes, if the straps don't disturb the shoulder retention or press the rear panel into your spine. Test the complete setup in riding position before committing to a long ride.
Do children need child-specific armour? They need a protector that fits their torso correctly. Adult armour can leave gaps or shift, so don't use an oversized product as a substitute for proper coverage.
What if it smells after a wet winter? Wash the removable fabric and straps as directed, dry everything fully, and keep the protector ventilated between rides. Persistent odour can signal trapped moisture or fabric that needs replacing.
Rider 18 can help you compare MTB chest protectors, check riding-position fit, and choose armour that works with your bike, layers, and hydration setup. Visit Rider 18 for practical advice, workshop support, and protective gear for New Zealand trail, enduro, e-bike, and family riding.


