

Mountain Bike Handlebars: A Practical Buyer's and Fit Guide
- by Nigel
-

You're standing in a bike shop looking at a wall of mountain bike handlebars, or staring at your own bike after a rough weekend on the Maitai, wondering whether a wider bar, more rise, or a carbon upgrade will actually help. Your hands are sore, your wrists feel slightly wrong, and the choice seems to come down to a pile of numbers printed on cardboard.
That's the wrong way to choose. A handlebar is your main contact with the front of the bike, so its width, shape, rise, sweep, and stiffness affect steering, body position, comfort, and confidence. On Nelson trails such as Kaituna, Coppermine, and Te Ara Koa, the right bar should suit both your body and the terrain you ride, rather than merely copying the setup on someone else's bike.
Why Your Mountain Bike Handlebars Matter More Than You Think
Frames and forks get the attention, but your hands are constantly loading the bar. You pull against it when climbing, brace through rough descents, and use it to guide the front wheel around roots, rocks, and tight trees. A poor match can make a capable bike feel nervous, cramped, or tiring.
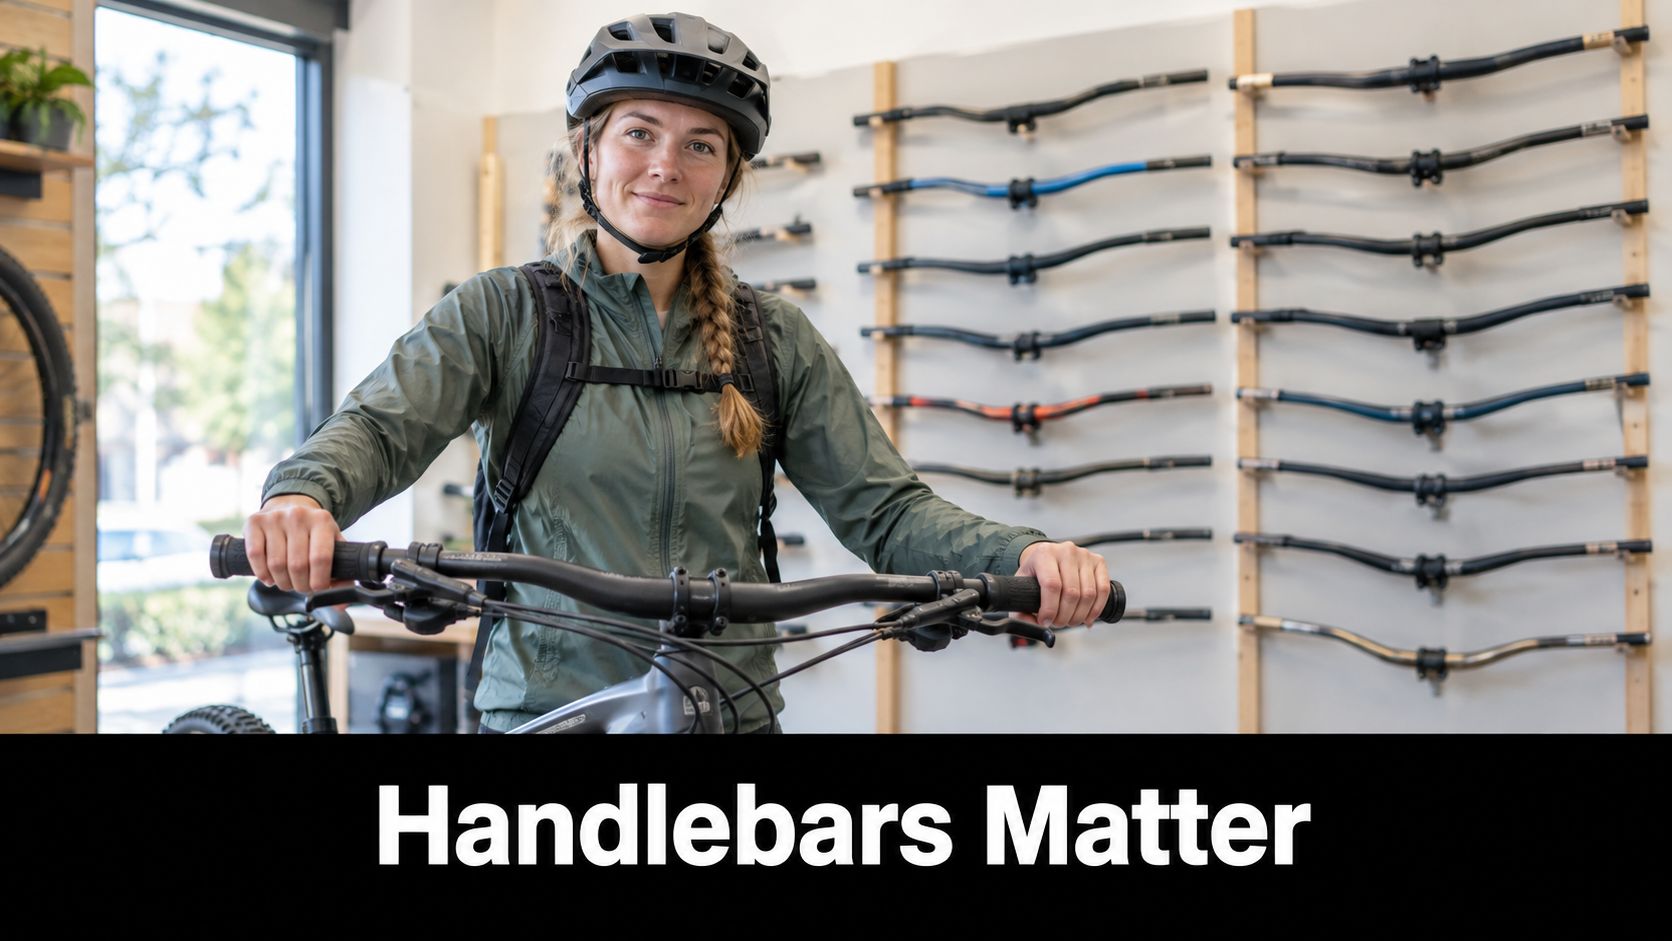
Width changes the way the bike behaves
A wider bar gives you more control over the front wheel. That helps when the trail gets steep, loose, or rough, particularly when you're descending aggressively or riding a bike-park line. It also opens your chest and can make the front end feel calmer.
The cost is manoeuvrability. A wide bar can catch trees, feel awkward on narrow singletrack, and leave a smaller rider with their hands too far apart. On a tight Nelson loop, control comes from a bar that gives useful purchase without forcing your shoulders into an uncomfortable stretch.
Shape controls comfort
Rise affects where your hands sit relative to the front axle. More rise can make a bike feel less aggressive and reduce the feeling of being pitched forward. Flat or low-rise bars put more weight toward the front, which can suit efficient cross-country riding when the rest of the bike's geometry supports it.
Backsweep and upsweep matter just as much. They determine the angle of your wrists and the way your brake levers meet your hands. A bar can have the right width but still feel wrong if its sweep forces your wrists to bend outward or makes the controls difficult to reach.
Shop rule: Choose the riding position first, then choose the bar. Don't buy a handlebar because its printed specification looks impressive.
New Zealand's cycling rules also show that handlebar configuration is treated as a safety and fairness issue, not just a styling decision. Cycling New Zealand Schools rules require bicycles to have handlebar plugs, while race categories restrict which bar shapes can be used. The NZ MTB technical regulations also specify race plate dimensions, including a front plate 15 cm high by 14 cm wide, with digits 8 cm high and a minimum line width of 1.5 cm.
This guide focuses on the decisions that matter for trail riding: bar types, body-based sizing, materials, clamp standards, installation, e-bike and kids' compatibility, maintenance, and crash checks.
The Main Types of MTB Handlebars Explained
Think of bar shapes as different riding personalities. A flat bar is the straight-talking multitool. A riser bar is the relaxed rider who lifts the cockpit. A gravity bar has broad shoulders and wants a steep descent.
Flat bars for direct, efficient riding
Flat bars have little or no rise and keep the front of the bike relatively low. They suit cross-country riders who value a direct steering response and an efficient climbing position. They can work well on a lightweight hardtail or a fast trail bike used for long climbs and flowing descents.
A carbon flat bar adds low weight and can soften some high-frequency trail vibration, but it needs careful installation and inspection. An alloy flat bar usually makes more sense for riders who crash regularly, share bikes, or want straightforward replacement costs.
Riser bars for trail riding
Riser bars lift the grips and often provide a more comfortable position for all-day trail riding. A small rise, below 15 mm, keeps the cockpit relatively low while adding a little room to adjust stack. A 20 to 30 mm rise gives a more noticeable lift and can suit taller riders, bikes with low front ends, or riders who prefer a less stretched descending position.
A riser bar is the sensible default for many Nelson trail bikes. It offers useful control without forcing the rider into the tall, heavily reinforced shape of a dedicated downhill bar.
Downhill, enduro, and gravity bars
Downhill bars are built around aggressive descending. They're often wide, sturdy, and designed for high mechanical advantage when the terrain is steep or the rider is carrying speed. Enduro and gravity bars overlap with downhill products, especially where stiffness and impact resilience matter, but an enduro rider may still want a little more balance for long climbs.
Don't fit a downhill-style bar just because it looks serious. If your usual ride involves extended climbing and tight bush singletrack, a slightly lighter trail riser can be easier to live with.
Carbon XC bars and specialised shapes
Carbon XC bars target riders who prioritise low weight and efficient handling. They suit race-oriented setups and long up-track missions where every cockpit adjustment affects climbing posture. Carbon risers sit between comfort and performance, offering a raised position with a ride feel some riders find less harsh.
Drop bars belong on gravel and endurance bikes, not ordinary mountain bike trail setups. Their curved shape offers hand positions for long road or gravel rides, but it isn't the natural choice for technical trail control.
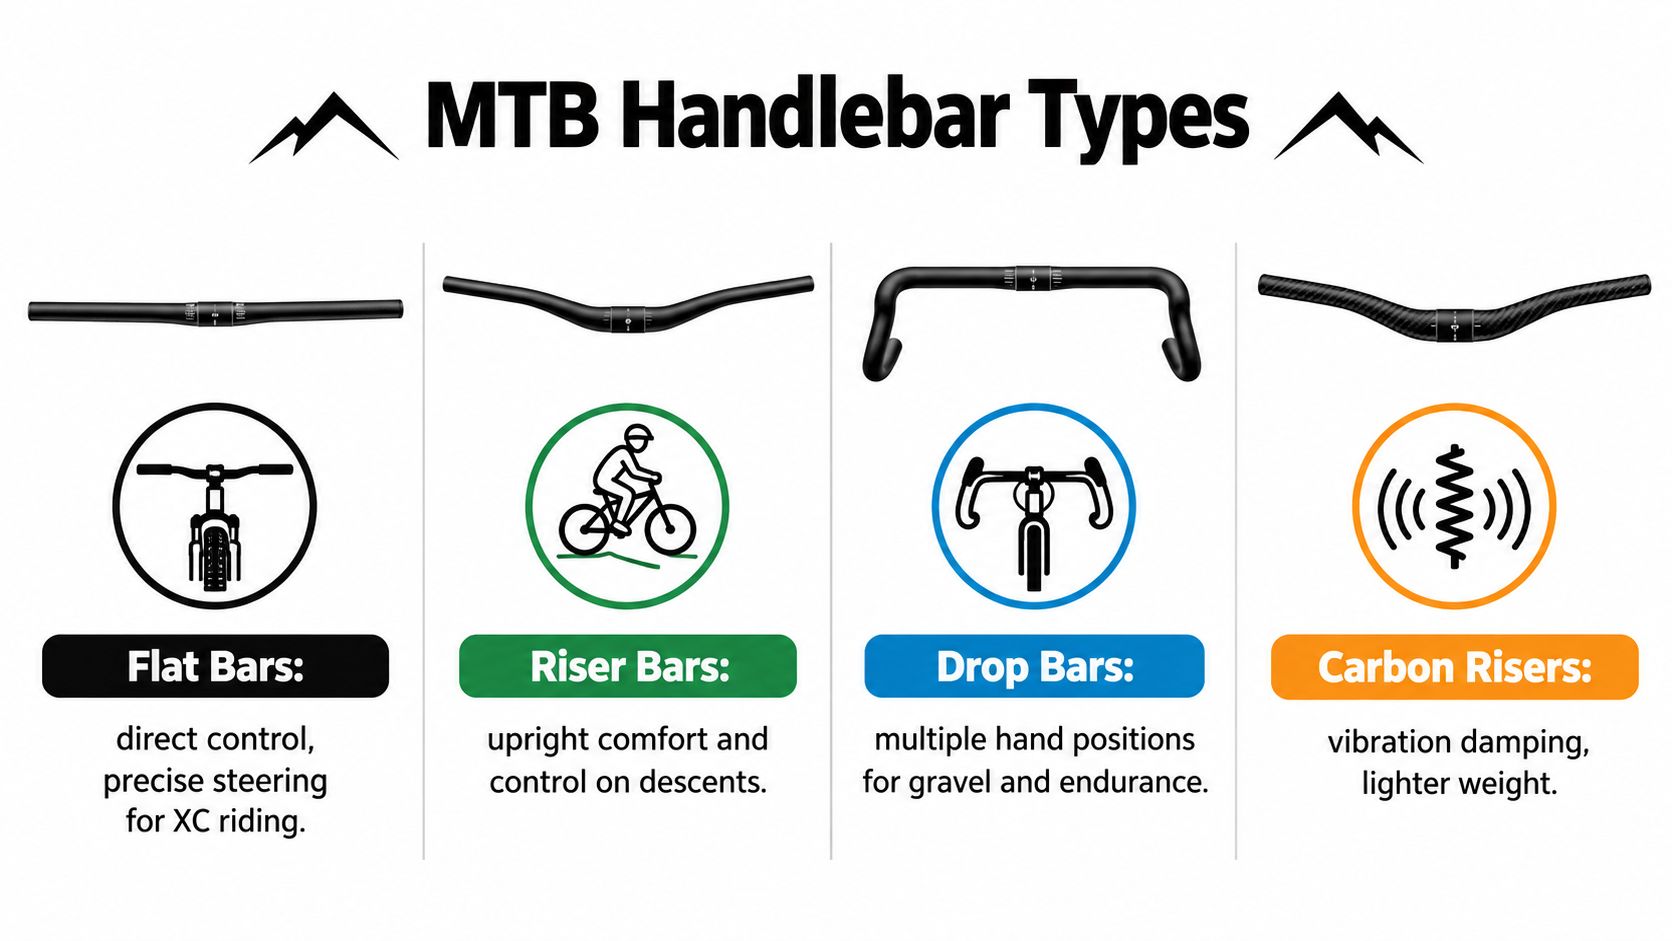
Before buying, check the shape against your actual bike and controls. If you're also maintaining a property or clearing access around a riding area, you may find it useful to find the Ryobi brush cutter at Value, but keep garden equipment and bicycle cockpit decisions separate. A brush-cutter-style handle has nothing to do with the fit or safety requirements of mountain bike handlebars.
How to Size Mountain Bike Handlebars to Your Body and Trails
Start with your shoulders, not a trend. Measure across the bony points at the top of your shoulders, near the acromioclavicular joints, then use that measurement as the centre of your bar-width decision. A practical starting point is to choose a bar within roughly 20 mm of shoulder breadth, then adjust for the terrain and your riding position.
That isn't a rigid formula. A descending-focused rider may prefer more width for control, while a smaller rider on tight singletrack may need less. NZ retailers commonly list MTB bars from 710 mm to 810 mm, with 31.8 mm and 35 mm clamp standards and rises from flat bars to 40 mm or more. Those stock ranges show what's available, not what your body needs. See the NZ MTB handlebar range and specifications as a useful reference point.
Use four measurements together
Width comes first. Go wider if you ride Kaituna-style descents, open rough terrain, or bike-park lines and want maximum steering leverage. Go narrower if your local riding involves tight trees, narrow trail corridors, or frequent upper-body fatigue.
Rise changes your reach and weight distribution. Taller riders often prefer additional rise because it reduces the need to drop their torso toward the bars. A shorter rider may find a high-rise bar makes the front wheel too light, especially on climbs.
Backsweep controls wrist angle. Around 7 to 9 degrees is a useful practical range for many trail riders who spend hours on the bike, because it brings the grips back toward a more natural hand position. More sweep can feel comfortable, but too much may slow steering response or make the controls feel oddly rotated.
Upsweep affects how your wrists meet the grips and how easily your fingers reach the brake levers. Rotate the bar so the grip area supports a neutral wrist, then set the brake levers to match your standing position. Don't use the printed rise as an excuse to ignore the actual rotation.
| Rider Profile | Bar Width | Rise | Sweep | Best Fit Trail |
|---|---|---|---|---|
| Smaller rider on tight singletrack | Shoulder width to slightly wider | Low to moderate | Moderate backsweep | Te Ara Koa and narrow bush trails |
| Average trail rider | Within roughly 20 mm of shoulder breadth | Moderate | Around 7 to 9 degrees backsweep | Mixed Nelson trail loops |
| Tall rider with a low cockpit | Shoulder width to moderately wider | 20 to 30 mm | Moderate backsweep | Long trail rides and technical descents |
| Aggressive descender | Wider end of your comfortable range | Moderate to high | Neutral wrist position | Kaituna and bike-park riding |
| Cross-country rider | Close to shoulder breadth | Flat or low rise | Efficient, comfortable sweep | Whaka up-track missions and fast loops |
Cutting a bar is easy. Making it longer again isn't. Buy a bar with enough usable width, mark equal sections from the centre, and shorten it gradually after testing the original position. If your hands go numb or your shoulders tense up, adjust one variable at a time so you know whether width, rotation, or lever angle caused the change.
Materials and Clamp Diameters Compared
Aluminium remains the sensible choice for most riders. It's predictable, easy to inspect, widely available, and generally more forgiving of the financial consequences of a crash. Carbon can reduce weight and provide a different vibration feel, but it demands correct torque, compatible components, and a more cautious approach after impacts.
| Material / Clamp | Weight | Price (NZD) | Ride Feel | Crash Durability |
|---|---|---|---|---|
| Alloy, 31.8 mm | Moderate | Qualitative, usually the budget-friendly option | Familiar and controlled | Straightforward to inspect and replace |
| Alloy, 35 mm | Moderate to higher | Qualitative, often positioned for aggressive builds | Stiffer at the cockpit | Durable, but still requires crash checks |
| Carbon, 31.8 mm | Low | Qualitative, generally a premium option | Can feel smooth and vibration-damping | Hidden damage can be harder to identify |
| Carbon, 35 mm | Low | Qualitative, generally a premium option | Light with a firm cockpit response | Requires careful torque and impact inspection |
Alloy or carbon?
Choose alloy for a rental bike, a kids' bike, a shuttle-day bike, or any setup that regularly meets the ground. It's also the better starting point if you're still experimenting with width and rise. You can change dimensions without feeling that every adjustment is a major investment.
Carbon suits a racer or experienced rider who already knows their preferred width and shape. It can reduce cockpit weight and may feel less harsh on repeated trail chatter. That benefit doesn't cancel out the need for correct installation. Carbon bars should never be clamped by guesswork or tightened with excessive force.
31.8 mm or 35 mm?
The 35 mm clamp standard has largely replaced 31.8 mm on aggressive trail and enduro builds, as discussed in this comparison of mountain bike handlebar design. Its appeal is a stiff, solid cockpit, especially for powerful riders, enduro bikes, downhill use, and heavier e-bikes.
That doesn't make 35 mm automatically better. A stiffer bar can transmit more trail feedback, and many everyday trail riders don't need maximum stiffness. The established 31.8 mm standard offers a broad choice of bars and stems, with a ride feel that can suit riders who value compliance and comfort.
My recommendation: Use 31.8 mm for general trail riding unless your bike already uses 35 mm, you ride aggressively, or your e-bike benefits from the firmer cockpit. Don't replace a good 31.8 mm setup just to follow the clamp-size trend.
Before ordering, compare the stem, bar, and control layout. Rider 18 carries MTB component options including OneUp carbon handlebars in 35 mm and other mountain bike parts, so its NZ mountain bike parts guide can help you check the wider cockpit system rather than shopping for a bar in isolation.
Compatibility and Installation for Trail, E-Bike and Kids Setups
A handlebar only works when every part clamped to it matches. Check the stem clamp diameter first, then the bar's control area, usable width, and room for your brake levers, shifter, dropper remote, bell, display, and grips.
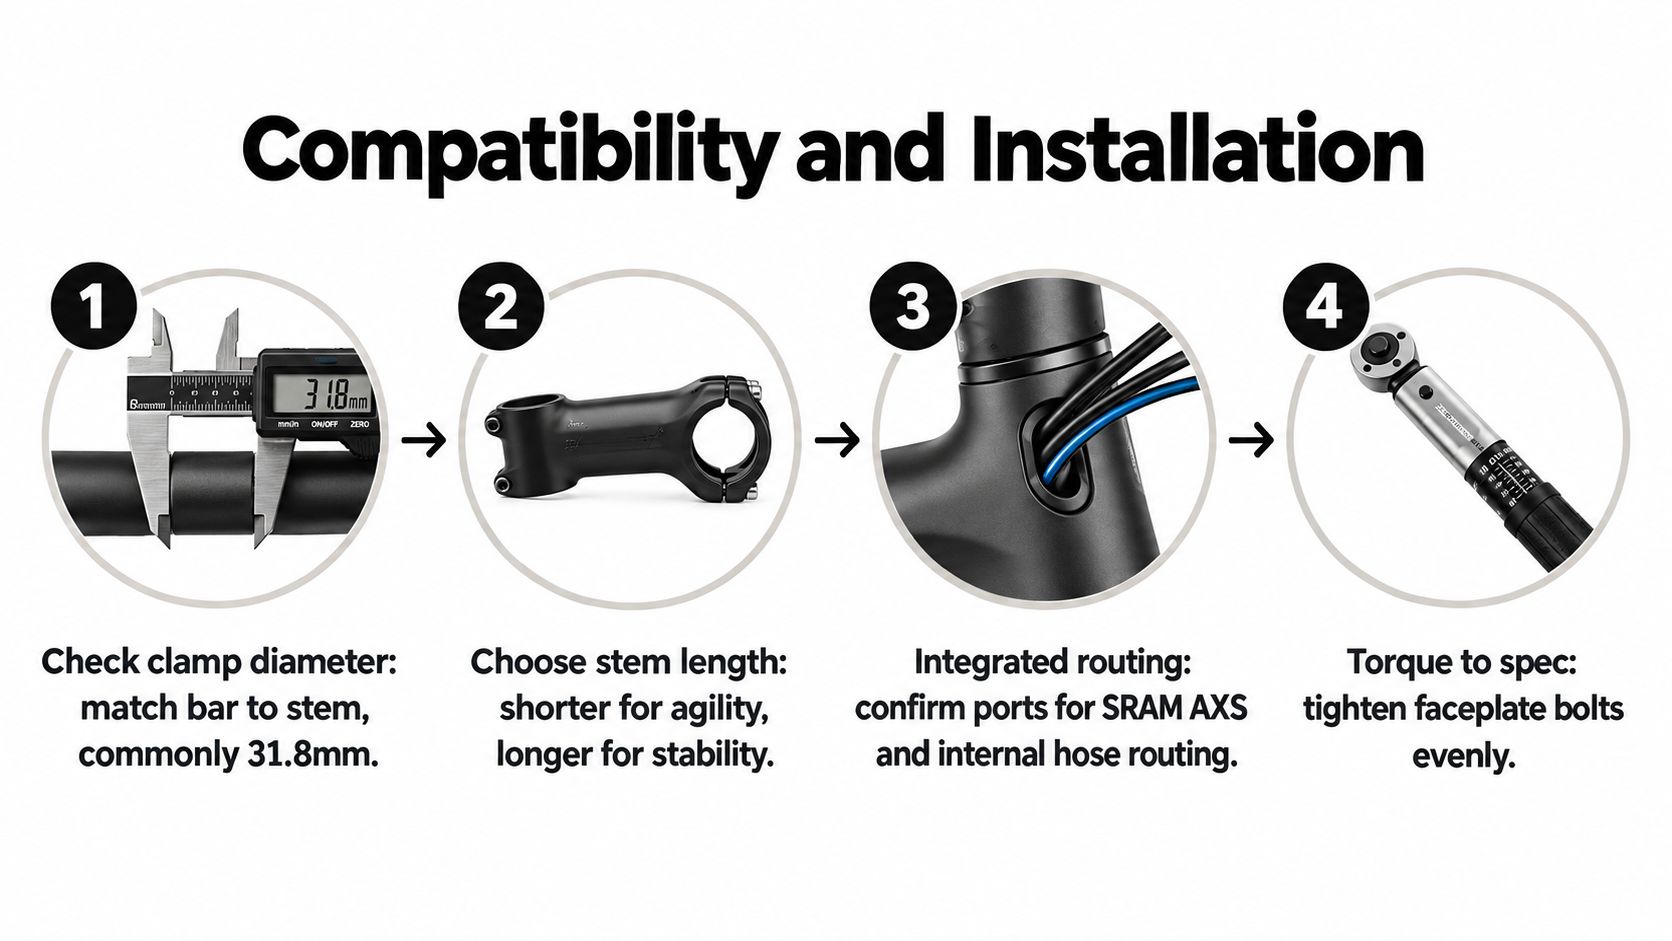
Match the cockpit before you cut
A 31.8 mm bar needs a 31.8 mm stem, and a 35 mm bar needs a matching 35 mm stem. Don't rely on appearance. Measure the clamp specification or check the manufacturer's marking.
Stem length changes handling as well. A shorter stem tends to make steering feel more immediate, while a longer stem can add stability and stretch the rider's position. Don't use stem length to compensate for a handlebar that's fundamentally too wide or too low.
If you're changing height as well as the bar, use this practical guide to adjusting handlebar height and check that the steerer, spacers, cables, and brake hoses still have safe movement.
E-bike controls need extra planning
E-bike handlebars carry more hardware than a basic trail bike. Wider bars can move a battery display away from its original position, while thumb throttles and control pods may have limited room near the grips. Bosch and Yamaha systems also need clean wire management, with enough slack for steering but no loops that can catch on the frame or suspension.
Integrated cable routing creates another checkpoint. Some SRAM and Shimano setups require specific routing ports or compatible stems and bars. If your bike routes hoses through the headset or cockpit, confirm the bar and stem design before removing anything. A standard external-routing bar may not suit an integrated system.
Kids' bikes are not small adult bikes
Kids' cockpits commonly use 22.2 mm stems and grips, so adult MTB bars and controls usually won't transfer directly. Reach matters more than fashion. The child should be able to hold the grips with relaxed shoulders, reach the brake levers without stretching, and turn the bar without the grips hitting their knees or body.
Install the bar by centring it in the stem, placing the faceplate evenly, and tightening the bolts in a crossed sequence. Use a torque wrench and follow the manufacturer's specified value. Don't guess, especially with carbon components or lightweight stems.
Lock-on grips make position changes and maintenance easier. Slip-on grips can work well on basic bikes, but they need a secure fit and should never twist during braking or descending. If hand, wrist, or pelvic discomfort persists, consult a qualified professional and find relief from biking discomfort rather than trying to solve every symptom with bar rotation alone.
Maintenance, Crash Checks and When to Replace
Handlebars deserve a quick inspection whenever you wash the bike or notice a new sound. Start at the stem-faceplate junction, where clamping loads concentrate. Look for hairline cracks, crushed surface marks, movement, or corrosion around the clamped zone.
Moisture under gel pads, tape, or grips can hide damage. Remove or move the covering when you're investigating a persistent creak, especially after wet riding or a crash.
Check alloy and carbon differently
An alloy bar may show a bend, dent, crack, or obvious change in alignment. A carbon bar can hide impact damage, so inspect the surface closely and compare suspicious areas with the opposite side. A careful tap or click test may reveal a change in sound, but it isn't a substitute for a professional assessment.
Use the edge-blanket method when checking carbon. Place a soft blanket or cloth beneath the bar and inspect it under good light while gently checking for unusual flex, delamination, or surface irregularity. If you're unsure after a hard impact, replace the bar or have a workshop inspect it. Handlebar failure is not worth gambling on.
Replace instead of rationalising
Replace the bar if it's bent, cracked, badly scored, persistently creaking, or damaged around the clamp. Stripped clamp hardware and a bar that no longer holds controls securely are also replacement triggers. A crash doesn't need to leave dramatic marks to justify caution, especially with carbon.
Keep the matching stem and controls in mind. If the bar has been through repeated impacts, a new bar with the correct clamp and torque specification is a cleaner solution than repeatedly tightening the old one. For hand comfort after the safety work is complete, compare grip shapes in this guide to mountain bike grips.
A Nelson workshop can check alignment, inspect crash damage, swap common cockpit standards, and help source a replacement when you need the bike back quickly. Rider 18's workshop also handles bike servicing and component work, which is useful when a handlebar problem is connected to brake hoses, e-bike wiring, or stem fit.
Your Quick Handlebar Decision Checklist
Use this order before you click buy or ask a shop to fit the bar.
- Start with your riding style: Pick a flat or low-rise bar for efficient XC riding, a riser for general trail use, and a stronger gravity-oriented bar for aggressive enduro, downhill, or shuttle riding.
- Measure your shoulders: Use shoulder breadth across the AC joints as your starting point, then choose a width within roughly 20 mm before adjusting for narrow trails or descending performance.
- Match the terrain: Stay closer to your body-fit width for tight trails such as Te Ara Koa, and move wider only when the extra control helps on rough, steep, or bike-park terrain.
- Choose rise for your position: Taller riders or riders with a low front end may benefit from a 20 to 30 mm rise, while a flatter bar can suit an efficient XC setup.
- Set sweep for neutral wrists: A backsweep around 7 to 9 degrees is a practical starting point for long trail rides, but rotate the bar based on how your wrists and brake fingers sit.
- Confirm the clamp: Match 31.8 mm to 31.8 mm or 35 mm to 35 mm, including the stem, before considering material or graphics.
- Choose the material clearly: Alloy suits riders who crash, shuttle, share, or want easy replacement, while carbon suits riders who already know their preferred shape and want lower cockpit weight or a different vibration feel.
- Check the controls: Confirm brake levers, shifters, dropper remotes, e-bike displays, throttles, cables, and grips all have usable space after the bar is fitted.
- Finish with safety: Centre the bar, tighten the faceplate evenly with a torque wrench, check cable movement, and inspect the cockpit again after the first rides.
If you're still between two widths or clamp standards, bring the bike into a Nelson workshop and have the fit checked rather than guessing from a product photo.
Visit Rider 18 in Nelson for mountain bike handlebars, cockpit components, fit advice, and workshop installation. Bring your bike and explain where you ride, whether that's Maitai, Kaituna, Coppermine, or tight local singletrack, so the team can help you choose and fit a bar that suits your body and trails.


