

Air Pump for Bike: A Practical NZ Buyer's Guide
- by Nigel
-

You're halfway out the door for the school run when you notice the back tyre looks soft. Or you're about to leave for work in Nelson, squeeze the commuter's tyre, and hear that familiar hiss. The pump is somewhere in the shed, but it doesn't fit the valve, its gauge is unclear, or it takes so long that you decide to ride anyway.
A reliable air pump for bike use turns that small delay into a routine job. The right model also protects ride comfort, handling, and tyre life, whether you're maintaining a kids' bike, an e-bike, a gravel bike, or a mountain bike. For broader equipment ideas, Flex Electric's guide to bike commuting tips and gear is a useful companion for riders building a dependable daily setup.
Why Every Rider Needs a Reliable Air Pump
Bike tyres lose air while they sit in the garage and while you ride. You might not see an obvious flat, yet a tyre can still be soft enough to make the bike feel sluggish, vague through corners, or uncomfortable over broken road surfaces.
That's why a pump belongs beside the bike, not in a box of occasional-use tools. NZTA advises keeping tyres at the pressure printed on the tyre sidewall, while Michelin's New Zealand tyre guidance explains that the bead should seat correctly before you bleed air back to the recommended range. The tyre's own pressure range is more useful than guessing by feel or chasing the pump's maximum rating.
Practical rule: If you ride regularly, check pressure before a long ride and make a quick weekly check part of your routine.
A floor pump normally handles home maintenance. It gives you a stable base, a longer handle, and usually a gauge, so topping up several bikes doesn't become a chore. A mini pump lives on the bike or in a riding bag, where it earns its place when a tube loses air away from home. CO2 inflators offer speed for emergencies, while electric pumps trade manual effort for battery dependence.
The wrong pump creates friction in silence. A pump head that doesn't seal can damage a Presta stem. A gauge that's hard to read encourages guesswork. A tiny pump may rescue you on the trail but become frustrating when you need to inflate a family's bikes at home.
Trade Me's dedicated bike-pumps marketplace shows that pumps are widely available through New Zealand retail channels, including portable and home-use formats. That variety reflects real riding patterns, not unnecessary choice. Your best pump depends on which bikes you own, where you ride, and how often you top up.
The Four Main Bike Pump Formats
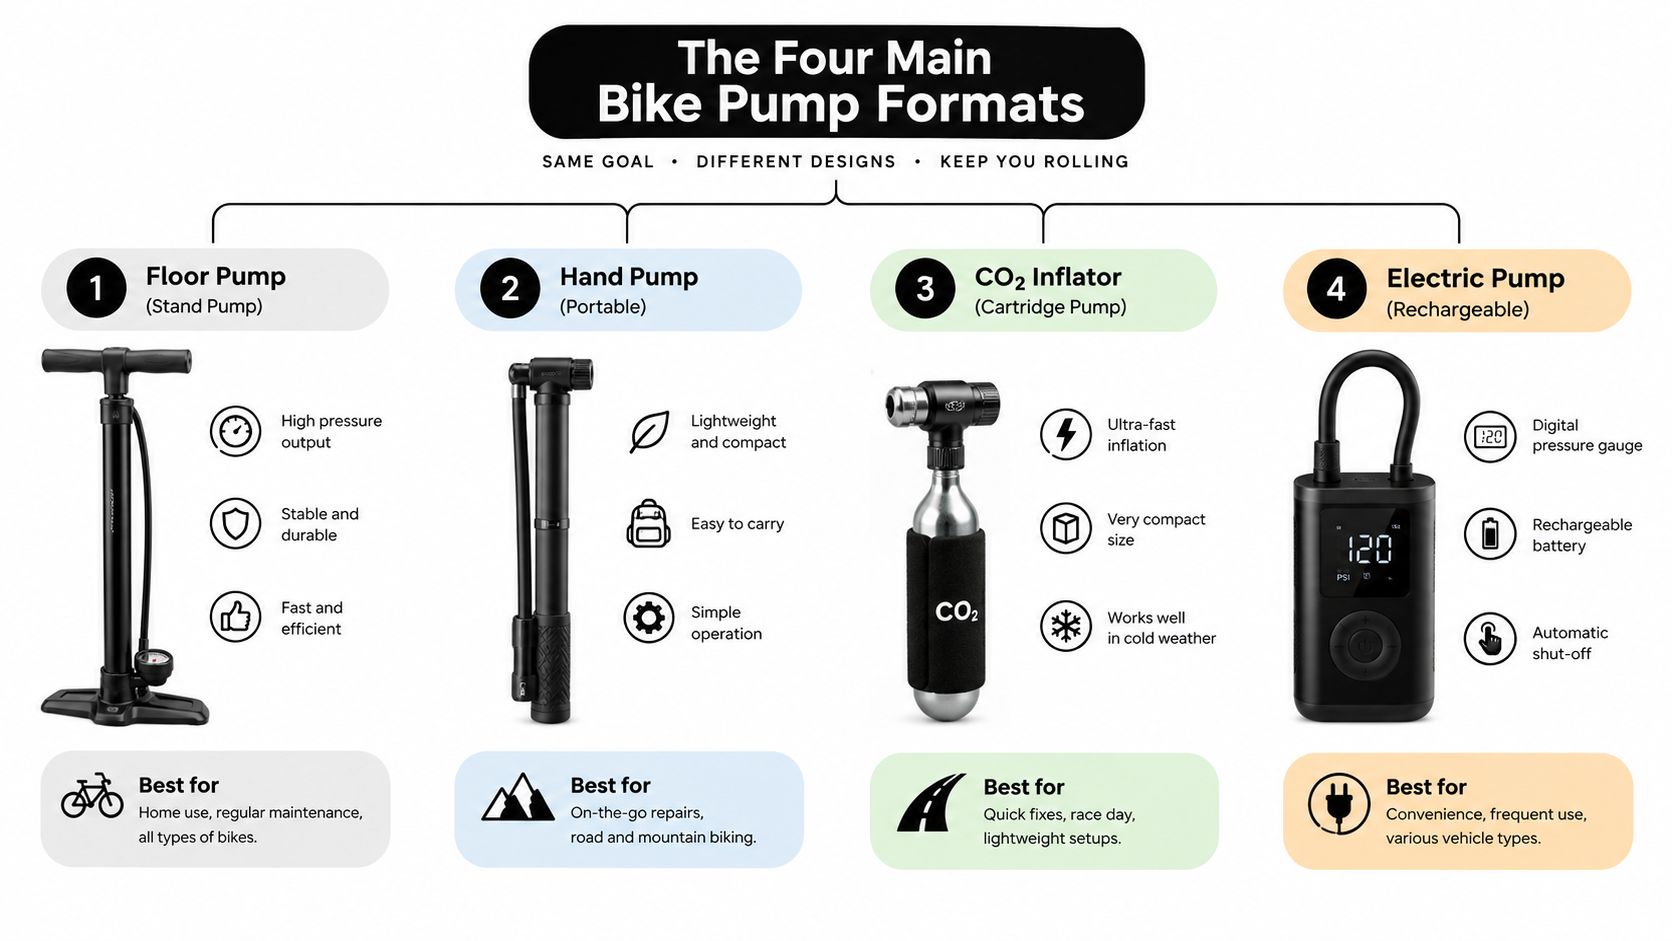
Think of the four pump families as tools for different jobs. No single format handles every situation equally well.
Floor pumps
A floor pump is the kitchen kettle of the shed. It's substantial, stable, and ready whenever you need it. You press the base down with your feet, use the long handle to move air efficiently, and read the gauge while standing comfortably.
Choose one for routine home inflation, several bikes, road tyres that need controlled pressure, or any household where the pump will be used often. Prioritise a secure head, a readable gauge, and compatibility with both valve types if the bikes in your home differ.
Mini pumps
A mini pump is the glovebox torch of cycling. It's compact, portable, and not especially fast, but it can get you moving after a puncture or a slow leak. Frame-mounted models suit commuters and trail riders who don't want to carry a pump in a bag.
Their limitation is volume. A small hand pump takes more strokes to fill a wide tyre, and the final pressure can be harder to judge without a reliable gauge. It's an excellent backup, but it's rarely the most pleasant home pump.
CO2 inflators
A CO2 inflator is an emergency tool for rapid inflation. It takes little space and can restore pressure quickly after a roadside tube change. The trade-off is that cartridges are consumables, and you need to know how much gas your tyre requires before you start.
Treat CO2 as backup rather than your only inflation method. It's particularly useful for riders who carry minimal equipment, but it doesn't replace a floor pump for regular pressure checks.
Electric pumps
An electric pump is a cordless power tool. It can be convenient for e-bike tyres, larger-volume tyres, or riders who find manual pumping difficult. NZ retailers also list digital-gauge and auto-stop models, which can make preset inflation simpler.
Battery capacity is the important limitation. You'll need to charge the pump, carry it, and understand how many tyre fills it can manage before the battery runs out. NZ pump listings and inflation products show why electric models appeal to households, but they also reinforce the value of keeping a dependable manual backup.
Presta vs Schrader and the Pressure Ranges That Actually Matter
Valve compatibility comes first. A pump that can't form an airtight seal on your valve won't inflate the tyre, regardless of its advertised pressure rating.
Presta valves are slim and usually have a small threaded tip that you unscrew before inflation. They're common on road, gravel, and many performance mountain bikes. Schrader valves are wider and resemble the valves used on car tyres. You'll often find them on kids' bikes, hybrids, e-bikes, and some commuter wheels.
A universal pump head can handle both, but check how it works before buying. Some heads have separate openings. Others switch internally or use a reversible insert. A New Zealand product specification also distinguishes direct-connect heads from flexible hoses, with direct, aligned engagement helping reduce side-loading on delicate Presta stems during inflation. Rider 18's tyre pressure gauge guide provides useful context for riders who want more control than a soft-tyre squeeze test.
The pressure printed on your tyre sidewall controls the decision. The following ranges are practical references from NZ product guidance, but your tyre's stated range remains the final authority.
| Bike type | Typical PSI range | Common valve | Pump feature to prioritise |
|---|---|---|---|
| Mountain bike | 30–50 PSI | Presta or Schrader | High-volume delivery and secure head |
| Gravel bike | 40–70 PSI | Usually Presta | Accurate gauge and adaptable head |
| Road bike | 80–130 PSI | Usually Presta | High-pressure capability and stable base |
| Kids' or balance bike | Lower-volume, sidewall-specific | Often Schrader | Simple dual-valve head and easy handling |
The numbers in the table are useful only as a starting point. A mountain bike with a different tyre construction may need another setting, and an e-bike may have its own manufacturer guidance. Don't assume that a pump marked with a higher maximum PSI is automatically better. A high-pressure road pump may be slow and awkward for a wide trail tyre, while a high-volume pump may not offer the control a skinny road tyre needs.
How to Inflate a Tyre Without Stripping a Valve
Inflation becomes straightforward once the pump head is aligned and locked correctly. Most damaged valves come from forcing the head on at an angle or levering it sideways while pumping.
Start with the wheel supported and rotate the valve to an accessible position. Remove the cap. If it's a Presta valve, unscrew the small top nut several turns and press it briefly to confirm that the valve is open. Don't remove the nut completely.
A calm inflation routine
- Match the head to the valve. Select the Presta or Schrader opening, or use the pump's universal setting. Push the head straight on, keeping it in line with the stem.
- Lock the chuck. Flip the lever or use the locking mechanism. The head should stay secure without you holding it. If air escapes immediately, stop and refit it rather than pumping harder.
- Pump smoothly. Use full, controlled strokes. If the handle suddenly feels unusually resistant, the head may be pressing the valve closed or sitting incorrectly.
- Watch the tyre bead. As the tyre takes shape, check both sides of the rim. The bead should sit evenly, with no section bulging out and no tube trapped between tyre and rim.
- Read the gauge at rest. Pause pumping before checking the number. The gauge can flicker during a stroke, so use the stable reading and compare it with the sidewall range.
- Bleed excess air carefully. If you overshoot, release a little air and check again. Don't treat the pump's maximum as your target.
New Zealand guidance stresses using the correct pressure range and inflating carefully until the bead is seated. You can also find useful maintenance context in Rider 18's guide to setting up tubeless tyres, particularly if your bike doesn't use a conventional inner tube.
Finish by removing the head straight off, not by twisting it around the stem. Screw the Presta nut closed, replace the cap, and give the wheel a final visual check.
Matching a Pump to the Rider in Your House
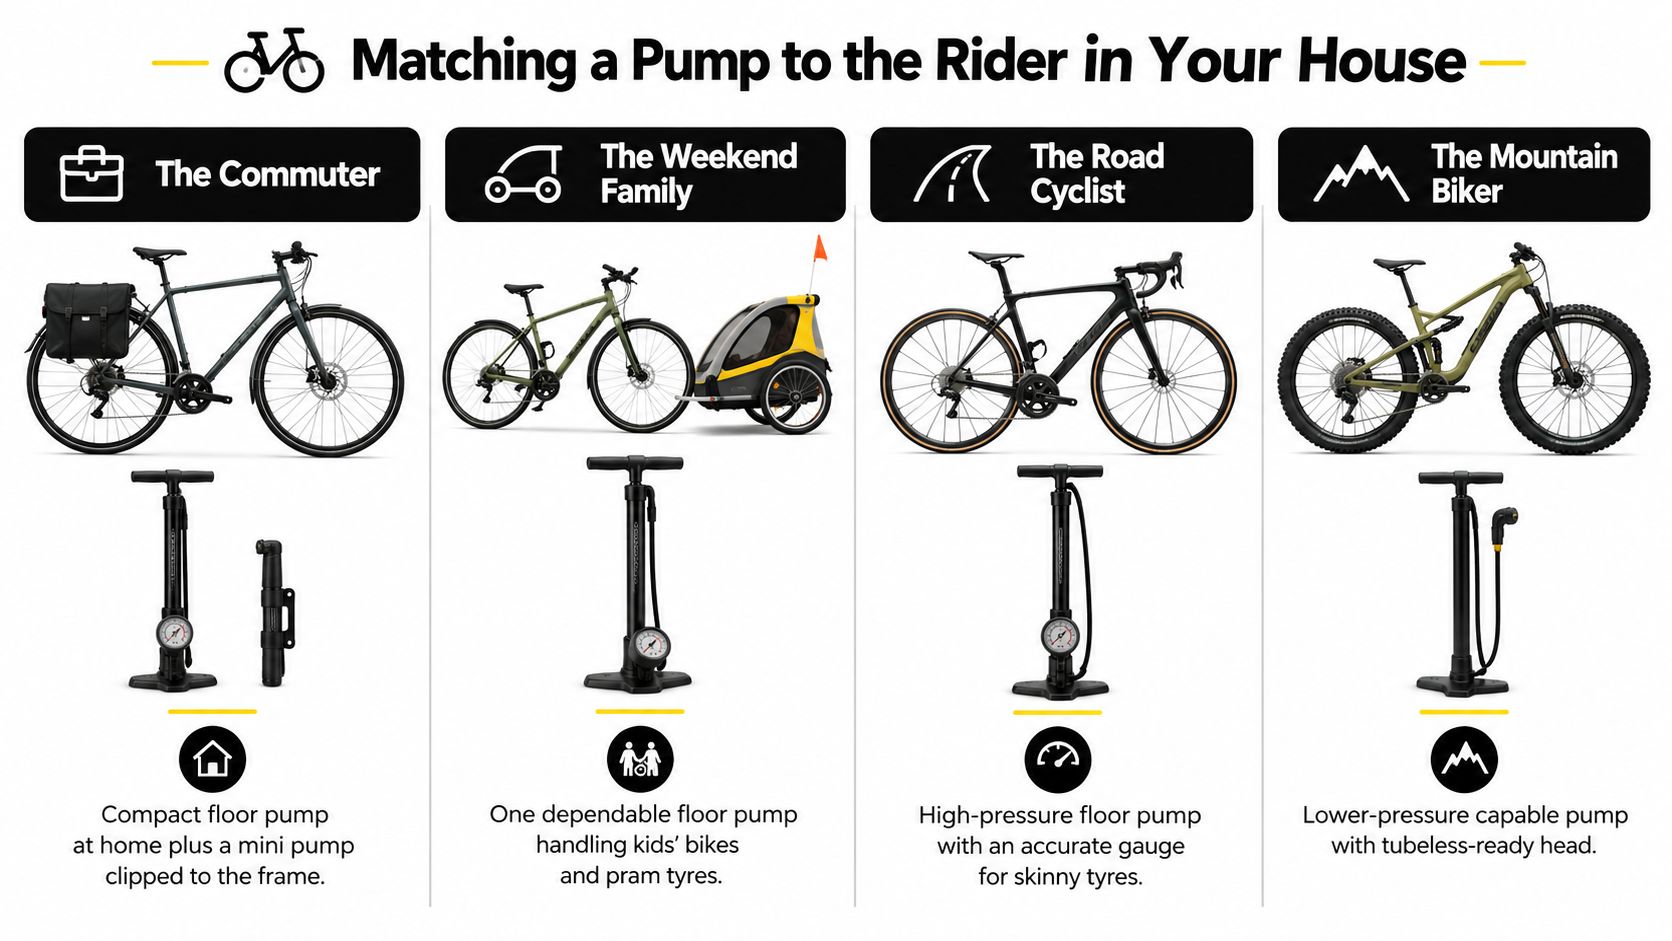
The easiest way to choose an air pump for bike use is to start with the bikes already in your shed. A Nelson household with an e-bike, a trail bike, and children's bikes has different needs from a single road cyclist who rides alone.
The commuter
Keep a gauge-equipped floor pump at home and a compact mini pump on the bike. The floor pump handles routine pressure checks before work, while the mini pump covers a puncture or slow leak on the road. If the commuter uses an e-bike, select a pump that handles the valve fitted to its tyres and can move enough air without becoming tiresome.
The family household
Prioritise simplicity. A floor pump with a dependable gauge and a head that works with both Presta and Schrader valves can serve children's bikes, adult bikes, and other pneumatic tyres around the home. A straightforward manual model also avoids the problem of finding a flat electric pump when everyone is trying to leave.
The trail rider
Use a high-volume floor pump for home setup and a mini pump for the trail. If you ride tubeless, look for a head that suits your setup and keep a CO2 inflator as an emergency option. A suspension-equipped mountain bike may also need a separate shock pump, because suspension pressure is adjusted through a specialised valve and requires precise control.
The e-bike owner
E-bike tyres often carry more system weight and may need regular top-ups, so an electric pump can be quite useful. The question is whether its battery capacity matches your household's actual use. New Zealand's e-bike market is projected to reach USD 46.41 million in 2026, with pedal-assisted models accounting for 76.85% of 2025 demand and urban bikes holding a 76.92% share, according to Mordor Intelligence's New Zealand e-bike market forecast. Those figures indicate a broadening audience, not a reason to ignore pump limitations.
| Household pattern | Sensible primary pump | Useful backup |
|---|---|---|
| One commuter bike | Compact floor pump | Mini pump |
| Family with mixed bikes | Dual-valve floor pump | Optional mini pump |
| Mountain bike household | High-volume floor pump | Mini pump or CO2 inflator |
| E-bike-heavy household | Floor pump or capable electric pump | Charged mini pump |
For more New Zealand-specific pump options and compatibility advice, see Rider 18's bike pump guide.
Are Electric Pumps Really Worth It for NZ Households
Electric pumps solve a real problem, but they're often sold as if one device can replace every other pump in the house. That's an appealing idea, especially when several bikes need attention before a weekend ride, but convenience depends on charging and capacity.
NZ product pages commonly market battery-powered mini pumps around 120–130 PSI, and some listings describe three to four tyre inflations per charge. Those claims are product-specific rather than a universal standard, so compare them with your tyre volume and household routine before relying on them. A wide e-bike tyre consumes more air than a skinny road tyre, and repeated top-ups can use the battery faster than the headline suggests.
Where electric pumps make sense
An electric model can be useful when:
- You own an e-bike: Frequent top-ups become easier, especially with larger-volume tyres.
- You inflate away from power tools: Auto-stop and a digital display can simplify roadside or car-based adjustments.
- Manual pumping is difficult: Motor assistance removes much of the physical effort.
The drawbacks are just as practical. You have to keep the battery charged, carry the device, listen to the motor, and accept that it may stop being useful once the charge is gone. It also may not be the fastest option for inflating several tyres from very low pressure.
A pump that works perfectly when charged is still unavailable if nobody remembered to charge it.
For most NZ households, the sensible arrangement is a floor pump plus a compact backup. E-bike owners may add an electric pump for convenience, but a manual floor pump remains valuable for accurate home inflation and regular maintenance. An all-in-one electric pump suits households that knowingly prioritise portability and reduced effort, not every rider by default.
Troubleshooting Stuck Valves and Slow Leaks
A pump head that hisses, refuses to lock, or keeps popping off usually points to alignment or a worn seal. Remove it, inspect the valve, and try again with the head straight. Don't keep forcing a lever against a crooked Presta stem.
For a stuck Presta core, use a proper valve-core tool if the valve design allows it. Brute force with pliers can damage the core or twist the stem. A Schrader valve may need the pump head repositioned gently so its internal pin engages correctly, but it shouldn't require aggressive pressure.
Finding the real source of air loss
If the tyre is soft again after sitting overnight, test the system rather than blaming the pump:
- Listen closely. Inflate to the tyre's recommended range and listen around the valve, tread, and rim.
- Use soapy water. Small bubbles can reveal a leak that's too quiet to hear.
- Check the valve area. A loose or damaged valve can leak even when the tube looks sound.
- Inspect the tube or tubeless system. A perished tube, puncture, rim tape problem, or low sealant level can all cause repeated pressure loss.
- Check the bead. An unevenly seated tyre can leak at the rim and may need deflating and reseating.
Tubeless tyres need particular care. A pump may inflate the tyre correctly while the system still loses air because the sealant has dried or the rim tape has failed. That's a tyre-system problem, not necessarily a pump problem.
Keeping the pump reliable
Wipe dirt from the head after trail rides, check the hose for cracks, and store the pump where it won't be knocked over or left on damp concrete. If the head leaks around the valve, replace its rubber seal when a compatible spare is available. Compare the gauge with another trusted gauge from time to time, especially if the reading suddenly seems inconsistent.
Putting It Together With Rider 18
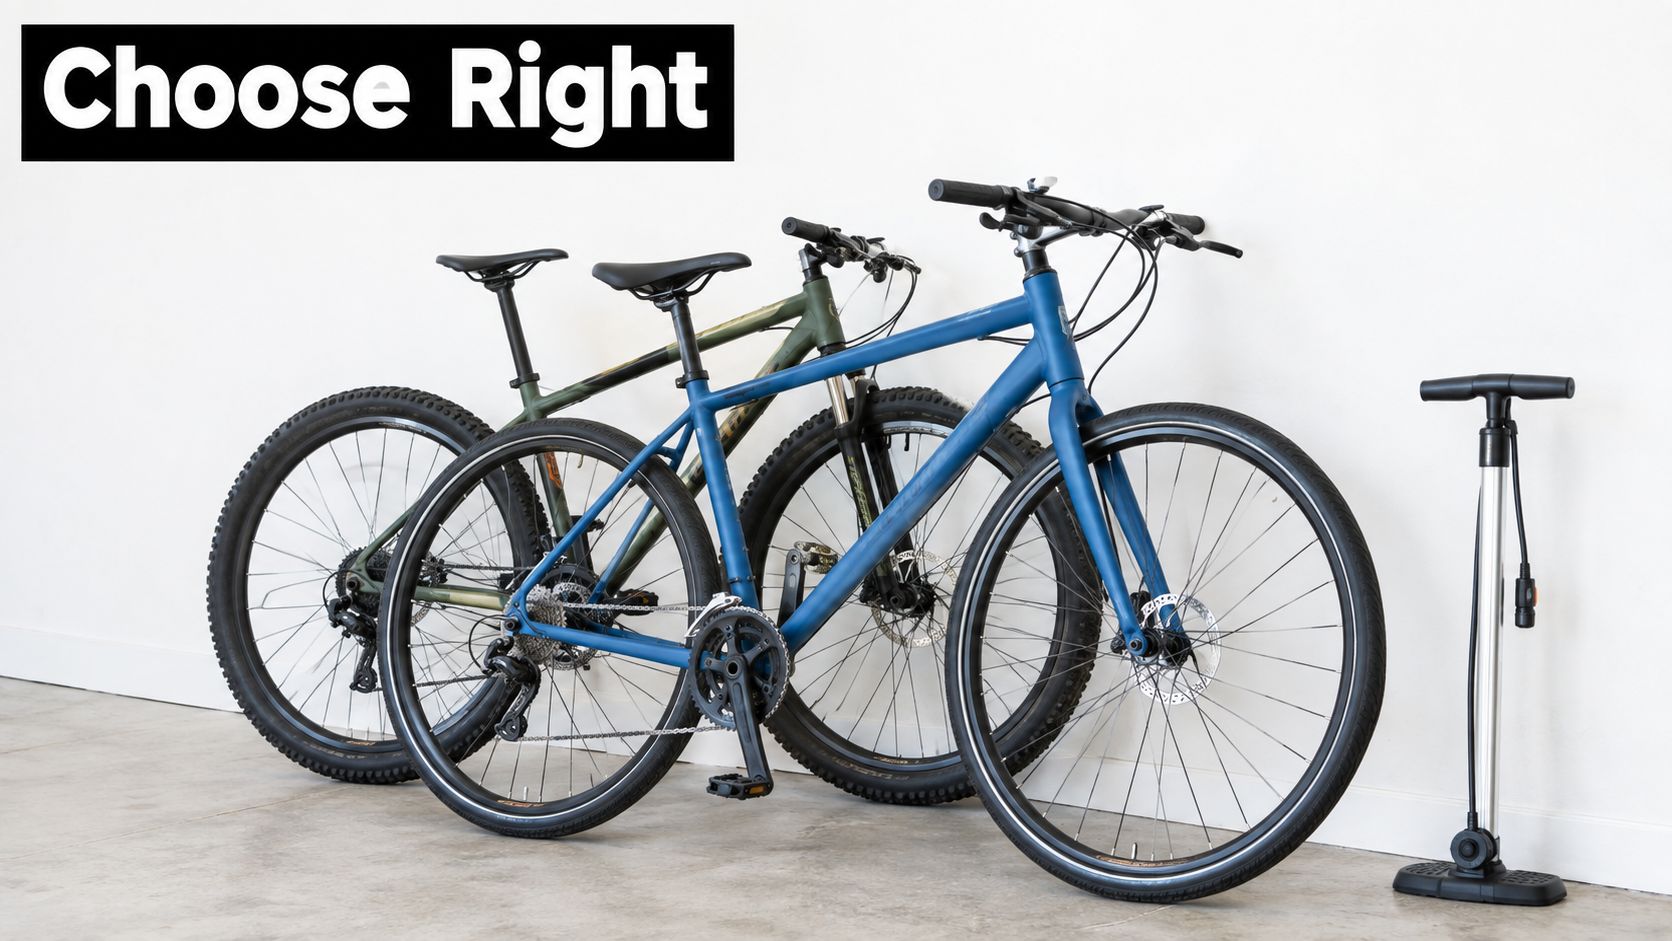
The right pump depends on the bikes in your home and the places you ride. Most riders settle on a floor pump plus mini pump, while e-bike owners may prefer a floor pump with an electric model for convenient top-ups. A single electric pump can work for a convenience-first household, provided its charge and capacity suit the actual workload.
Rider 18's Nelson workshop and online store offer bicycle pumps alongside tools and related items such as valve cores, sealant, tubes, and suspension pumps. The team can help you check valve compatibility and choose a setup that suits your bike collection rather than selling you the highest specification on the label.
Visit Rider 18 in Nelson or shop online to compare floor, mini, electric, and shock pump options for your bikes. Bring your valve and pressure questions, and choose the inflation setup that'll keep your next commute, family ride, or trail day moving.


