

Mountain Bike Accessories Must Have for Every Ride
- by Nigel
-

You reach the trailhead, unload the bike and spot a soft rear tyre. The pump's still at home, your bottle is nearly empty, and the weather has turned since you checked the forecast. A ride that should've started with a quick roll-out now begins with a decision about whether you're prepared to continue.
That's why mountain bike accessories must have isn't a universal shopping list. The right kit depends on where you ride, how long you're out, who's riding with you and what your bike needs. Start with protection, then add the repair gear, clothing and emergency support that fit your ride. The aim isn't to carry everything. It's to know what you'll need, and to have it ready when you need it.
Building a Kit That Works Beyond the Trail
Three questions sort the whole accessory list: what the law requires, what the trail could demand of you, and what you want to carry. In New Zealand the legal side is straightforward. A helmet is compulsory on the road, and it should be automatic off it. Everything beyond that is a judgement call about risk.
The right call changes with the ride. A puncture won't fix itself, and an unplanned stop feels very different once the weather turns, even on a local loop. A confident rider on a familiar urban trail may prefer a small saddle bag and a bottle. A solo rider heading into remote country needs more capacity for repair supplies, first aid and changing conditions. A parent managing a family ride has different priorities from someone on an enduro or downhill session, and an e-bike brings charging and battery planning into the mix. Two riders on the same trail can reasonably carry different loads.
A practical rule: Pack for the consequences of stopping, not just the time you expect to spend riding.
That rule catches the riders most guides skip. Trail regulars build habits over seasons. The rider who gets out twice a month, or the family doing a rail trail at the weekend, is more likely to be caught short by a flat tyre or cold weather than by any line choice. Build the foundations first: puncture repair, a way to inflate a tyre, water and a way to reach help. Purpose-built extras, from additional protection to navigation tools, come after those are covered.
Keep the kit focused, check it before rides, and adjust it when the route or conditions change. A small bag you carry beats a full kit left in the shed.
Understanding the Core Mountain Bike Accessory System
Think of your kit as a system, not a pile of products. A chain tool is only useful if it works with your chain, you know how to use it and you can reach it when a link breaks. The same logic applies to every accessory: it needs to suit the bike, the ride and the rider.
Start with protection. A correctly fitted helmet is the foundation, followed by gloves and any body protection appropriate to the trail and your riding style. Next comes mechanical self-sufficiency: tyre levers, a pump or inflator, repair supplies and a multitool. A chain tool and compatible quick link become more relevant the farther you're riding from help.
The remaining layers make the difference between a manageable delay and a much harder day. Carry water and food suited to the length of the ride. Add clothing for the forecast and the possibility of a change in conditions. Take a charged phone, and on remote routes consider whether you'll need navigation or a communication option that works beyond mobile coverage. Lights matter if the ride could run into low visibility or darkness.
Set the baseline, then scale it
For a short, familiar ride, you may be able to keep your load light. On a longer or remote route, a waterproof layer, warm non-cotton clothing, first aid, food and extra repair capability deserve more space. Your own confidence matters too. If you can't confidently repair a puncture, practise before you rely on that repair kit far from the trailhead.
Injury numbers also need careful interpretation. ACC recorded 5,686 mountain-biking injury claims in 2020 and 4,121 in 2023, while Nelson recorded 753 outdoor-recreation claims in 2024. Those figures indicate exposure and risk, not proof that any particular accessory prevents injury (ACC's outdoor-recreation injury data). Choose protection because it fits your riding, not because a claims total promises a specific result.
Comfort deserves a place in the system as well. If friction is an issue on longer rides, a product such as anti-chafe cream for athletes may be worth considering alongside correctly fitted shorts and clothing. Keep the essentials accessible, compatible and familiar, and leave optional extras until the core kit is dependable.
Choose Accessories for Your Riding Reality
Don't copy a checklist built for someone else's terrain. Choose accessories by asking how much consequence a delay, injury or mechanical failure would have on your route. A familiar local trail, a remote solo ride and a downhill session don't call for the same balance of protection, weight and repair equipment.
| Riding context | Highest priorities | Useful additions | Main trade-off |
|---|---|---|---|
| Urban trail | Fitted helmet, gloves, water and a basic puncture kit | Eye protection, lights if visibility may drop | A larger pack adds weight for a route close to home |
| Cross-country | Helmet, pump, tyre-repair supplies, multitool, water and food | Extra layer, navigation and a compact first-aid kit | More self-sufficiency means more to carry |
| Enduro or downhill | Helmet and protection suited to speed, terrain and personal risk | Knee and elbow pads, eye protection, full-face helmet | More armour adds coverage but can reduce comfort and willingness to wear it |
| Backcountry | Repair kit, food, water, weather layers, navigation and communication | First aid, a distress beacon where appropriate, extra chain-repair capability | A larger pack carries contingencies but adds weight |
| Solo ride | Essentials for self-recovery, plus a charged phone and route plan | Alternative emergency communication where coverage is uncertain | Extra communication gear adds cost and carrying needs |
| Group ride | Shared repair resources, personal essentials and a plan to stay together | Group navigation and a first-aid kit | Sharing tools works only if someone carries them and knows how to use them |
| E-bike | Helmet, bike-compatible repair gear and battery-aware route planning | Secure charger carrying or extra navigation power for longer trips | Added equipment has to be balanced against bike and pack weight |
| Family ride | Correctly fitted protection for every rider, water and simple repair supplies | Child-specific weather gear, snacks and suitable carrying options | Extra supplies take space, and a child's comfort can set the pace |
Eye protection is useful when trail debris, dust or changing light affect your vision. Pads and a full-face helmet make more sense when the terrain and riding style warrant added coverage; they're not automatic purchases for every trail ride. A distress beacon becomes more relevant when a route is remote and mobile service is unreliable.
Hydration needs the same ride-by-ride thinking. A bottle may suit a short loop; longer outings can call for more carrying capacity. If you're comparing options for longer rides, this guide to hydration bladders in New Zealand can help you weigh a bladder against bottles. Buy first for fit, function and your actual routes. Leave specialised upgrades until you know what your riding calls for.
Select and Maintain Safety and Mechanical Essentials
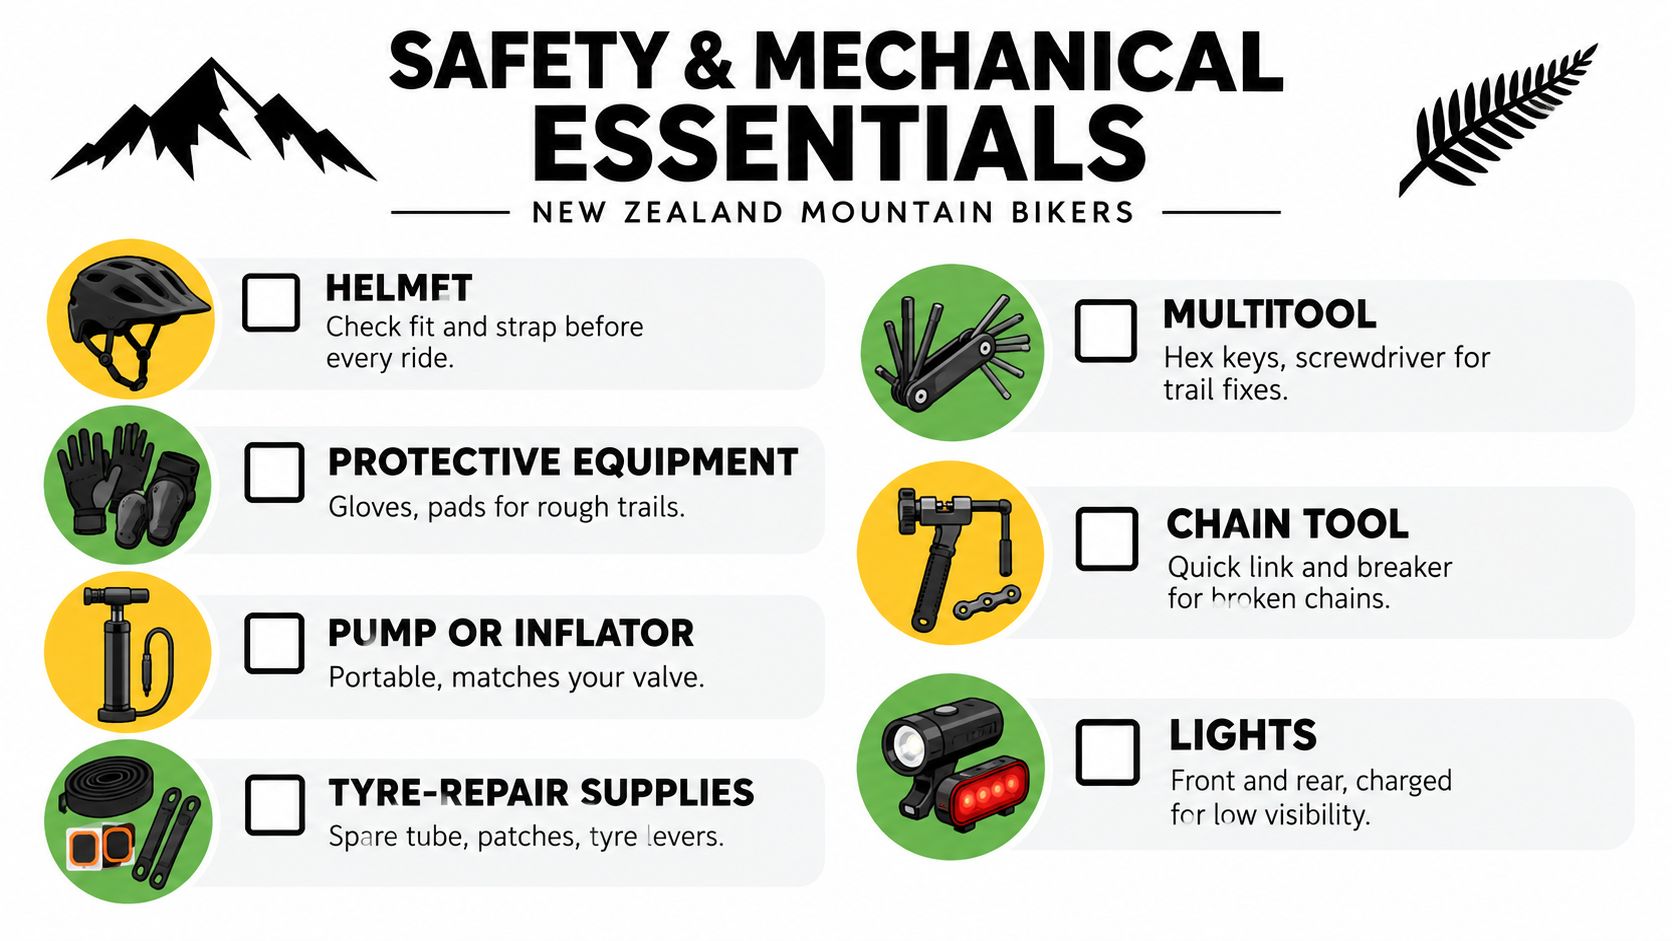
A helmet comes first. New Zealand's all-ages bicycle-helmet law took effect on 1 January 1994, requiring an approved helmet securely fastened when cycling on a road (evaluation of New Zealand's bicycle-helmet law). For trail riding, choose a helmet that fits and stays stable when you move your head, brake or shift position.
Fit and inspect before you ride
Set the helmet level and low on the forehead. Adjust the retention system so it feels snug without pressure, and check that the straps form a secure V around each ear. If it shifts noticeably when you move your head, refit it rather than assuming the strap adjustment will sort itself out on the trail. Replace a helmet after a significant impact, even if the shell looks intact, because its impact protection may be compromised.
Choose gloves and pads for the ride you're doing and the conditions in which you'll wear them. More coverage isn't automatically better if it makes you too hot or uncomfortable to keep the gear on. For general context on protective gear choices, Gisborne skate gear advice from Blitz Surf offers a related look at protection for action sports.
Match the repair gear to the bike
Before buying a pump, check that it works with your valve. Make sure tyre levers suit your tyre and rim combination, and choose repair supplies for your setup, including whether you run tubeless tyres. Check that your multitool has the sizes and functions your bike needs. If you carry a chain tool or quick link, confirm compatibility with your drivetrain instead of assuming one will suit every bike.
Test your tools at home. Practise fitting a tube, plugging a tubeless tyre or using the chain tool before a trail-side repair makes that the first attempt. Inspect consumables for damage or signs they've been used, and replace patches, plugs and quick links when needed. Check that lights work and are charged before a ride where visibility could change.
For help choosing a helmet that fits your riding, compare the options in Rider 18's mountain-bike helmet guide. The right choice is the one you can fit properly, maintain and wear consistently.
Pack Trail Repair and Emergency Equipment
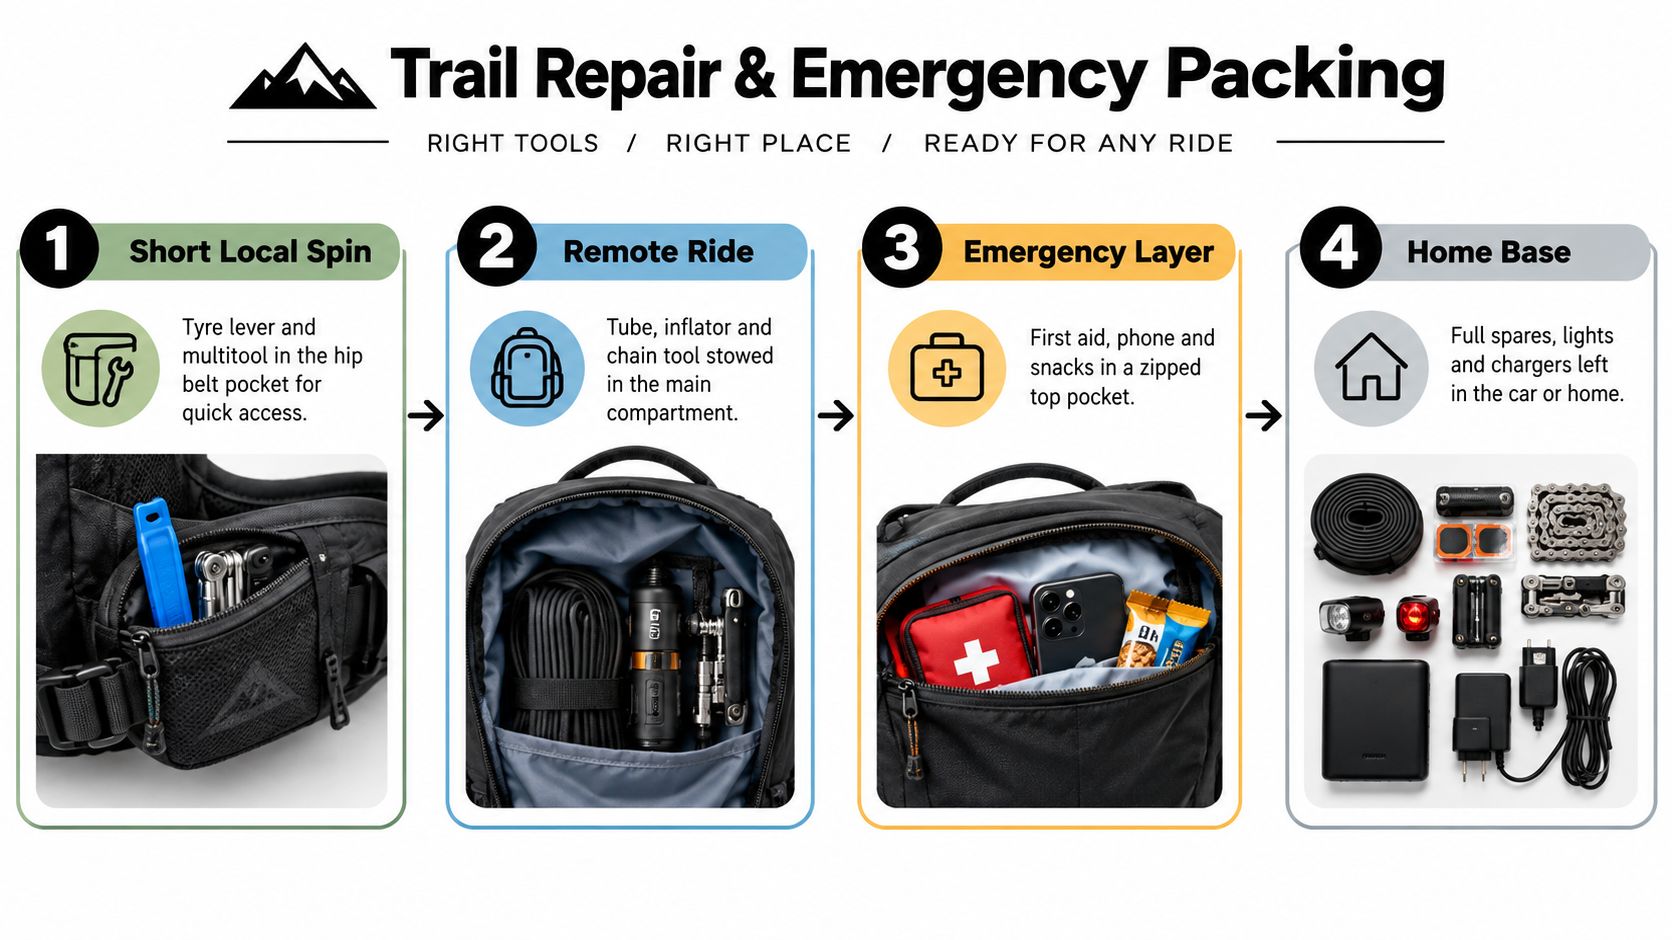
Put the tools you may need first somewhere you can reach without emptying your whole bag. A tyre lever and multitool might live in a hip-belt pocket or saddle bag for a familiar local spin. For remote rides, add the repair supplies and emergency gear that give you more options if a minor problem becomes a long stop.
The New Zealand Mountain Safety Council's mountain-biking advice includes a waterproof shell, warm non-cotton layer, food, water, repair kit, light, first aid, navigation and communication equipment. The reason is practical: riders can face poor weather, injury, mechanical failure or places without phone reception. A compact tool kit can help you fix a puncture or drivetrain issue, while clothing and food matter if you're delayed.
Give each item a place
- On the bike: Secure a saddle bag or frame bag with the tools and repair supplies you'll use most often. Keep the load firmly attached so it doesn't shift while riding.
- In a pocket or hip belt: Store small, frequently used items such as a multitool, tyre lever or snack where you can reach them quickly.
- In the main pack: Put a spare tube, inflator, chain tool and extra clothing where they're protected and easy to find. Add water and food according to the ride.
- In a zipped pocket: Keep your phone, first-aid supplies and other items you don't want lost or exposed. Don't bury emergency gear under everything else.
- At home or your vehicle: Keep bulkier spares, chargers and a fuller maintenance setup there for before and after the ride.
If you're building a basic puncture kit, this guide to a mountain-bike tyre repair kit can help you think through the supplies you'll need. A kit only works if you know what's in it and how to use it, so practise the repair at home.
Link the route, weather and communication plan
Share your route and expected return with someone, especially when you're riding alone or heading somewhere remote. Check the forecast, carry navigation that suits the route, and don't assume a phone will have reception everywhere. On rides where mobile coverage may be absent, consider what alternative communication is appropriate for the area.
Before leaving, check tools and consumables, confirm your phone and lights are charged, review the weather and tell someone your intentions. That small routine makes it easier to catch a forgotten layer or empty repair supply before you're already at the trailhead.
Adapt Accessories for Electric Mountain Bikes
An e-bike isn't just a conventional mountain bike with a battery added. Sustained speed, extra electrical equipment and battery range all affect what you carry and how you plan your route. The bike's added weight also makes it worth being deliberate about pack choices. Take what you need, but don't fill every available space with gear you're unlikely to use.
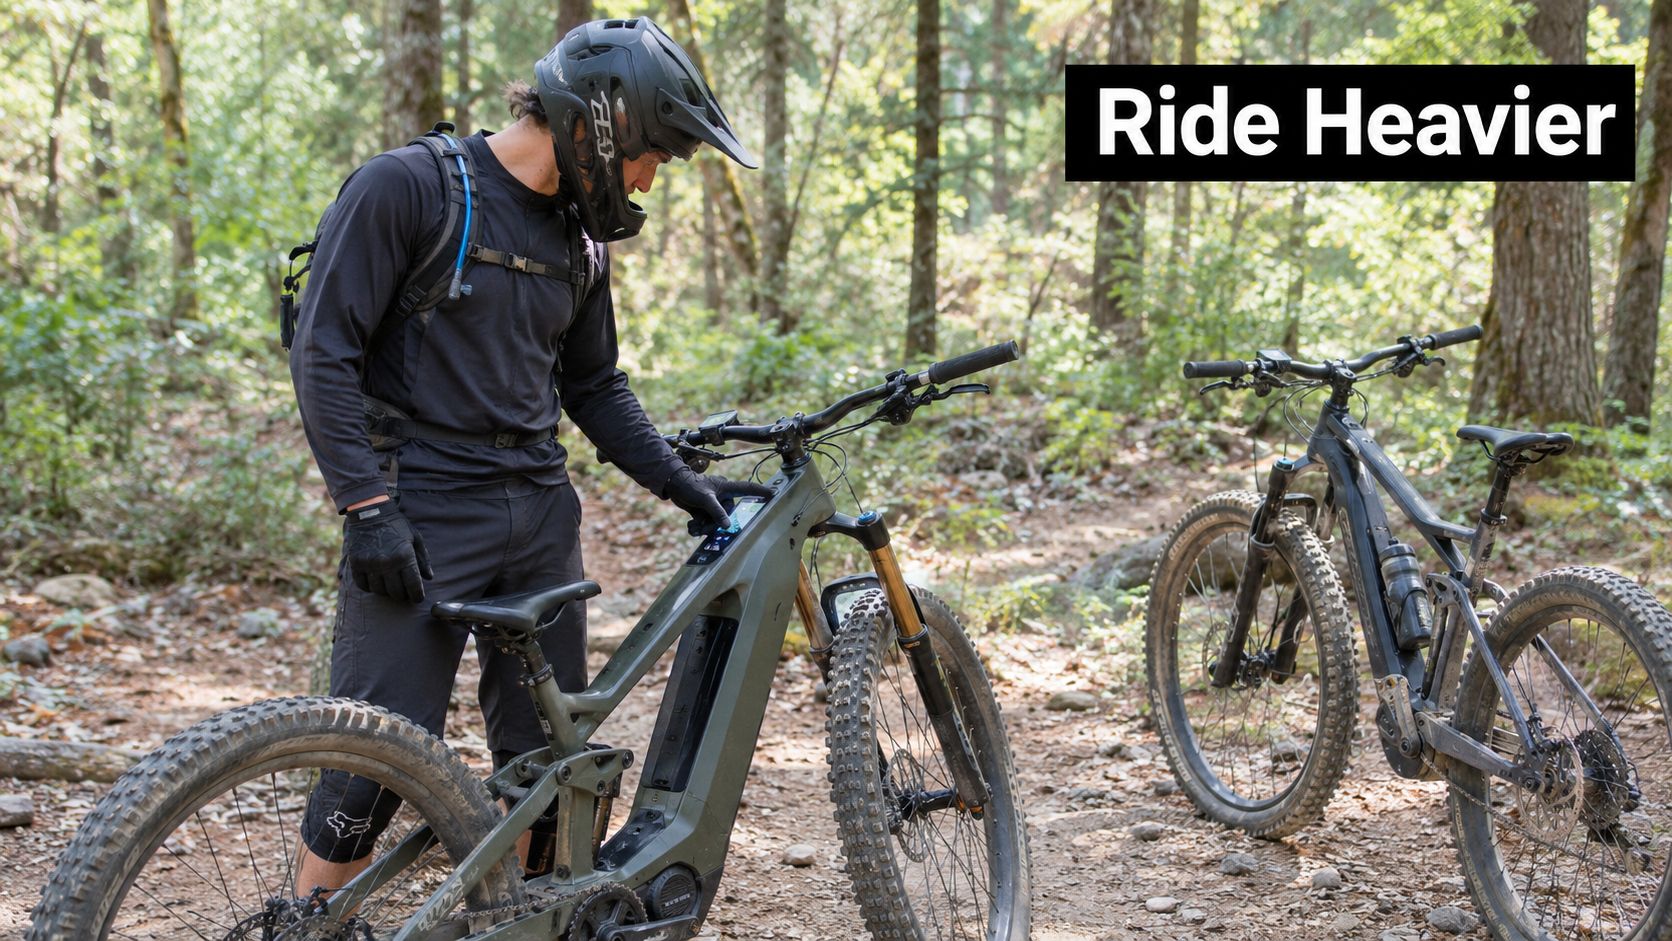
Helmet fit and stopping awareness deserve particular attention when speed rises. Kinetic energy increases with the square of velocity, so a 25% increase in speed produces about 56% more kinetic energy at impact. Treat that as a reason to ride within your control and choose protection carefully, not as a promise that any single accessory will prevent an injury.
NZTA reported that 8% of New Zealanders used an e-bike in the previous year. It also reported that e-bike riders cycled weekly more often than push-bike riders, at 67% compared with 52% (NZTA's cycling and walking report). More regular use makes it useful to keep a dependable repair kit on the bike and make charging part of ride planning.
Choose what stays on the bike
A multitool, tyre-repair supplies and a pump or inflator can be part of a permanent riding setup if they're secured properly and suit your bike. Keep removable items, such as a charger, separate when you don't need them on the trail. If you do carry a charger, protect it from impact and weather, and make sure it's secured rather than loose in a bag.
Check compatibility before fitting electrical accessories, racks, trailers or charging equipment. Don't assume a component will work because it fits physically; check the bike and accessory manufacturers' guidance or ask a qualified workshop. This matters for anything connected to the electrical system or carrying a load.
A short trail ride may need the normal riding essentials and no charger. A commute might call for weather protection and a secure way to carry removable equipment. For a family outing, consider the needs of every rider as well as the route back. On a longer journey where charging may be unavailable, plan conservatively: use the displayed range as an estimate, keep a reserve and decide in advance when to turn around.
This video offers another perspective on e-mountain-bike riding and preparation.
Choose Accessories for Kids and Family Rides
A family kit isn't an adult kit with smaller gloves. Children need gear that fits their current size and ability, and adults need to plan for the pace, comfort and support of the whole group. Choose a route and ride length that leave room for breaks, changing weather and the possibility of a mechanical problem.
Fit protection to the child
Start with a helmet that carries the required standards marking and sits securely. Consumer NZ identifies legality, standards marking and correct fit as important considerations for children, and recommends checking fit again as they grow (Consumer NZ's guide to children's bike helmets). Don't buy a helmet with extra room for a child to grow into. Recheck its position, retention system and straps regularly, and replace it after a significant impact.
Choose a balance bike or children's bike that suits the child now, rather than asking them to manage equipment that's too large or difficult to control. If a child seat is part of the journey, select one that fits the bike and child, and follow its manufacturer's fitting and use guidance. For help with children's vision protection, kids sport lens options provide one place to review sports eyewear options.
Make the ride manageable for everyone
Pack water, snacks and weather protection that the children can carry or that an adult can access quickly. Use simple riding activities to keep young riders involved, such as taking turns spotting trail features or choosing a safe place for a break. Keep the plan flexible. A tired child's needs should matter more than completing the route.
Plan repairs and communication as a group. An adult should carry the tools and know how to use them, while another adult or a responsible riding companion can stay with the children if someone needs to work on a bike. Check that phones are charged and decide how the group will respond if riders become separated. Don't assume a child can manage a puncture or carry the supplies needed for the whole group.
Before setting off, check every rider's helmet, water, clothing and bike. Adjust the route if weather, confidence or energy levels don't match the plan. The best family accessory is a setup that lets everyone ride safely and comfortably without expecting a child to make adult decisions.
Complete Your Purchase and Pre-Ride Checklist
Buy in order of consequence, not novelty. Start with protection that fits and stays in place, then add the mechanical basics: tyre levers, repair supplies, a compatible pump or inflator, and a multitool suited to your bike. Pack water, food, a suitable layer and a way to call for help, then adjust the load for route length, weather, rider age and whether an e-bike is carrying extra weight.
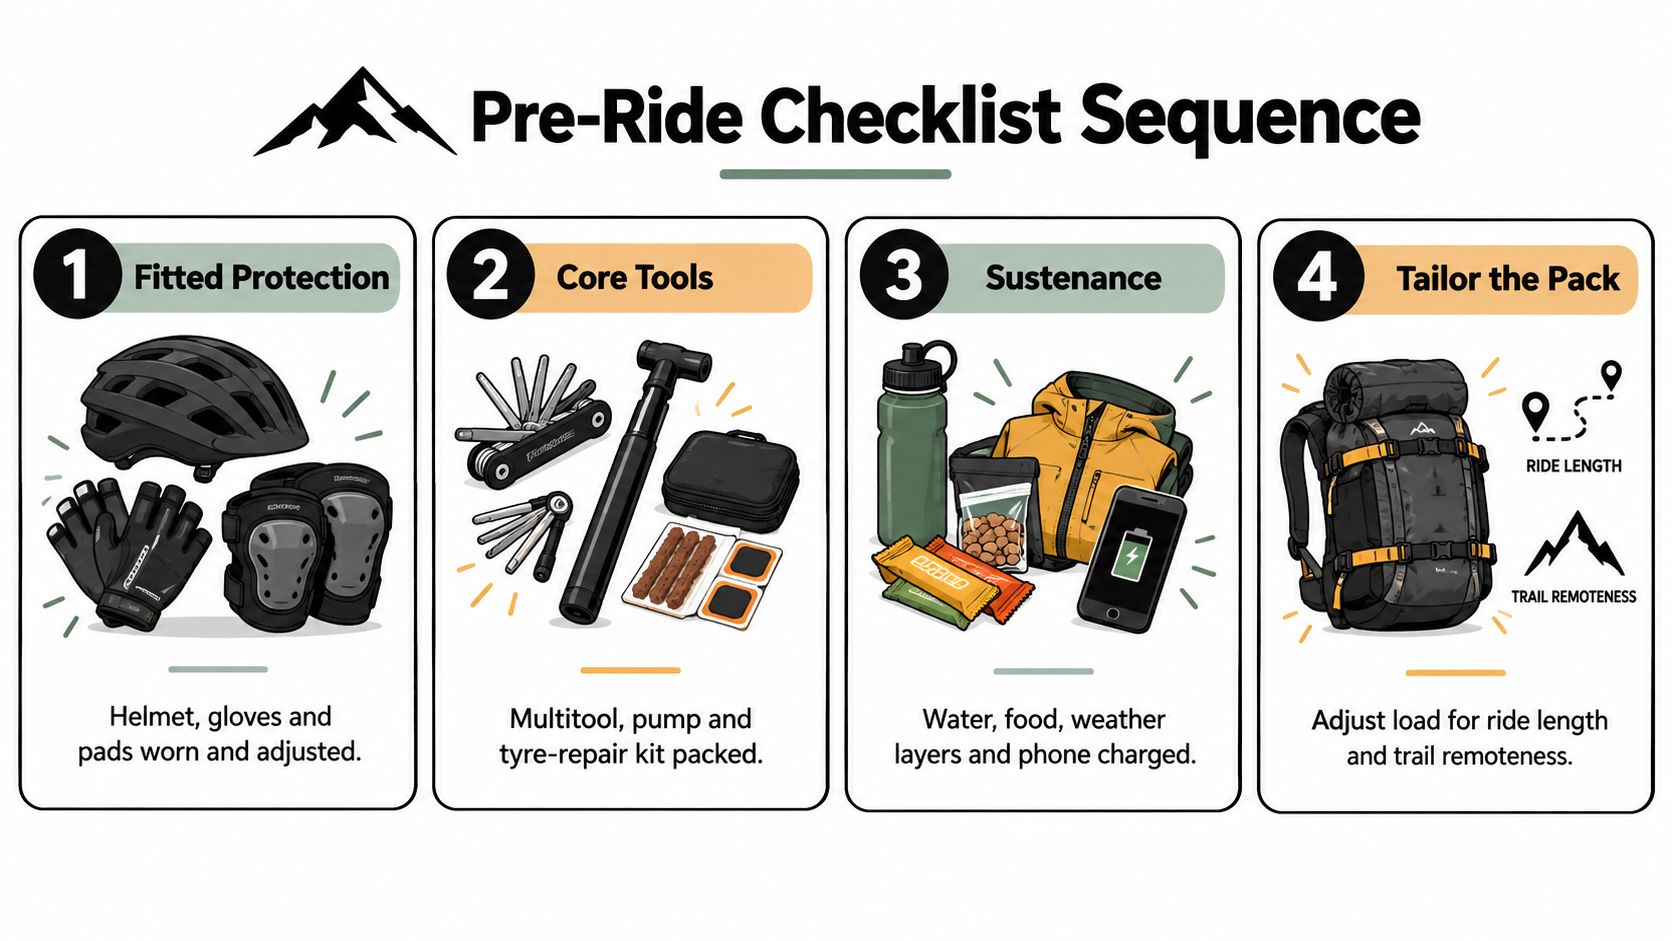
Split the final list into required items, risk choices and upgrades. Required means local law, trail rules or the ride plan demands it. Risk choices are helmets, pads, lights and repair gear matched to remoteness and consequence. Upgrades are comfort items that can wait until the basics are proven.
- Protection: Check helmet fit and condition, and confirm pads and gloves suit the ride.
- Repairs: Inspect the pump, tyre supplies, multitool and chain-repair parts. Replace used or damaged consumables.
- Visibility and power: Test lights, charge devices and plan for dark, wet or dusty conditions.
- E-bike and family loads: Confirm charge margin, braking feel, child-seat fit and who carries tools.
- Route and conditions: Check the forecast, review the route and share trip intentions when appropriate.
- After a crash: Replace a helmet after a significant impact, even if it looks undamaged.
Rider 18's online range includes helmets, armour, gloves, apparel, hydration, nutrition, tyres, wheels, brakes, drivetrains, suspension parts and tools. Riders in Nelson can ask the workshop about fitting, maintenance advice and repairs, while online orders can be shipped nationwide. Browse by the job the gear needs to do, and ask when fit or compatibility is unclear.
Build a minimum kit for your next solo ride, then create separate versions for family outings and e-bike days. If a fit, interface or repair is uncertain, book a workshop check before that equipment has to work on the trail.
Rider 18 offers mountain-bike accessories, components and workshop support for riders building a kit around their bike and local conditions. Visit Rider 18 to browse gear online or get advice from the Nelson team before your next ride.


