

Dropper Post MTB: The Ultimate Setup Guide
- by Nigel
-

You're halfway through a technical climb, seated high enough to turn the pedals efficiently, when the trail suddenly tips down into rocks, roots, and tight corners. There's no time to stop, loosen a clamp, and lower the saddle. If the saddle stays high, it crowds your body exactly when you need to move behind and below the handlebars.
That's the problem a dropper post MTB setup solves. A handlebar remote lets you lower and raise the saddle while riding, so you can pedal at the correct height on climbs and create space for descending, cornering, jumps, and technical sections. The right post isn't the one with the most travel alone. Frame insertion depth, extended height, routing, diameter, and serviceability determine whether the upgrade works properly.
New Zealand has a substantial mountain-bike audience. Sport NZ's 2013/14 Sport and Active Recreation Profile estimated that 8.8% of adults aged 16 and over, about 292,000 people, participated in mountain biking during the previous 12 months. Cycling or mountain biking overall included 24.8%, about 823,000 adults, and mountain-bike participation had risen by 3.6 percentage points from 1997/98 to 2013/14. That scale helps explain why droppers are now a practical workshop and retail topic rather than a niche racing component.
Why Every Modern Trail Bike Needs a Dropper
A fixed post forces one saddle height to serve two opposing jobs. It needs to put your hips in an efficient position for climbing, yet it also sits between your legs when the trail becomes steep or technical. A dropper separates those jobs without making you dismount.

The saddle height changes the bike's behaviour
With the post fully extended, set the saddle at your normal pedalling height. That gives you the leg extension and hip position you need for sustained climbing. Before a steep descent, press the remote and lower the saddle. Your legs can then bend freely, your hips can move around the bike, and the saddle is less likely to interfere when the rear wheel moves through rough ground.
Lowering the saddle also changes how you load the bike. You can keep your weight centred over the bottom bracket instead of being pushed forward by a high saddle. On a steep pitch, that extra room makes it easier to shift your hips rearward while keeping your chest low and your eyes up. In corners, a lower saddle gives your body more freedom to lean the bike and drive pressure through the outside pedal.
A dropper doesn't replace technique. You still need a stable attack position, level pedals, bent elbows, and relaxed hands. It gives that technique room to work.
Practical rule: Raise the saddle for efficient pedalling. Lower it before the terrain demands body movement, not only when the descent looks extreme.
The change is especially noticeable on rolling New Zealand trails, where a ride can move repeatedly between short climbs, off-camber corners, rocky chutes, and small drops. Reaching for a bar-mounted lever is far more realistic than stopping at every transition.
A young technology that became standard equipment
Dropper posts are relatively recent in mountain biking. The history of dropper posts from Canyon identifies the Gravity Dropper as the first widely acknowledged model in 2003, followed soon after by brands including Maverick, RockShox, and Crank Bros. That places the dropper in the same broad story of modern MTB development as suspension and disc brakes, rather than in the category of long-established bicycle hardware.
Local riding has helped make the category relevant. Trail, enduro, and e-bike riders regularly switch between climbing and descending, so an adjustable saddle solves a repeated problem rather than a one-off inconvenience. Current NZ listings cover different diameters, travel lengths, routing arrangements, and actuation systems, which is a sign of a mature component category.
For a useful overview of mountain bike parts in New Zealand, think of the dropper as a control component. It affects how you position yourself, how quickly you respond to terrain, and how confidently you can use the bike's suspension. The upgrade only earns that role if it reaches your correct pedalling height and drops far enough without hitting the frame or saddle.
Decoding Diameters Travel and Actuation Types
The specification that stops a dropper installation before it starts is diameter. Measure the frame's seat-tube opening or check the original post, then match the new post exactly. NZ listings commonly show 30.9 mm and 31.6 mm droppers, while 27.2 mm posts also appear for particular frames and smaller builds, as shown by New Zealand dropper-post listings.
A shim can sometimes adapt a smaller post to a larger frame opening, but it doesn't make every combination safe. The post must remain straight, the shim must support the correct area, and the frame and manufacturer must permit that arrangement. Never use a loose improvised sleeve or rely on a seat-clamp bolt to compensate for a mismatch.
Travel is useful only when it fits
Travel describes how far the saddle moves down. NZ retail examples include options around 125 mm, 150 mm, and 170 mm, with other local listings spanning from shorter travel to considerably longer models. More travel can provide more clearance on steep terrain, but only if the post can sit low enough in the frame and still extend to your correct pedalling height.
A long post can fail in two ways. Its lower mechanism may hit an obstruction inside the seat tube, or its overall stack may leave the saddle too high even when the post is fully inserted. A shorter post with less travel can be the better result if it allows correct saddle height and reliable operation.
Consider three measurements together:
- Diameter: Match the frame standard, or use a properly specified shim where compatible.
- Travel: Choose the useful drop available after checking the frame and rider position.
- Overall length: Include the post body, collar, head, and saddle height, not just the advertised travel.
Cable, hydraulic, and electronic operation
Most riders encounter a mechanical cable-actuated post first. It uses a handlebar lever and cable housing, and a worn cable can usually be replaced without specialist hydraulic equipment. The trade-off is routing friction. Poorly cut housing, tight bends, contamination, or incorrect tension can make the lever heavy and the return action slow.
Hydraulic systems use a sealed line and cartridge arrangement. Their operation can feel smooth, but air or a damaged line may require bleeding with the correct kit. Wireless electronic systems remove the physical cable or hose and can simplify installation, but they add electronics, battery management, and a higher purchase threshold.
Many MTB droppers combine cable actuation with an internal air/oil cartridge. Lever ratio affects the force required at the remote, while sealed cartridge construction influences how the post feels and how it can be serviced. A PRO Koryak specification from a NZ retailer provides an example of a 2:1 lever ratio and mixed oil/gas cartridge design.
| Actuation Type | Pros | Cons | Best For |
|---|---|---|---|
| Mechanical cable | Familiar setup, straightforward cable replacement, broad availability | Housing friction and cable tension affect feel | Most trail bikes and practical workshop builds |
| Hydraulic | Smooth lever operation and sealed system design | Bleeding and line work are more involved | Riders who prioritise refined actuation |
| Electronic wireless | Minimal physical routing and clean cockpit installation | Requires batteries and adds system complexity | Builds where routing is difficult or convenience matters |
Mastering Compatibility and Frame Fitment
The most common fitting error isn't choosing the wrong riding discipline. It's choosing a post that physically fits the diameter but cannot sit low enough in the frame. The label might say 150 mm travel, yet that number tells you nothing about whether the complete post will clear the seat tube, bottle bosses, cable ports, or internal frame shape.
NZ buyers often get specification-heavy product pages and little help matching travel to body height, frame geometry, and insertion depth, a gap also visible in local product guidance for the SDG Tellis. Shorter riders and children moving onto trail bikes face the tightest choices because a post that works on a larger frame may leave the saddle too high on a compact one.
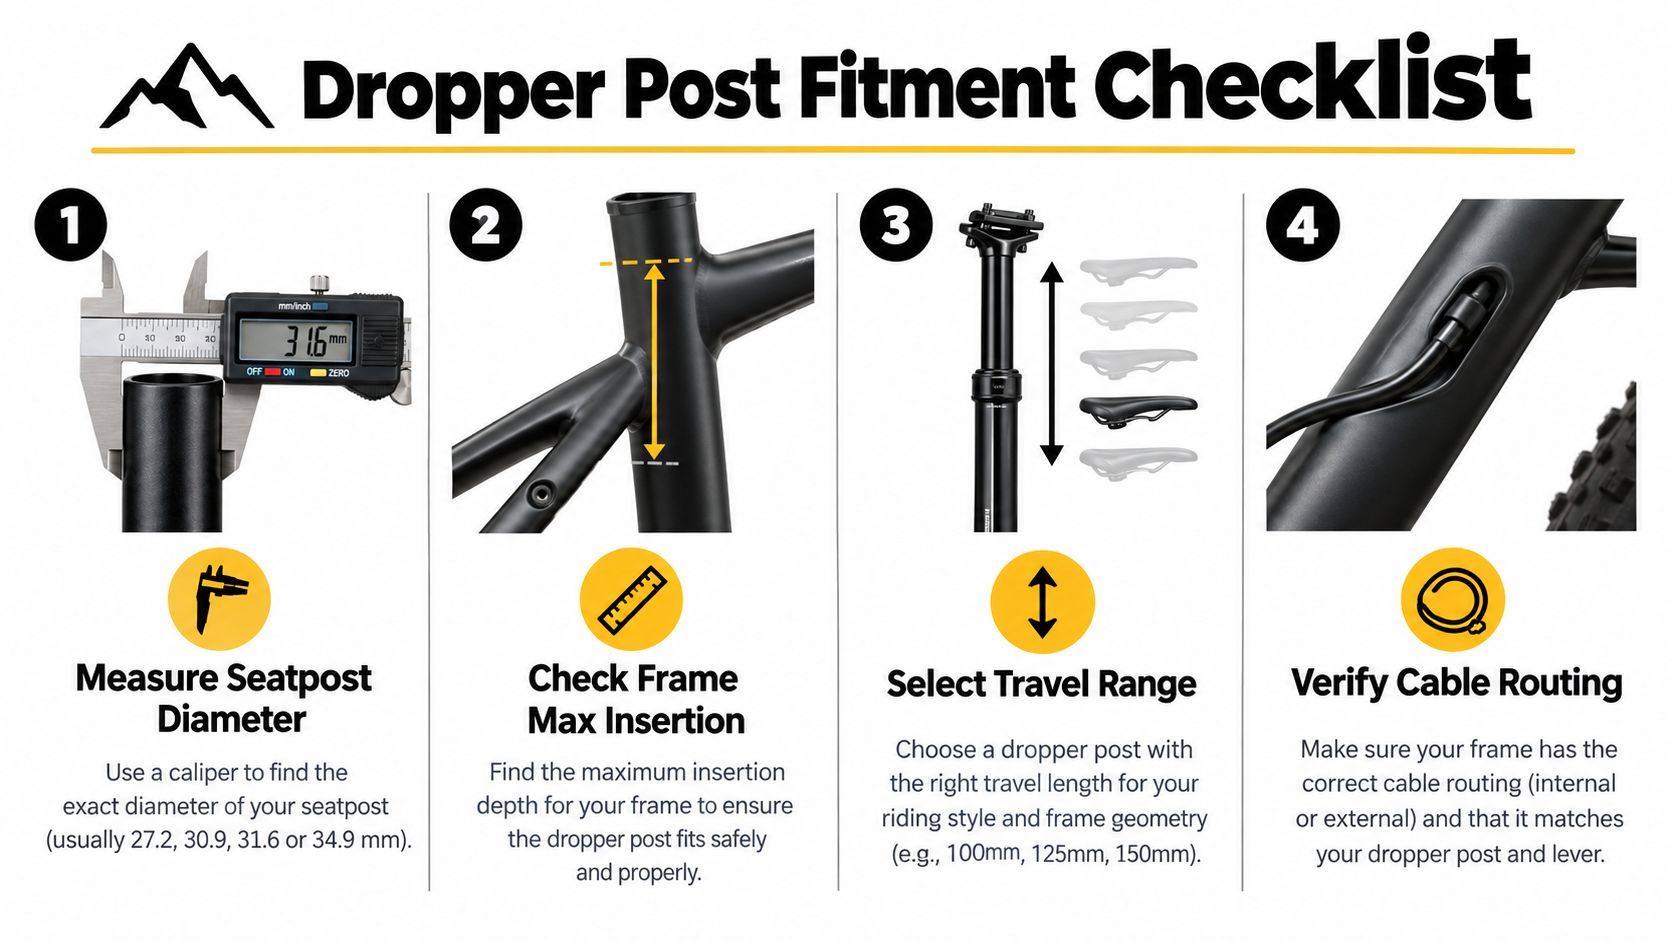
Measure the frame before ordering
Use this sequence rather than guessing from wheel size or frame size.
- Confirm the diameter. Remove the existing post and measure it with callipers, or verify the frame specification. Don't confuse the outside diameter of the seat tube with the post diameter.
- Find the maximum insertion depth. Remove the saddle and post, then inspect the inside of the seat tube with a light. Look for internal routing ports, a bend, a bottle-boss bolt, a suspension obstruction, or a frame stop that prevents deeper insertion.
- Measure the post's insertion requirement. The manufacturer's minimum insertion mark is a safety limit, not a suggestion. The complete post also has a collar and head that contribute to the height above the frame.
- Record your current saddle height. Measure from a repeatable point on the frame to the saddle rails or saddle top, then reproduce that height with the new post fully extended.
- Compare the complete dimensions. Check the manufacturer's overall length, stack height, maximum insertion, and travel. The post must fit inside the available frame depth while placing the saddle at your established pedalling height.
Why insertion depth beats travel marketing
A post with less travel may be the only one that fits a short seat tube, but that doesn't automatically make it a compromise. A properly extended 100 mm or 125 mm post is more useful than a longer model that forces the saddle too high, bottoms against an obstruction, or violates the insertion limit.
Shorter riders should pay close attention to the distance from the saddle rails to the bottom of the post head. Two droppers with identical travel can produce different final saddle heights because their stack dimensions differ. A compact post may allow more travel within the same frame, while a tall post may need to be inserted farther than the frame permits.
The same logic applies to smaller children's trail bikes. Their saddle height must support confident starts and stops, but the post still needs enough extension for comfortable pedalling. Measure the bike and rider together instead of selecting travel from an adult trail-bike chart.
Fitment warning: If the post reaches the frame obstruction before the collar seats, stop. Don't force it down, cut the frame, or remove the minimum-insertion mark.
A properly selected shim can solve a diameter mismatch when the post is compatible with that arrangement. For example, a purpose-made 30.9 mm to 31.6 mm seatpost shim is a more controlled solution than an improvised spacer, but it still doesn't remove the need to check insertion depth and manufacturer requirements.
Installation Routing and Wet Climate Maintenance
A dropper can work perfectly on the bench and still drag on the trail after poor routing. Too little internal cable housing pulls tight as the bars turn. Too much forms loops inside the frame and adds friction. Hydraulic hose needs the same clearance checks, plus protection from sharp bends and care to avoid introducing air during service.
Remove the post before routing anything. Locate the frame's entry and exit ports, feed the cable or hose through without forcing it, then turn the bars fully both ways. The actuator must move through its complete range, with no tension at either steering limit. On a cable system, secure the housing neatly, set inner-cable tension at the lever or post, and confirm full extension and full drop.
Frame insertion depth also affects the installation. A post can have the correct diameter and travel yet stop against an internal obstruction before its collar reaches the frame. Measure the available depth with the post removed, account for the post's stack height, and keep the manufacturer's minimum-insertion mark inside the frame. If the post cannot reach the required depth, choose a shorter post or a model with a shorter overall length.
Wet riding changes the service calculation
Nelson, the West Coast, and coastal riding areas expose parts to mud, water, grit, and salt. A dirty stanchion can carry contamination past the wiper seal, increasing friction and wear. After a wet ride, wipe the exposed stanchion with a clean, soft cloth. Keep a pressure washer away from the seal area because high-pressure water can force grit deeper into the moving parts.
Use grease only where the manufacturer specifies it. The wrong lubricant can attract grit or affect the seals. Check the wiper for damage, keep the post clean, and inspect cable housing for water entry or corrosion.
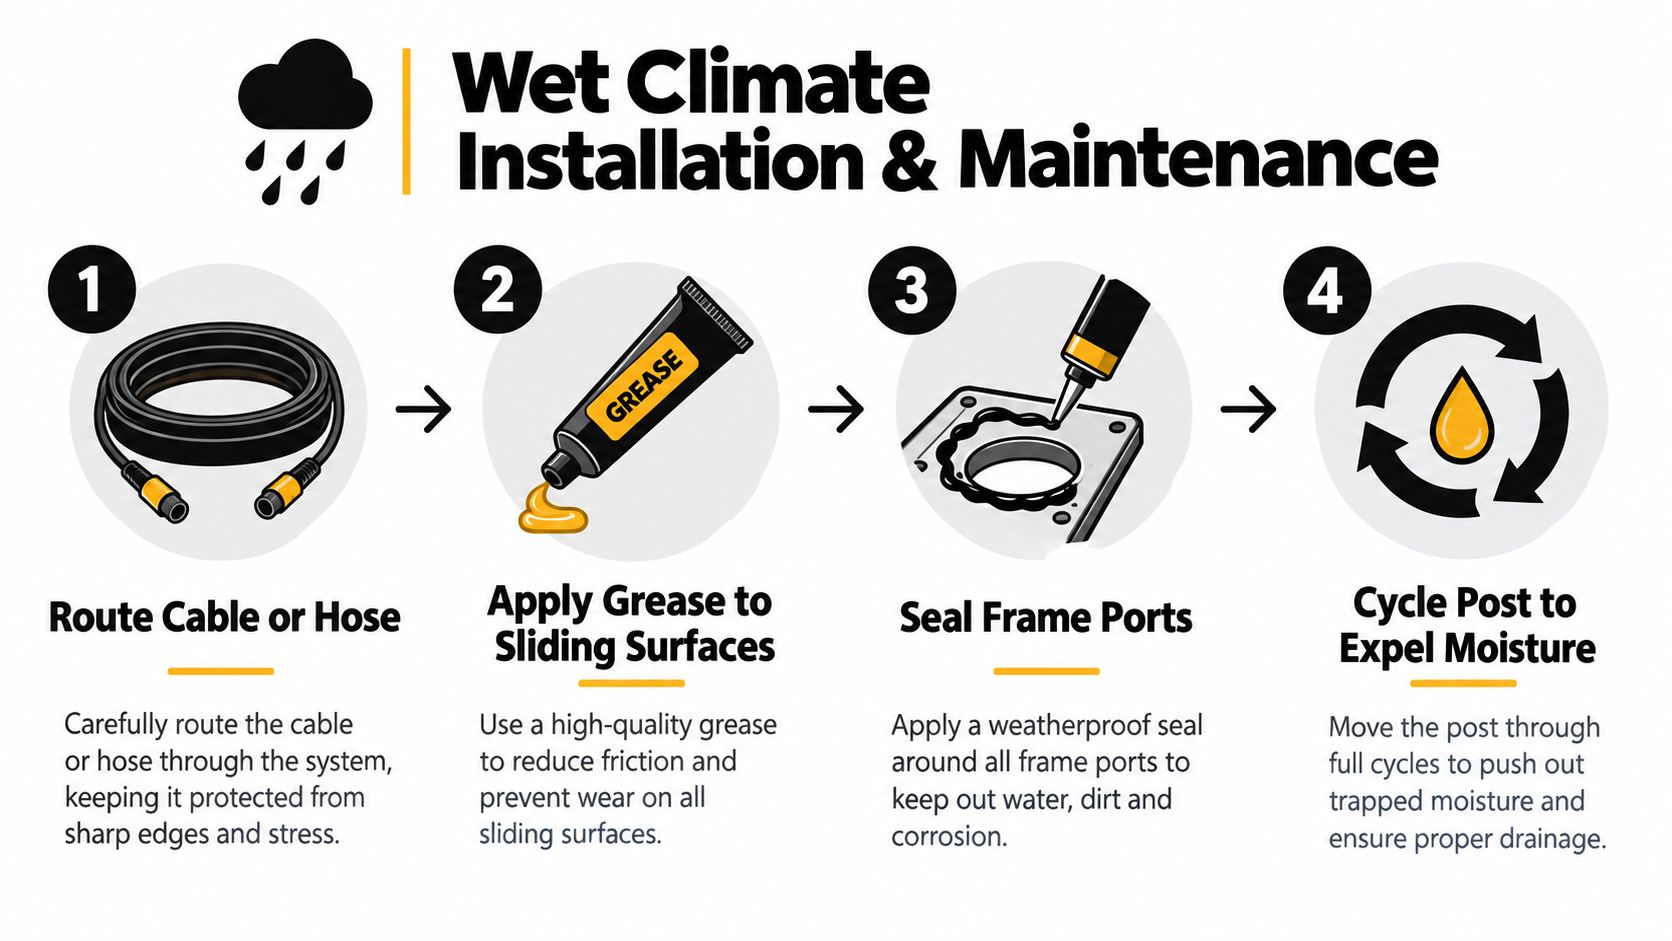
Independent NZ retail guidance recommends a basic service at least yearly, as noted in this PNW Range dropper listing. Treat that as a baseline, not a fixed schedule. A bike ridden often through mud may need attention sooner if the post feels gritty, returns slowly, becomes noisy, or stops short of full extension.
Service or replace
The fault determines the economical choice. A dirty wiper, dry sliding surface, or worn seal may be addressed with a lower service. A post that sinks under load can require air-spring work, seal replacement, or a new cartridge. Some cartridges are replaceable, while others make replacing the complete post more practical.
Local listings place basic or manual options at roughly NZ$139 and premium units at about NZ$450. Compare that cost with the post's original price, parts availability, workshop labour, and stanchion condition. A neglected post can seem cheap until it needs a cartridge and extra parts. Regular cleaning and annual assessment can delay replacement, while a badly worn stanchion or unavailable cartridge usually makes a new post the more sensible option.
Troubleshooting Common Trail and Garage Issues
A dropper that feels slightly slow is giving you useful information. Don't keep pressing the remote harder until the problem becomes a complete failure. First separate the symptoms, because a sinking post, a slow return, and a vague lever can come from different parts of the system.
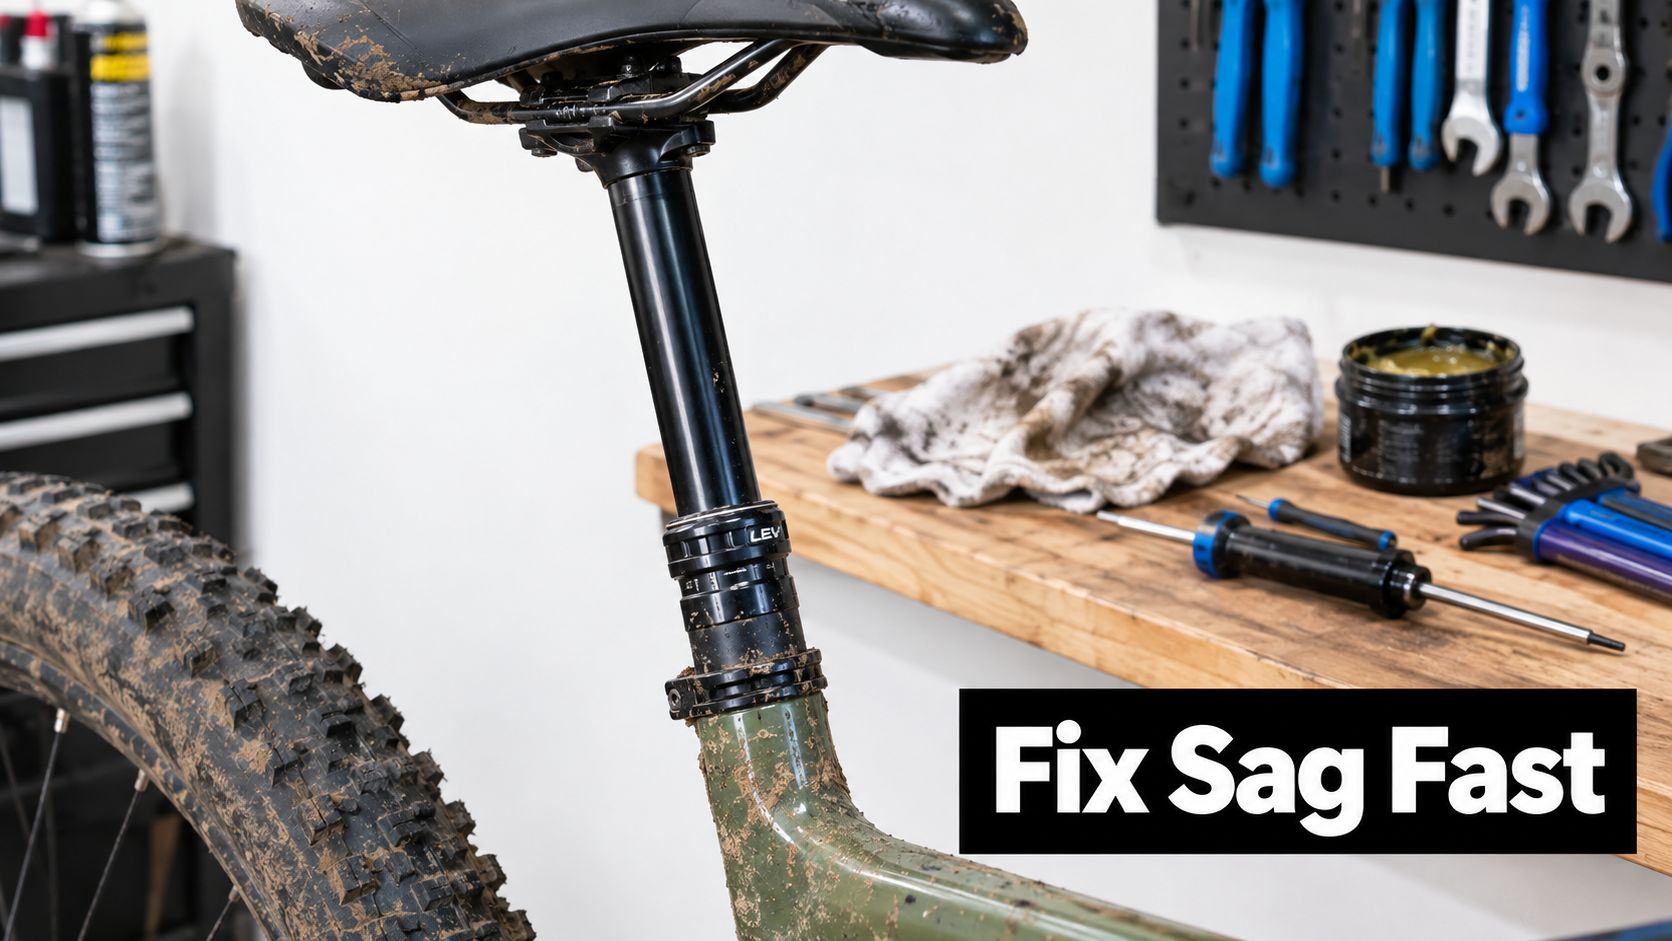
When the post sinks under load
A post that lowers while you're seated is not operating normally. Check whether the movement occurs only when the lever is pressed, or whether it sinks with the remote untouched. If it only moves when the lever is being pulled, the cable may be too tight, the actuator may not be returning fully, or the lever may be contacting the bar.
If it sinks with no lever input, the internal air spring, cartridge, or seals need inspection. Don't add pressure blindly. Find the manufacturer's pressure specification, use a shock pump if the design permits adjustment, and check whether the valve or seal is losing pressure. Persistent sag usually belongs on the workshop bench rather than in a trail-side repair.
When it won't return
Remove your weight from the saddle and operate the lever. If the post moves slowly or stops short of full extension, clean the exposed stanchion and inspect the wiper seal. Next, check the cable route for tight bends, crushed housing, contamination, or a cable end that isn't seated correctly.
A mechanical post with excessive housing friction may work on the repair stand but fail under real riding conditions. Disconnect the cable at the post only if you're comfortable doing so, then test the actuator by hand. If the actuator moves freely but the post remains slow, the fault is likely internal. A hydraulic system with a soft lever may need a bleed, while an electronic system may need its battery and actuator checked.
Trail fix: Clean the stanchion, confirm the lever isn't obstructed, and inspect obvious cable damage. Don't disassemble a pressurised cartridge beside the trail.
When the lever feels vague
A dead zone at a cable lever usually points to slack or routing friction. Turn the barrel adjuster in small increments, testing the post after each change. Too much tension can hold the actuator open and stop the post from locking properly, so aim for immediate engagement without constant cable preload.
If adjustment doesn't restore a crisp response, replace the cable and housing or inspect the actuator. A hydraulic lever that feels spongy needs a different approach, usually checking for air in the line and arranging a proper bleed. The OneUp Components V3 dropper post rebuild kit is an example of a model-specific service solution, not a universal kit for every post.
The following video demonstrates dropper-post maintenance procedures. Use it as a visual aid, but follow your own manufacturer's torque, lubrication, pressure, and disassembly instructions.
Stop riding and seek workshop help if the post has side-to-side play, visible scoring, oil leakage, structural damage, or a cartridge that won't hold position. Those faults can affect both control and the frame interface.
Expert Fitment and Servicing at Rider 18
Some dropper installations are simple. Others involve tight internal routing, awkward frame access, a post that needs a different travel choice, or a cartridge that requires model-specific tools. The cost of getting the fitment wrong is more than an untidy cable. You can end up with a saddle that never reaches pedalling height, a post that bottoms on an obstruction, or a remote that works inconsistently in the wet.
A dedicated workshop can measure the bike in its actual configuration, including saddle height, post stack, insertion depth, routing ports, and bottle-boss clearance. That matters particularly on compact frames, e-bikes with crowded internal spaces, and older bikes where the available seat-tube depth isn't obvious from the frame size.
Where workshop precision matters
Internal cable routing benefits from correct housing length and clean frame entry points. A mechanic can identify binding before the post is fitted, protect the housing from sharp edges, and set the actuator tension so the post locks and releases correctly. Hydraulic systems add bleeding requirements, and a proper bleed kit helps remove air without contaminating the line or surrounding components.
Post selection also benefits from matching the complete dimensions rather than choosing travel alone. Current local options include different diameters and travel choices, while Rider 18 stocks OneUp dropper options including 31.6 mm models with 150, 180, 210, and 240 mm travel, based on its product range. That doesn't mean every frame can accept those sizes. It means the retailer can compare the available model with your frame measurements instead of treating the travel label as the whole answer.
Local support for New Zealand conditions
Rider 18 operates from Nelson and supports mountain-bike, e-bike, and family-cycling riders with workshop work and component sourcing. For riders dealing with wet-season contamination, the useful service is the combination of cleaning, inspection, cable or hose replacement, seal and cartridge assessment, and a realistic recommendation about whether repair or replacement makes sense.
The store also offers nationwide shipping, with free delivery over $100, according to the publisher information supplied for this article. That can make sourcing a compatible post or service component practical for riders outside Nelson, provided they confirm diameter, travel, stack, insertion depth, and routing before ordering.
Rider 18 can help you match a dropper post to your bike's diameter, available insertion depth, saddle height, and riding conditions, then handle routing or servicing when the job exceeds home tools. Visit Rider 18 for compatible MTB components, dropper service parts, workshop support, and advice before you buy.


