

Bike Helmets for Adults: A Practical NZ Buyer's Guide
- by Nigel
-

You're standing in the shed with a new commute planned, a gravel loop saved on your phone, or an e-bike waiting for its first proper ride. The old helmet is scratched, the straps never sit quite right, and you're wondering whether the shape, price or brand matters most.
At a good bike shop counter, the answer starts somewhere else. A helmet has to be legal in New Zealand, correctly fitted, suitable for your riding and in sound condition. Those four checks matter more than a fashionable colour or an impressive list of features.
Why a Helmet Deserves More Thought Than Most Riders Give It
New Zealand made bicycle helmets compulsory in January 1994. Adult helmet use rose from about 43% in 1993 to approximately 92% in 1994, establishing helmet wearing as a normal part of cycling in New Zealand (New Zealand government information).
That law applies to adults riding bicycles on roads, including commuting, recreational cycling and many e-bike trips where the vehicle is legally treated as a bicycle. The practical message is simple: if you ride on the road, you need an approved helmet that's securely fastened.
The legal requirement is only the starting point. A certified helmet can't protect you properly if it rocks backwards, slides over your eyes, pinches your temples or has a loose chin strap. The design is tested as a complete system, but you still have to make that system work on your head.
Shop-floor advice: Don't buy a helmet because it looks right on the shelf. Buy it because it stays in the right position when you move, look over your shoulder and ride.
Three questions usually produce the right answer:
- What does the law require? Check the compliance marking and make sure the helmet is approved for cycling in New Zealand.
- Does it fit your head? The shell should sit level, the retention system should hold it firmly and the strap should stay secure under your jaw.
- Does it suit your riding? A ventilated road-style lid, a covered mountain-bike helmet and a commuter helmet with visibility features solve different problems.
Adults often spend more time choosing tyres or lights than choosing the equipment protecting their head. That's backwards. A helmet is not a generic accessory, and the correct choice depends on your head shape, route, speed and willingness to wear it every time.
The Standards Behind an Approved Helmet
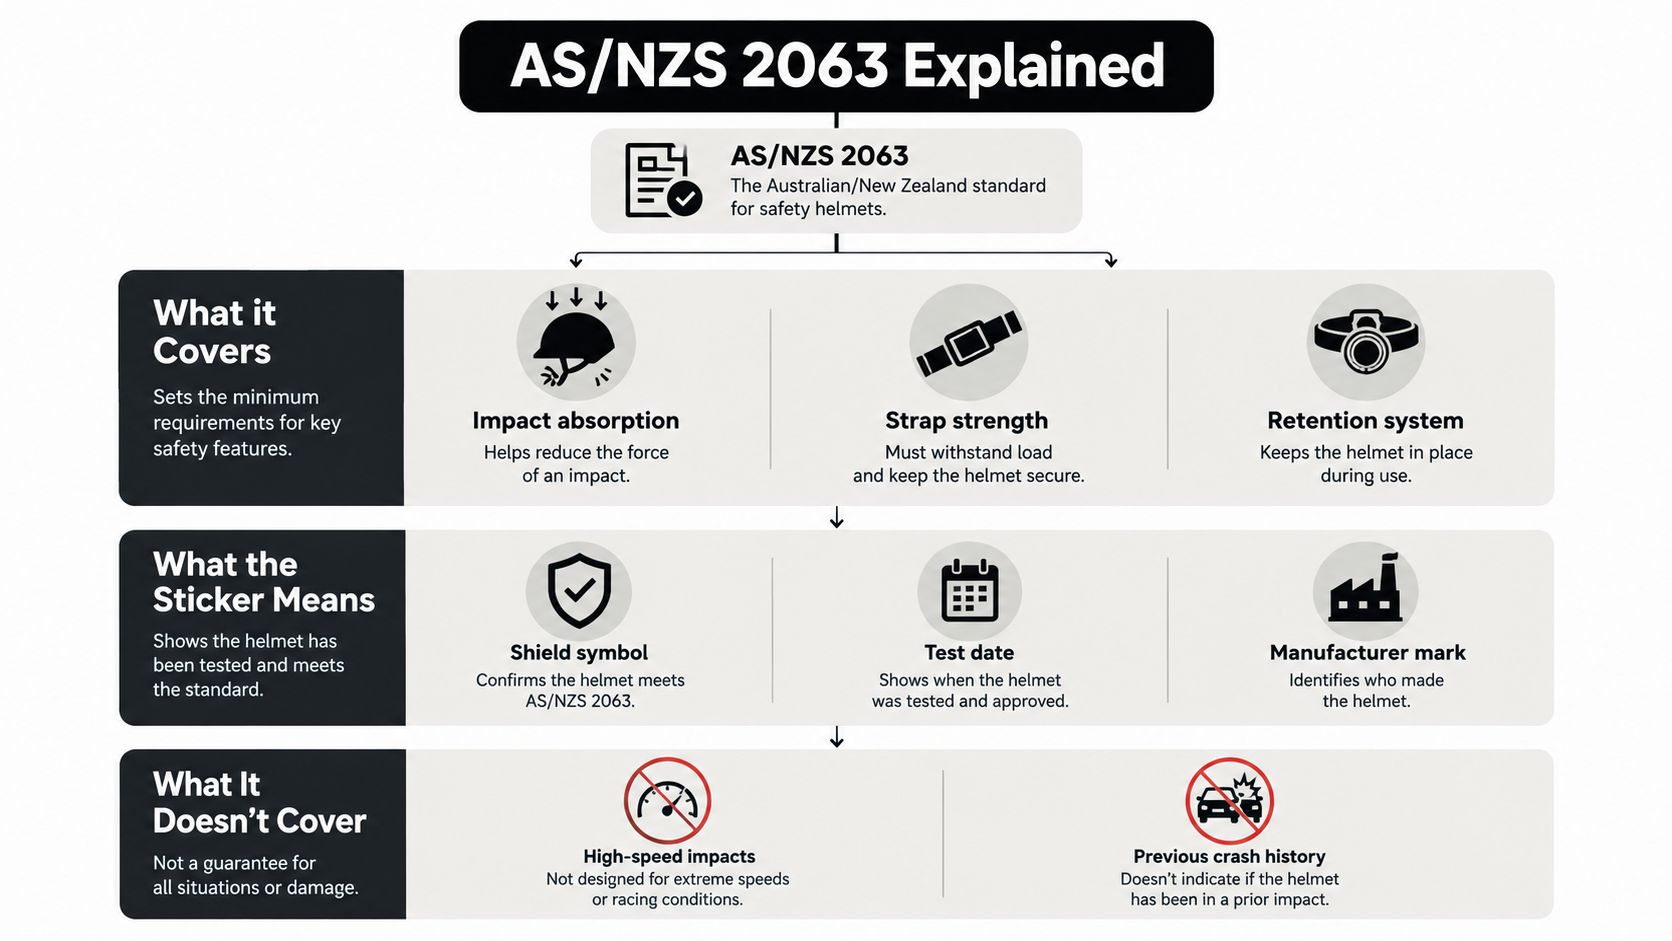
The label inside a helmet tells you whether the product has been made and tested against an approved bicycle-helmet standard. In New Zealand, AS/NZS 2063 is the key standard most riders will encounter.
In plain English, the standard isn't limited to checking whether the foam absorbs impact. It also considers:
- Impact-energy attenuation, meaning how the helmet manages impact energy.
- Helmet stability, so the lid doesn't come off or shift excessively.
- Load distribution, which assesses how forces move through the helmet.
- Retention-system strength, covering the straps, anchors and fastening arrangement.
- Peripheral vision clearance, so the helmet doesn't obstruct the rider's view.
NZTA lists AS/NZS 2063:2008, NZS 5439, AS 2063.2, EN 1078, Snell B90/B95, ASTM F1447 and the US CPSC bicycle-helmet standard among approved options for adult cycling in New Zealand (Standards New Zealand's bicycle-safety guidance).
What the marking does and doesn't tell you
A compliance mark indicates that the helmet-and-retention system has met defined performance requirements. It doesn't tell you that the helmet is the right size, that it has never been crashed, or that it will remain stable with the straps loose.
That distinction matters with imported helmets and older stock. Check the label inside the shell rather than relying on a product photograph or a retailer's broad description. If you're comparing road and mountain-bike options, this guide to bicycle helmets for road bikes can help you understand how design priorities differ.
Certification also isn't a licence to ride faster or take bigger risks. It confirms that the product has met a standard under defined tests. It can't account for your riding position, road surface, traffic, crash angle or whether the helmet is worn correctly.
Look for a clear compliance marking, then inspect the physical helmet. The straps should anchor cleanly, the buckle should close positively and the adjustment system should work without sticking. If any part feels flimsy or damaged before you ride, choose another helmet.
Matching Helmet Type to How You Actually Ride
Choose the riding category before you choose the brand. Most adults have one main use, even if they occasionally ride elsewhere.
| Helmet type | Best for | Key design features |
|---|---|---|
| Urban commuter | Daily road riding, errands and transport | Visibility, practical ventilation, glasses compatibility and useful rear coverage |
| E-bike commuter | Faster urban riding and longer-distance transport | Secure retention, clear vision, stable fit and features that remain comfortable at higher speeds |
| Mountain and enduro | Singletrack, technical trails and bike-park riding | More rear and side coverage, a stable fit and a peak that manages sun, rain and trail debris |
| Gravel and mixed-surface | Sealed roads, forestry roads and long adventure loops | Balanced ventilation, moderate coverage, low weight and compatibility with glasses |
An urban commuter helmet should be easy to put on and easy to live with. Bright colours, reflective details or an integrated light can make sense on Nelson streets, particularly when you ride in changing light. Don't choose a bulky trail helmet for a short road commute if it makes you hot and uncomfortable enough to leave it at home.
E-bike riders should prioritise retention and unobstructed vision. Higher typical speeds mean that a loose dial, flapping strap or unstable peak becomes more irritating and potentially more consequential. A low-profile road lid can work for a road-style e-bike, while a more covered commuter or trail helmet may suit an upright bike used on rougher paths.
Mountain-bike helmets generally extend farther around the back and sides of the head. That extra coverage is useful on trails, where falls can involve roots, rocks, berms and uneven ground. A peak should stay in position rather than snapping back into your line of sight, and it should work with your glasses.
For mixed riding, a gravel or adventure helmet is the sensible middle ground. It won't offer the same trail coverage as an enduro lid or the same airflow as a dedicated road helmet, but it suits riders who move between tarmac, gravel roads and easy tracks.
If you're organising a cycling holiday or guided ride, a cycling and bike tour booking platform can help you think through the environments you'll encounter. That's useful when deciding whether your everyday helmet needs to handle road miles, gravel touring or more technical trail sections.
Full-face protection is a separate decision. It makes sense for downhill, bike-park and aggressive enduro riding, but it's usually excessive for a normal commute. Read more about the trade-off in this guide to full-face helmets.
Measuring Your Head and Getting the Fit Right
Measure your head before you shop, but don't treat the measurement as a final answer. Wrap a flexible tape around the widest part of your head, just above your eyebrows and ears, keeping it level. Record the circumference, then use that figure as a starting point for the manufacturer's size range.
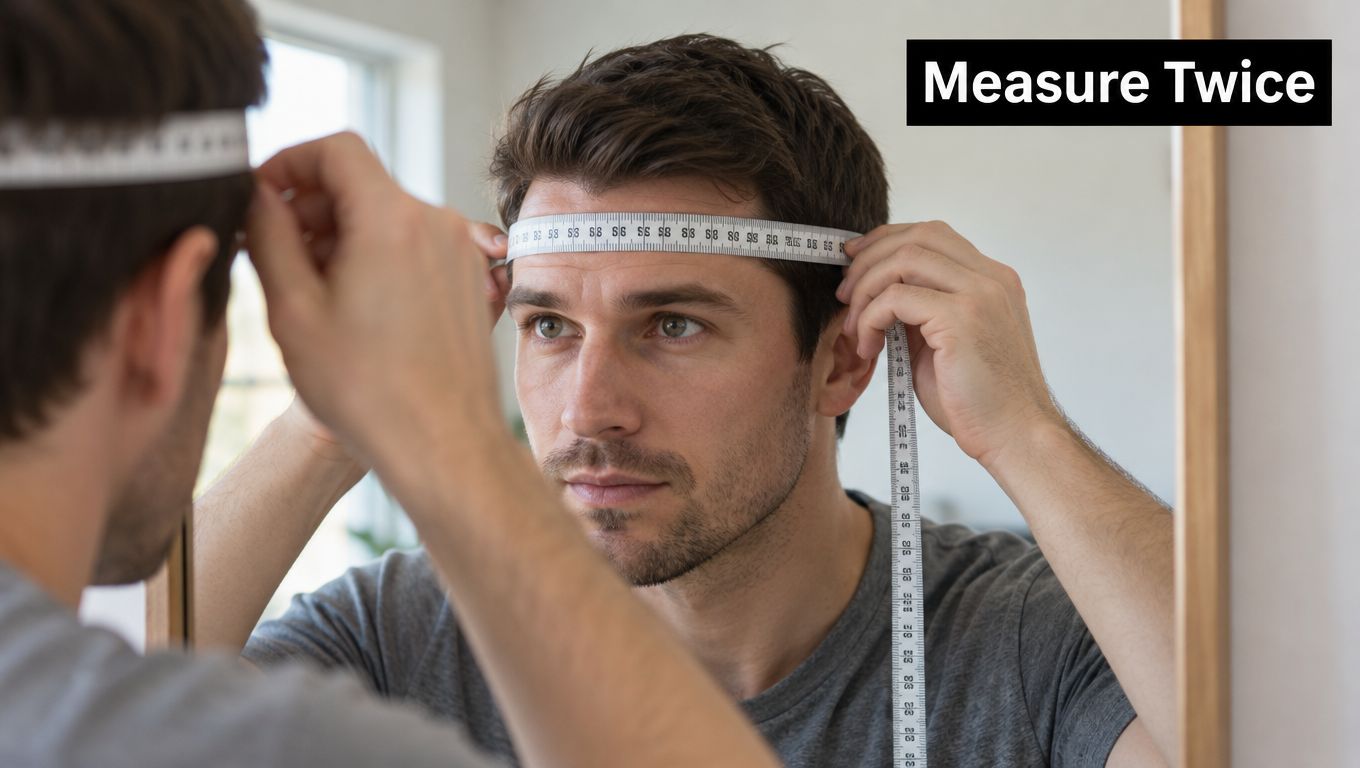
Your head shape matters as much as the number. Some helmets suit rounder heads, while others feel better on a longer oval shape. If a helmet presses hard at your temples even though the circumference is correct, try a different model rather than assuming you need to tolerate it.
The fitting sequence I use in the shop
Start with the helmet sitting level across your forehead. It shouldn't tilt backwards, expose too much of the forehead or sit so low that it interferes with your vision. NZTA identifies level positioning, stability during head movement and a securely fastened strap as core checks for effective use (NZTA cycle factsheet).
Adjust the rear dial or retention cradle until the helmet feels snug without creating pressure points. The helmet should make contact around your head, not float above it because the pads are doing all the work. Next, set the side straps so they meet below each ear and bring the buckle under your jaw.
Use the shake test. Look forward, then gently move your head from side to side and up and down. If the helmet shifts independently of your head, slips towards your eyebrows or rocks backwards, it isn't fitted correctly.
Try the helmet with the equipment you ride with:
- Glasses: Make sure the arms don't push the helmet upwards or interfere with the retention cradle.
- Winter beanie: Check whether your usual beanie changes the fit. Don't force a helmet over thick fabric if it becomes unstable.
- Ponytail: Test the position and make sure the retention system doesn't catch or push the hair into an uncomfortable spot.
- Audio equipment: Ear hooks and speakers can affect strap placement, comfort and awareness of traffic.
A good fit feels secure without feeling like a clamp. Wear the helmet for several minutes in the shop. Walk around, look over both shoulders and adjust the dial again. If you keep reaching up to fix it, the shape or size is wrong.
Feature Trade-offs Worth Thinking About
Features should solve a problem you have. They shouldn't distract you from the basics of certification, fit and condition.
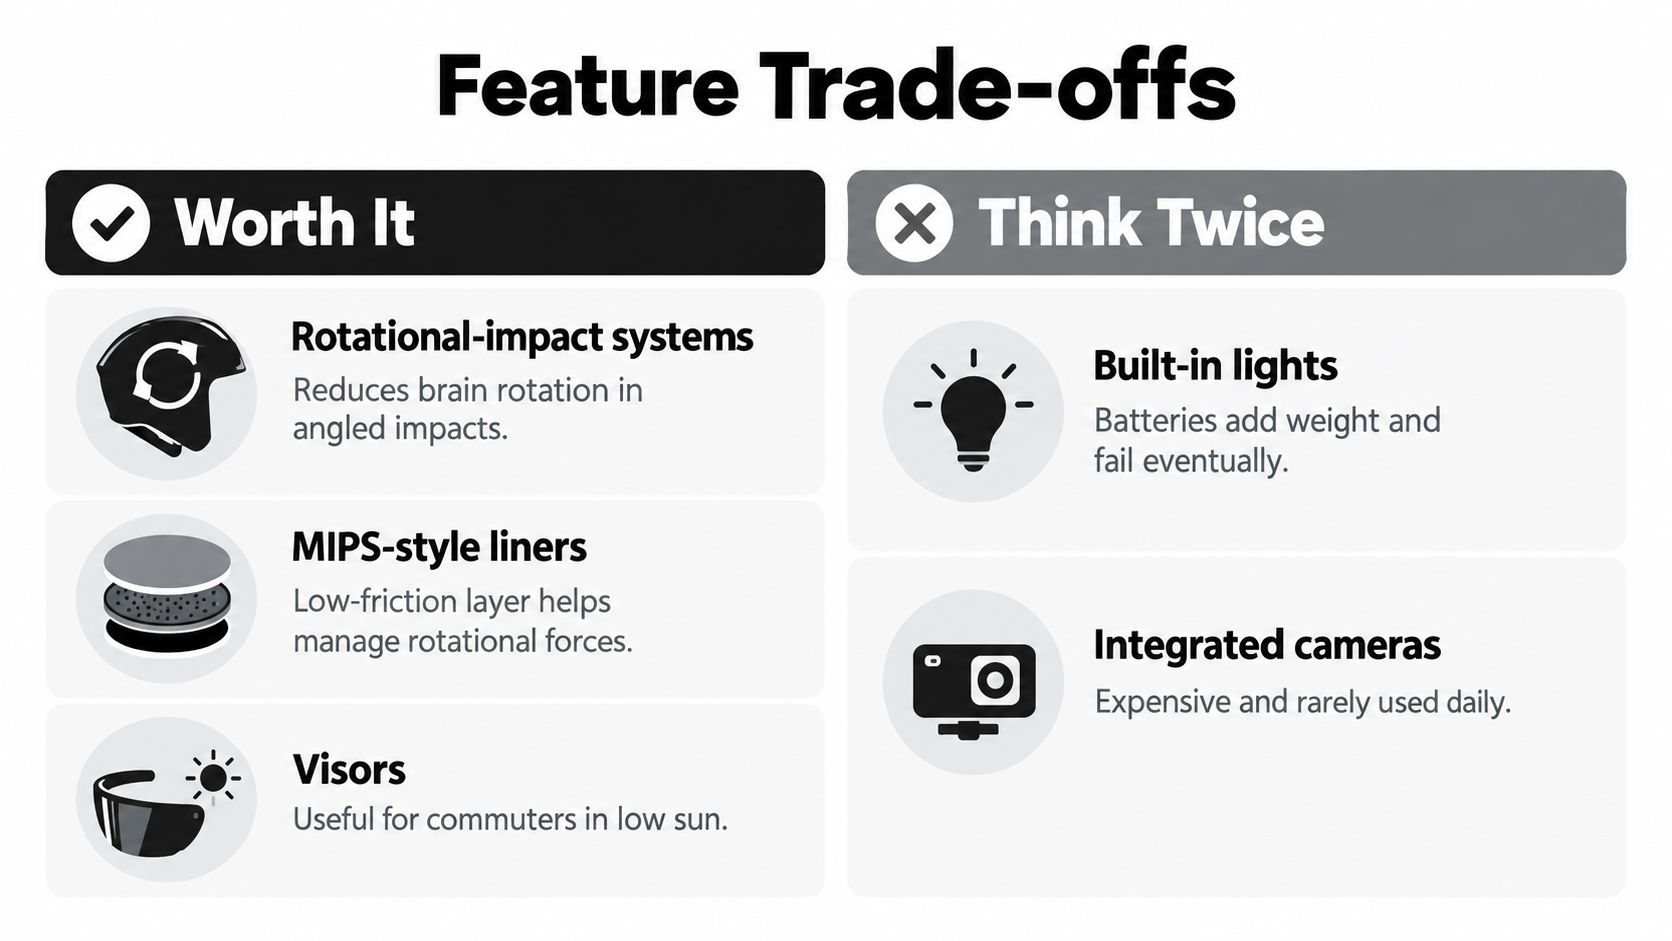
Rotational-impact systems are worth considering, particularly if you ride technical trails, commute regularly or use an e-bike. Systems such as MIPS-style liners are designed to allow controlled movement between layers during certain angled impacts. They don't replace a correct fit, and they shouldn't persuade you to choose an uncomfortable helmet.
A peak is useful when low sun, rain or trail debris affects your vision. A fixed peak is simple and sturdy, while a removable peak gives you more flexibility between road and trail use. On a commuter helmet, the best peak is the one that stays out of your sight line and doesn't catch wind.
Spend on the feature you'll use
Built-in lights can be useful for commuters. They improve the helmet's visibility profile, but they still need batteries, charging and a working switch. A bright shell, separate front and rear lights and reflective clothing may offer a more flexible setup.
Ventilation matters in warm weather and during climbs. More vents usually improve airflow, but they can reduce warmth and leave more exposure in wet or cold conditions. For a Nelson rider who commutes year-round, choose airflow based on the pace and duration of the ride, not on a product photograph.
Camera mounts, speaker systems and accessory rails need more scrutiny. A mount can be useful if you already record rides, but it adds another object to manage and may affect where the helmet sits. Audio systems should never block your ability to hear traffic.
A good mountain-bike helmet guide, such as this resource on mountain-bike helmet choices, is useful when comparing coverage, peaks and trail-focused features.
My buying rule: Pay first for a stable fit and a comfortable shape. Choose technology only after those two requirements are satisfied.
When to Replace, Inspect or Walk Away
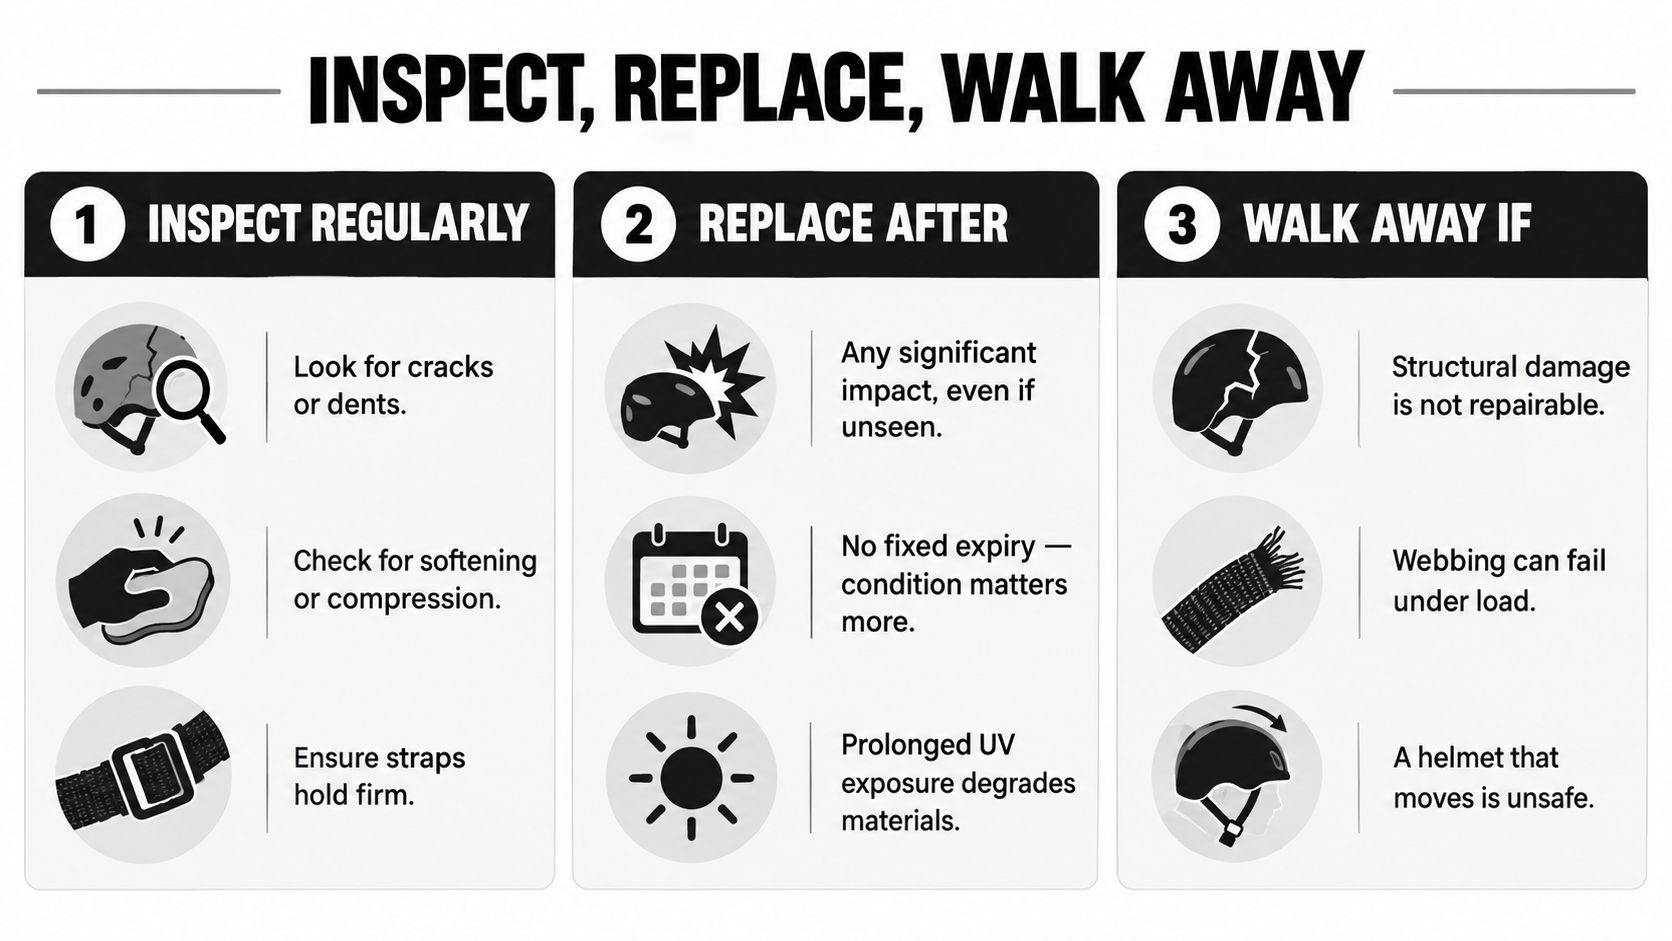
A helmet doesn't become safe again because the damage isn't visible. The safest decision after a significant impact is replacement, even if the shell looks clean and the straps still work.
Waka Kotahi advises that a bicycle helmet protects your head only once and recommends inspection after a drop or crash. Auckland Transport also warns that visible cracks in the polystyrene require replacement and recommends buying new rather than second-hand because hidden damage can't be verified.
A low-speed fall deserves an honest assessment. If you tipped over on a flat commute and your head didn't contact the ground, inspect the shell, liner, straps and buckle. If the helmet hit the ground, treat it as impacted equipment rather than assuming the low speed makes it harmless. A helmet dropped from a bench or car boot presents the same problem: you don't know what happened inside the liner.
A practical inspection rule
Look closely at the entire helmet:
- Shell: Check for cracks, splits, dents or separation.
- Liner: Look for crushing, soft spots or areas that no longer sit evenly.
- Straps: Check for fraying, cuts, stretched webbing or loose anchor points.
- Buckle: Confirm that it closes, releases and stays secure.
- Retention system: Turn the dial or adjuster and confirm that it holds tension.
The concern that helmets increase neck injury isn't supported by the evidence cited in the available New Zealand Medical Journal evaluation. Its review of a meta-analysis of 40 studies found helmet use associated with 51% lower odds of head injury, 69% lower odds of serious head injury, 33% lower odds of facial injury and 65% lower odds of fatal head injury, with a near-null effect on neck injury (the cited New Zealand cycling-code material).
Those figures describe an association across studies, not proof that a helmet alone determines every outcome. They do support a straightforward conclusion: a sound, properly fitted helmet is sensible protection, and rejecting helmets because of a neck-risk myth is poor advice.
There's no useful shortcut for a second-hand helmet. You may not know whether it has been crashed, dropped, stored in damaging conditions or altered by a previous owner. If the history is uncertain, walk away and buy new.
For regular commuters and e-bike riders, inspection should become part of ordinary bike care. Check the helmet when you clean your bike, after any fall or drop, and whenever the fit starts to feel different. Replace it when the structure, retention system or history gives you a reason not to trust it.
Buying Locally and Getting the Most From Your Shop
Take your usual riding setup to the fitting. Bring your glasses, winter beanie, ponytail arrangement, and any audio or lighting accessories you use. A helmet that feels right on a bare head can press or shift once those weekly extras are in place.
Ask three direct questions:
- Which approved standard does this helmet carry?
- Can the retention system, pads, or straps be replaced or serviced?
- What happens if there is a warranty issue or crash?
Rider 18 is a Nelson-based bike shop and online store supplying helmets, apparel, components, and workshop services, with nationwide shipping and free delivery over $100 (Rider 18). In ten minutes, a local fitting can put round and oval shells on your head, reveal pressure points, and show whether your glasses interfere with the straps. For online orders, shake-test the helmet over a sink on arrival so you can return it before riding if it shifts or feels wrong.
If you are comparing shop support with online ordering, what ServeApps recommends offers practical guidance on fit, returns, and after-sales help. For helmets, check the return policy before paying, because comfort problems may appear after more than a few minutes of wear.
Before leaving the shop, perform the level-position, shake, and strap checks. Ask the staff member to watch your adjustment, then repeat it yourself. You will need to set the helmet correctly every time you ride, including on an e-bike where higher speeds make secure retention and clear visor vision more important.
A Simple Decision Checklist and Where Helmet Tech Is Heading
Use this checklist before buying:
- Confirm an approved New Zealand standard.
- Measure your head, then try the helmet on.
- Set it level across your forehead.
- Tighten the retention system until it's stable without pressure points.
- Fasten the buckle under your jaw.
- Match the helmet type to your main riding.
- Choose features that solve a real problem.
- Inspect after impacts, drops and damage, not just according to a calendar.
Adult helmet design is moving towards more integrated protection and more commuter-focused equipment. E-bike riders will continue to value stable retention, clear vision and comfortable coverage, while rotational-impact systems and built-in visibility features will remain common points of comparison. The useful technology is the technology that improves daily use without making the helmet uncomfortable or complicated.
For most riders, the next step is uncomplicated. Take your head measurement, decide whether you're mainly commuting, riding an e-bike, exploring gravel or riding trails, then try on approved helmets until one stays put and feels natural.
Rider 18 offers adult helmets, riding gear, components and workshop support from its Nelson store, with nationwide shipping for riders elsewhere in New Zealand. Visit Rider 18 with your riding glasses and usual setup in mind, and choose a helmet that fits securely before you commit to the next ride.


Please upload banner from store admin blog pages