

16 Inch Bikes NZ: Your Complete Sizing and Buying Guide
- by Nigel
-

A 16-inch bike is the standard NZ pedal-bike entry point for children roughly 100–120 cm tall, usually around 5 to 7 years old. It's the right bridge for a child moving from balance-bike practice into independent pedalling, provided the individual fit is correct.
You're probably looking at a row of small bikes while your child points at the brightest one, asks whether it has training wheels, and then tries to sit on a model that's clearly too big. That's normal. The wheel size gives you a useful starting point, but the right choice depends on height, leg length, confidence, brakes, weight, and whether your family rides smooth paths or rougher park tracks.
For 16 inch bikes in NZ, my advice is simple: measure first, choose the lightest sensible bike your child can control, and match the build to the riding you typically do. Don't buy an oversized bike just because you hope it'll last longer.
Why 16 Inch Bikes Are the NZ Standard for Young Riders
A child who has outgrown a balance bike often has the balance needed for pedals, but not yet the confidence for a large, heavy bicycle. That's where a 16-inch bike earns its place. Auckland Transport's kids' ride-size guide places a 16-inch wheel bike in the 100–120 cm height band and approximately 5–7 years age band, after balance bikes at 85–110 cm and 12-inch bikes at 85–100 cm. The guide also recommends checking height with shoes off against a chart, which is more useful than relying on a birthday alone. Auckland Transport's kids' learn-to-ride guide gives Kiwi parents a practical local reference.
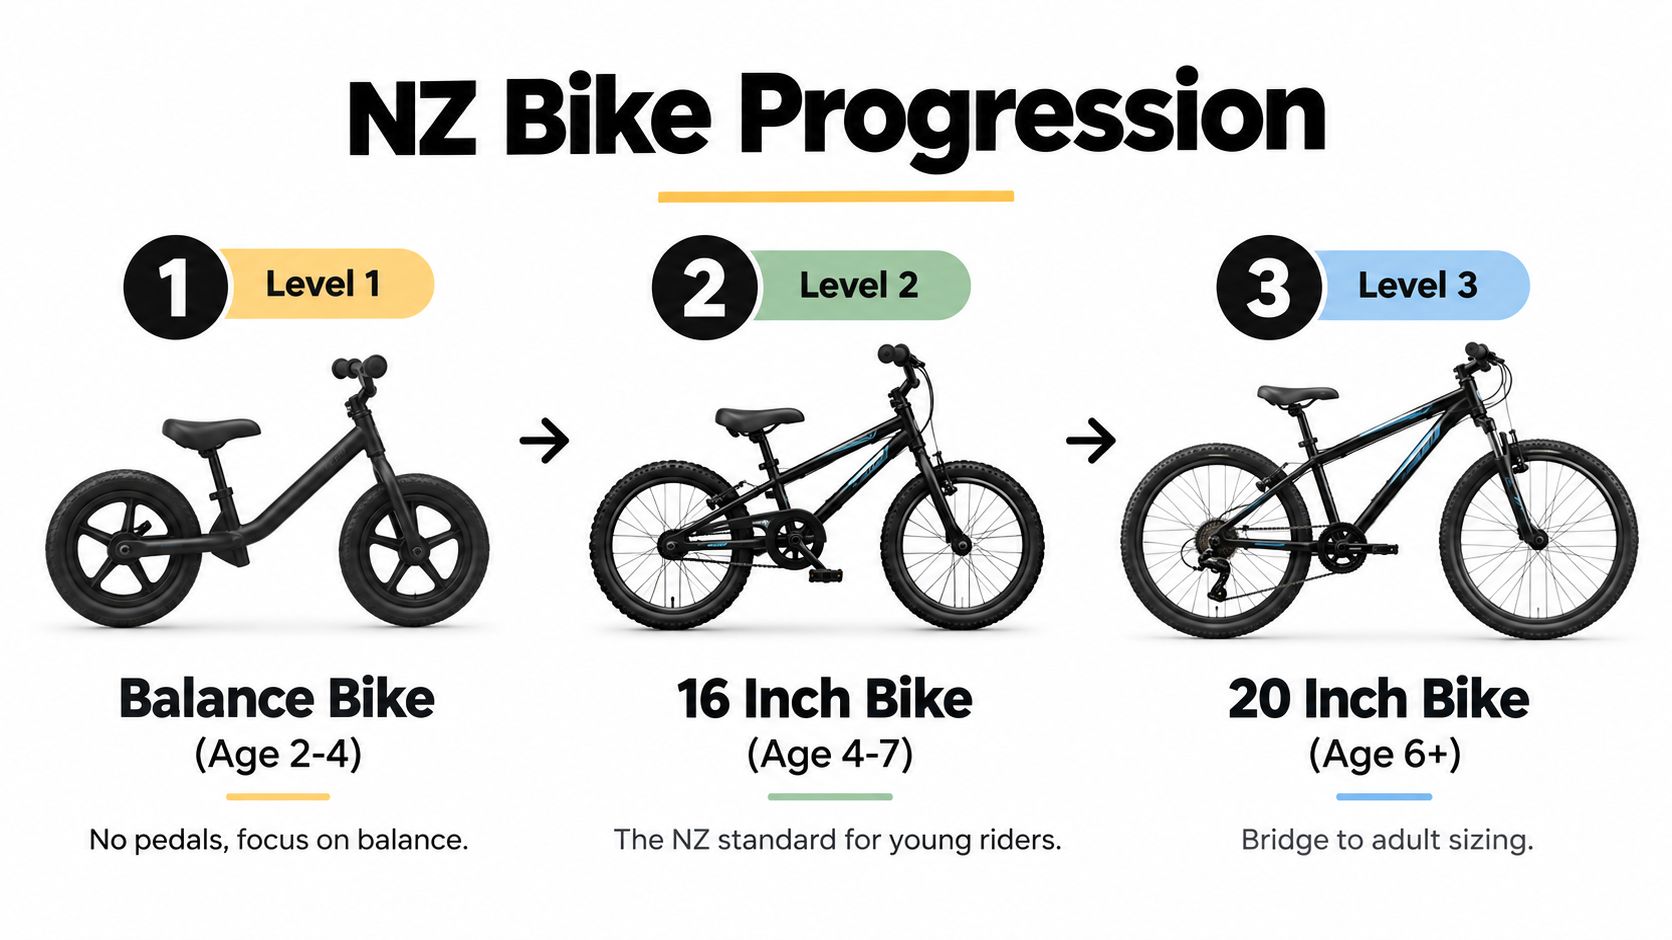
Use height as the first filter
New Zealand retail and advice guides commonly place 16-inch bikes somewhere around ages 3–6 or 5–8, depending on a child's height and confidence. One NZ guide gives a height range of 84–112 cm, while another places the category at 99–117 cm and ages 5–7. Those differences don't mean the guides disagree about the bike. They show why age is only a rough filter. Evo Cycles' kids' bike buying guide is useful for seeing how local sizing advice varies within the same wheel category.
A child at the shorter end may need a low-set saddle and simple controls. A taller child may fit a 16-inch bike but be close to the next wheel size. The bike must suit the rider today, not an imagined version of them later in the year.
Practical rule: If your child can't mount, stop, and steady the bike without help, it's too big or poorly set up.
A balance-bike graduate may not need training wheels at all. If you want to understand the skills developed before pedals, read this guide to the Cruzee balance bike. A child who already glides and steers may only need a manageable frame, reachable brakes, and a calm space to practise.
How to Accurately Measure Your Child for a Perfect Fit
Don't buy from an age chart alone. Two children the same age can have very different leg lengths, reach, coordination, and confidence. Measure your child barefoot, then use the result to shortlist bikes before you worry about colour or accessories.
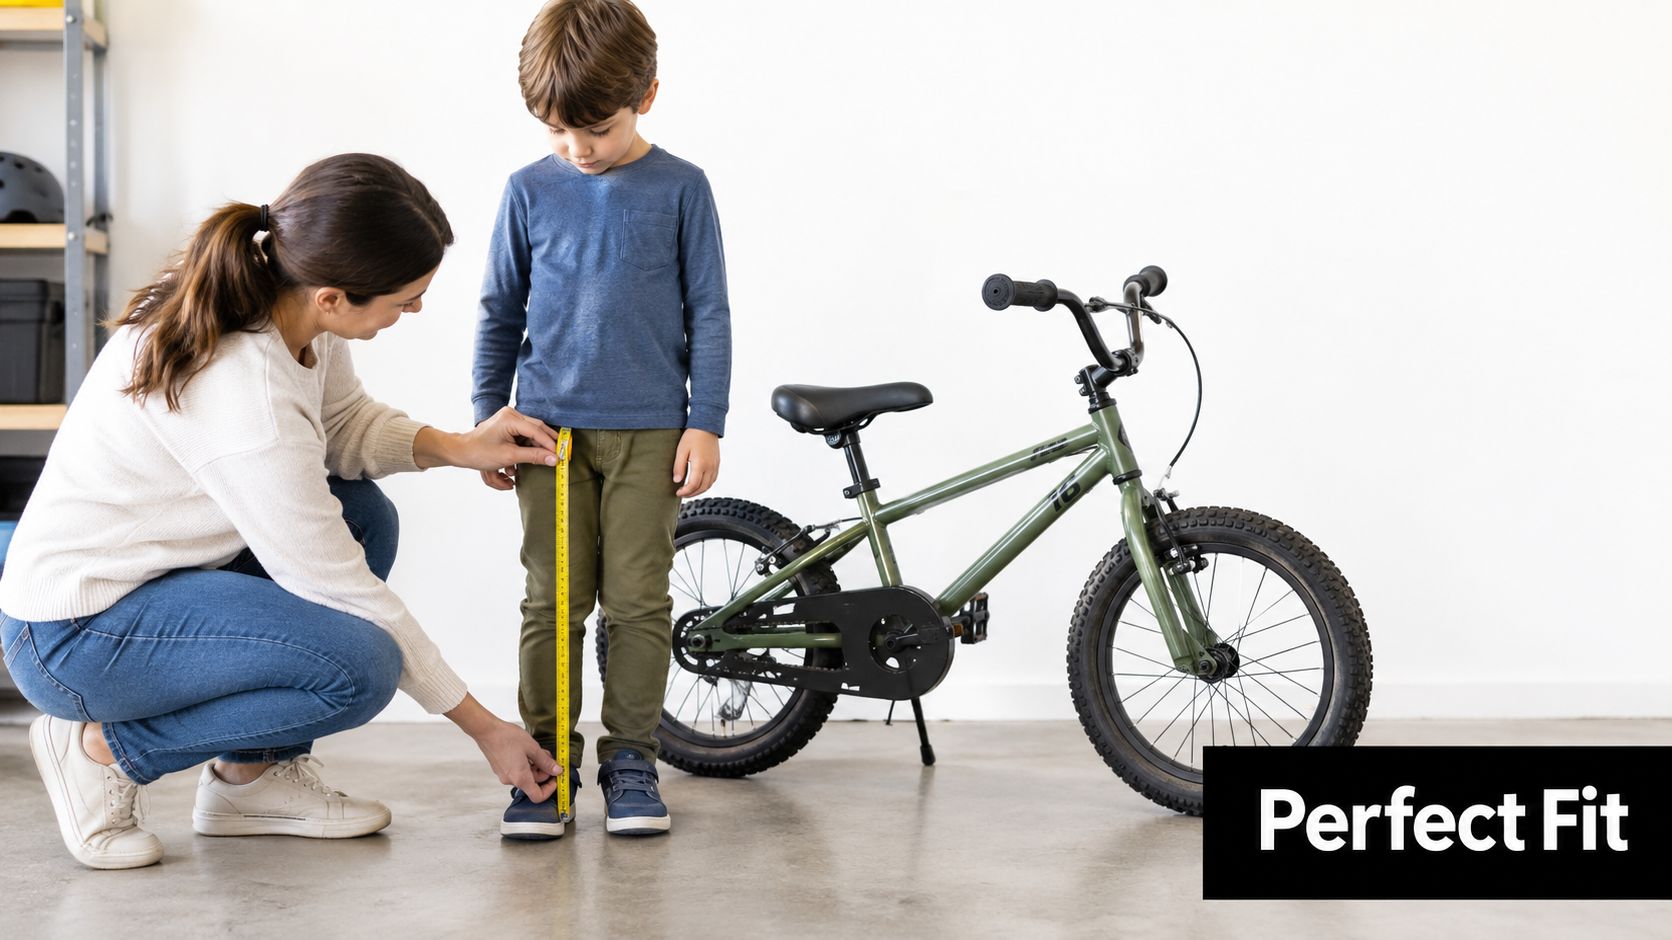
Start with a barefoot measurement
Have your child stand upright against a wall with shoes off and feet comfortably apart. Place a book between the legs, level against the body, and measure from the floor to the top edge of the book. Repeat the measurement once so you're not working from a crooked tape line.
That figure is more useful than age because it tells you whether your child can sit, stop, and regain balance. Height still matters, but inseam controls the practical relationship between the saddle, pedals, and ground. If you're comparing bike sizing with other children's products, a clear international kids clothing sizes chart can help explain why age labels vary so much between brands, although clothing measurements aren't a substitute for bike fitting.
Check the bike before the first ride
With the bike stationary, check four points:
- Feet and saddle: A new rider should be able to get their toes down without sliding off the saddle.
- Standover clearance: There should be a small gap between the top tube and the child's body when standing over the bike.
- Handlebar reach: Their elbows should have a soft bend, not locked straight or cramped against the body.
- Brake access: Fingers should reach the levers without stretching or shifting the hands from the grips.
A child riding on gravel, an uneven driveway, or grass needs control before pedalling efficiency. Lowering the saddle temporarily can make starts and stops less intimidating, but don't drop it so far that the knees are jammed up at the top of every pedal stroke.
The Rider 18 bike frame size chart can help you understand the relationship between frame dimensions and rider position, but a child still needs a hands-on check. Numbers narrow the choice. The child's posture and control make the final call.
Use the video below as a visual reference for checking position and fit before you adjust the bike.
Understanding Brakes, Gears, and Frame Weight Trade-offs
Two 16-inch bikes can look similar on the shop floor and feel completely different on the path. For a timid learner, a heavy frame and stiff brake lever can turn a short ride into a wrestling match. For a confident child on mixed surfaces, a sturdier frame and predictable hand brakes can make the bike feel planted.
Brakes come before clever extras
Many 16-inch bikes use rear coaster brakes, front handbrakes, or both. A coaster brake is mechanically simple, and some children find back-pedalling intuitive. The downside is that a nervous rider may pedal backwards while trying to reposition their feet, triggering the brake unexpectedly.
Front and rear handbrakes teach a useful skill earlier, provided the levers fit small hands and don't require excessive force. Consumer NZ stresses that bike fit and helmet adjustment matter, so brake reach belongs in the same safety check rather than being treated as a minor specification. Go Ride's NZ kids' helmet guide also reinforces the need to choose safety equipment by fit, not age alone.
Keep gearing uncomplicated
Most children at this stage don't need a complicated drivetrain. A single-speed bike lets them focus on starting, steering, pedalling, and stopping instead of managing a shifter. Gears can make sense for a very confident rider, but they add decisions and maintenance without automatically making a small bike easier to ride.
Weight changes confidence
A lightweight frame is easier to lift over a kerb, correct during a wobble, and move from a standstill. Aluminium often helps reduce weight, while steel can offer a solid feel and lower purchase cost. Don't pay for a long list of features if the bike is so heavy that your child avoids riding it.
| Feature | Best For | Trade-off |
|---|---|---|
| Rear coaster brake | Simple starter bikes and children comfortable with back-pedalling | Less direct control and can confuse a child who pedals backwards while balancing |
| Front and rear handbrakes | Children ready to learn conventional stopping | Requires correctly sized levers and enough hand strength |
| Single speed | Most first pedal-bike riders | Less flexibility on hills |
| Lightweight aluminium frame | Timid learners and children who lift or manoeuvre the bike themselves | Usually costs more |
| Heavier steel frame | Short, flat rides and families prioritising a lower purchase price | Can make starts, turns, and recovery from wobbles harder |
My preferred beginner setup is a light frame, simple gearing, and handbrakes that the child can reach comfortably. A coaster brake isn't automatically unsafe, but it shouldn't be accepted without checking how the child pedals under pressure.
Matching Bike Types to NZ Riding Styles and Terrains
Choose the bike for the family's real Saturday ride, not the fantasy version involving perfect paths and no rain. A child riding around a smooth driveway needs a different machine from one joining family trips across grass, gravel, and uneven park tracks.
Lightweight beginners
A lightweight starter bike suits a child who is still learning the sequence of push off, pedal, steer, and stop. These bikes usually have a simple frame, low weight, no gears, and a predictable upright position. Training wheels may be available, but they're not essential for a child who has already developed balance on a balance bike.
This is the sensible choice for:
- Driveways and footpaths: Smooth surfaces offer fewer surprises while the child learns.
- School courts and parks: An upright position makes looking ahead and stopping feel natural.
- Short neighbourhood rides: Simplicity matters more than trail hardware when distances are modest.
Durable everyday riders
A stronger BMX-style or mini-trail bike makes more sense when your child rides hard, drops the bike regularly, or spends time on grass, gravel, and compact dirt. Local advice notes that some BMX-style 16-inch bikes are stronger and more heavy-duty, while other 16-inch models prioritise low weight and easy learning. 99 Bikes' NZ kids' bike buying guide explains this distinction between lighter learner bikes and more durable options.
The trade-off is straightforward. A durable bike can tolerate rougher everyday use, but it may weigh more and feel less forgiving to a small or hesitant rider. Don't buy a mini-trail bike because it looks adventurous if your child mainly rides a flat footpath.
“Buy for the surface your child rides most, not the terrain shown in the product photos.”
For mixed NZ riding, look for tyres with useful grip, brakes that are easy to modulate, and a frame that doesn't feel oversized. Suspension is rarely the first feature I'd prioritise at this size. Control, weight, tyre contact, and fit matter more.
Navigating Price Ranges and Spotting Quality Value
The supplied NZ buying information doesn't establish reliable retail price bands, so I won't pretend that a particular dollar figure defines entry-level, mid-range, or premium value. Prices change with brand, stock, freight, seasonal sales, and component choices. A cheaper bike can be soundly built, while an expensive one can still be a poor fit.
Spend on the parts your child feels
Put the budget towards the things that affect control:
- Manageable weight: Your child should be able to move and steady the bike.
- Reachable brakes: A brake lever is useless if small fingers can't squeeze it.
- Correct geometry: The saddle, bars, and pedals should support a relaxed position.
- Durable wheels and tyres: These matter if the bike is used on grass, gravel, or uneven paths.
- Local assembly or adjustment: A correctly set-up budget bike can ride better than a poorly assembled expensive one.
Save money on decorative extras your child may quickly outgrow. Baskets, novelty accessories, and elaborate graphics won't compensate for a heavy frame or awkward reach.
Compare value by use
For a cautious beginner who rides only smooth paths, a basic single-speed bike with good fit may be enough. For a family planning frequent mixed-surface rides, paying more for a stronger build can be justified if it keeps the bike stable and serviceable. The right question isn't “Which bike has the most features?” It's “Which features will my child use every week?”
Check what the price includes, whether training wheels are supplied or optional, how the bike arrives, and who handles adjustments if the brakes rub or the gears need attention. A transparent warranty and access to a local workshop can be worth more than an impressive-looking component list.
The Importance of Local Sourcing, Fitting, and Support
Online shopping makes it easy to compare models, but a boxed bike still needs a proper mechanical check. Bars must be aligned, fasteners tightened, wheels checked, and brakes adjusted. With a child's first pedal bike, small setup errors can feel like a failure to ride.
A local fit prevents expensive mistakes
A New Zealand bike specialist can assess whether the child is sitting too far back, reaching too far forward, or struggling with a brake lever. That advice is especially useful when your child sits between size categories or when you're deciding between a low-weight learner and a more durable trail-oriented model.
Local support also makes follow-up practical. A loose brake cable, rubbing wheel, or slipping saddle is much easier to resolve through a nearby workshop than through an overseas returns process. Weather and riding surfaces vary across the country, so advice from people who understand local family riding is more useful than a generic product description.
What to ask before buying
Ask the retailer to confirm the minimum saddle height, brake type, training-wheel compatibility, and recommended rider height. If the bike is for a balance-bike graduate, ask whether the child can safely skip training wheels. If it's for rougher paths, ask whether the tyres and wheels are intended for that use rather than relying on a mountain-bike appearance.
Rider 18 is one local option that stocks children's bikes and provides workshop support, fitting advice, and cycling gear through its Nelson store and online service. That combination is useful when you want the bike assembled correctly and someone available for adjustments after the first rides.
Essential Safety Gear and Maintenance for Long-Term Fun
A child can ride confidently only when the basic checks become routine. Before each ride, inspect the helmet, brakes, tyres, pedals, and wheels. Keep the process brief and let your child help.
Fit the helmet properly
The helmet should sit level, cover the forehead without blocking vision, and stay snug when your child shakes their head. Straps should meet neatly below the ears, with the buckle sitting comfortably under the chin. NZ helmet guides commonly place children in ranges around 47–54 cm or 50–57 cm, so measure the head instead of guessing from age. Go Ride's helmet sizing advice offers a useful local reference. For fit standards, certification, and accurate measuring, see our guide to a child's crash helmet.
Replace a helmet after any impact, even when the shell looks fine. Internal damage may not be visible, and a helmet that has absorbed a hit should not return to service.
Teach a simple pre-ride check
Give your child a role in the inspection. They can squeeze the brakes, press the tyres, check for rubbing, and turn the pedals while you listen for unusual noises. Stop riding if a wheel feels loose or a brake lever pulls too far.
After muddy or dusty rides, wipe grit from the bike. Keep the chain clean and lubricated where applicable, and check fasteners regularly. Wet conditions and road grime can make a small drivetrain noisy or stiff. A neglected bike becomes harder to pedal, which children can mistake for losing riding ability.
Build confidence without rushing
The first successful ride might reach only the driveway. It still counts. Practise starting and stopping on a flat, open surface, then introduce grass, gentle slopes, or gravel once the controls feel familiar. Keep the saddle at a height the child can control rather than raising it early for growth.
The right 16-inch bike supports independence without making every wobble feel dangerous. Lightweight beginner bikes suit children learning balance, while tougher everyday models make more sense for regular paths and trails. Keep either option maintained and make family rides regular instead of turning every outing into a formal lesson.
Rider 18 offers kids' bikes, balance bikes, helmets, cycling accessories, workshop servicing, and local fitting support. Visit Rider 18 with your child's height, barefoot inseam, and usual riding surface ready, then compare a lightweight learner with a tougher everyday option.


