Tyre Repair Kit: Your Ultimate NZ Rider's Guide
- by Nigel
-

You’re halfway through a Nelson ride, the trail is running well, and then the bike starts to feel vague in the back end. A few more metres and you hear it. That soft hiss every rider knows. It might be a thorn, a shard of rock, or one of those annoying little punctures that sealant almost handles but not quite.
That’s the moment a tyre repair kit stops being “something I should probably carry” and becomes the thing that gets you home under your own steam.
Generic puncture advice often reads like it’s written for cars in a car park. It doesn’t help much when you’re on a wet trail, your hands are cold, the tyre is tubeless, the bike is loaded, or you’ve got kids waiting while you sort a flat. Around Nelson, that matters. Trail surfaces change fast, gravel shoulders can be sharp, and e-bikes put different demands on tyres than a lightweight analogue bike.
A decent kit, and the know-how to use it, saves rides, saves hassle, and in plenty of cases saves the tyre too.
Why Every NZ Rider Needs a Tyre Repair Kit
A puncture in New Zealand isn’t unusual. It’s normal riding life. The difference between a minor interruption and a long walk is whether you can deal with it where it happens.
That matters beyond convenience. In New Zealand, defective tyres were a factor in approximately 5% of all reported vehicle crashes between 2018 and 2023, and a 2022 NZTA survey found 28% of Kiwi cyclists experienced at least one puncture annually. The same data found 62% relied on repair kits, saving an average of NZ$150 per incident compared with professional services, according to this tyre repair background report.
For riders, those numbers line up with what we see in the workshop. Punctures aren’t rare edge cases. They’re one of the most common problems you’ll deal with if you ride regularly.
What the flat really costs
The obvious cost is time. The less obvious cost is the ride you lose because you weren’t prepared.
On a mountain bike, a small tread puncture can turn a good day into tyre wrestling beside the trail. On an e-bike, a flat can leave you pushing a heavier machine farther than you’d like. For families, one puncture can end the outing for everyone, not just the rider with the problem.
Practical rule: If you ride far enough from home that walking back would annoy you, you need a tyre repair kit.
Why NZ riding makes preparation more important
Nelson riding throws a few specific challenges at you:
- Sharp trail debris: Gorse, stones, and gravel edges can all create clean punctures that need more than hope and a half-dry bottle of sealant.
- Mixed riding surfaces: Many riders move from bitumen to gravel to trail in one ride. Tyres cop different impacts across the same outing.
- Variable conditions: Wet coastal weather and changing elevation can affect pressure feel and how a repair behaves after you get rolling again.
A repair kit isn’t just for aggressive riders either. Commuters, rail trail riders, parents towing kids, and weekend cruisers all benefit from having one simple solution close at hand.
Anatomy of a Modern Tyre Repair Kit
A good modern tyre repair kit is a first-aid kit for your tyre. Each tool has one job. Used in the right order, they work together quickly and cleanly.

Most riders think of the plug itself and ignore the rest. That’s usually why roadside repairs fail. The plug is only one part of the system. Preparing the hole and getting the tyre reinflated properly matter just as much.
The core tools that do the work
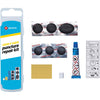
Here’s what you’ll usually find in a tubeless-focused kit:
- Rasp or reamer: This roughens and opens the puncture so the plug can bond properly. If you skip this, the plug often folds, tears, or sits too loosely.
- Insertion tool: This holds the plug while you push it into the hole. Some are forked. Some are needle-style. Both aim to leave the plug in the tyre as you pull the tool back out.
- Rubber plugs: Riders often call these bacon strips. They’re sticky, compressible cords designed to fill the puncture channel.
- Rubber cement or vulcanising solution: Some kits include it, some don’t. When it’s part of the system, it helps the plug bed into the damaged area more securely.
- Blade or trimming edge: Useful for tidying excess plug if it’s flapping or too long after insertion.
The tools that make the repair practical
The tyre repair part is only half the job. You also need to put air back in the tyre and check the pressure properly.
That usually means carrying:
- Mini pump or inflator: CO2 is fast, but a mini pump is reusable and less stressful if the first attempt doesn’t seal.
- Valve tool: Handy when you need to add sealant or clear a blocked valve.
- Gloves or rag: Not glamorous, but useful when you’re dealing with wet sealant and gritty tyres.
- Pressure check: If you want the repair to last, inflation needs to be sensible, not guessed. A proper bike tyre air pressure gauge guide helps riders understand what they’re aiming for after a trail repair.
A repair that holds air but leaves the tyre badly underinflated isn’t finished. It’s just the next problem waiting to happen.
What a kit does not do
A tyre repair kit doesn’t fix every kind of tyre damage. It won’t safely solve a torn sidewall, a damaged bead, or a rim problem. It also won’t compensate for old sealant that’s dried out, badly seated tubeless tape, or a tyre casing that’s already tired.
That’s why the most useful kits are compact but complete. You don’t need a giant pouch. You do need the right tools in one place, ready to grab when the hiss starts.
Comparing Repair Methods Plugs Patches and Sealants
Not every puncture wants the same fix. Riders often lump everything together under “puncture repair”, but plugs, patches, and sealants solve different problems and come with different trade-offs.

If you’re choosing what to carry, or trying to work out whether a trailside fix is enough, this is the comparison that matters.
Quick comparison
| Method | Best For | Speed of Repair | Durability | Skill Level |
|---|---|---|---|---|
| Plug | Tubeless tread punctures on the trail | Fast | Good for getting you rolling, then inspect later | Moderate |
| Patch | Workshop repair after tyre removal | Slower | More durable when the damage suits patching | Higher |
| Sealant | Small punctures and prevention inside tubeless tyres | Fastest when it works automatically | Limited on larger cuts and temporary in emergency use | Low to moderate |
Plugs work when the hole is too much for sealant alone
For a lot of mountain bikers and trail riders, plugs are the most useful field repair. You don’t need to remove the tyre. You don’t need a clean workshop setup. You find the hole, prepare it, insert the plug, and reinflate.
In NZ conditions, that’s a major advantage. Mud, gravel, and wet grass don’t make tyre removal any more enjoyable than it already is.
A plug is the right call when the puncture is in the tread area and the tyre casing still looks sound. For riders carrying a compact tool such as the Topeak Plug N Tool Mountain Pro, the process is straightforward enough to do on the side of a trail without emptying half your pack.
The trade-off is that a plug is still a field repair. It can last well, but it needs inspection afterwards, especially if the hole was large or the tyre was ridden flat before the repair.
Patches are for follow-up, not panic
A patch is more of a bench job than a trailside fix. You remove the tyre, inspect the inside properly, clean the damaged area, and apply the patch where it can bond correctly.
That makes patches useful for:
- Controlled workshop repairs: You can clean the inside of the tyre properly and inspect the casing.
- Follow-up after a successful trail repair: If you plugged a puncture to get home, a patch may be part of the next step.
- Riders who want a longer-term solution: Especially when the tyre is otherwise in good shape and worth saving.
What patches are not good at is speed. If you’re standing beside a trail with a leaking tubeless setup, a patch is rarely your first move.
Sealants are brilliant until they aren’t
Sealant is often your first line of defence, whether you realise it or not. In a healthy tubeless tyre, small punctures can seal with little more than a hiss and a splatter.
For NZ e-bike commuters, emergency sealant kits can seal punctures up to 5mm and provide a 10 to 15km limping distance at reduced speeds. After that kind of repair, you should deflate and refill after 100km so the sealant redistributes properly, which can help prevent up to 20% of repeat flats in variable altitude conditions, according to this emergency sealant guidance.
That sounds ideal, and sometimes it is. But sealant has clear limits:
- It struggles with bigger cuts: Once the opening is too large, pressure pushes sealant out faster than it can plug.
- It’s messy to assess on the trail: The tyre may appear sealed, then reopen when you rotate the wheel or start riding again.
- It can complicate later repair decisions: Especially if you’ve used an emergency product and the tyre now needs proper inspection.
Don’t confuse “the hissing stopped” with “the tyre is sorted”. Ride a few metres, recheck pressure, and look for fresh seepage.
What usually works in real riding
For most NZ riders, the practical hierarchy looks like this:
- Let existing tubeless sealant do its job first if the puncture is small.
- Use a plug when the hole won’t seal on its own but the tyre casing is otherwise okay.
- Use a patch later in the workshop if the tyre is worth a more involved repair.
- Stop and seek help if the damage is in the sidewall, near the bead, or obviously structural.
Families, commuters, and trail riders all use these same methods. The difference is where the line sits between “good enough to continue” and “time to stop messing about”.
Your Step-by-Step Guide to a Trailside Tyre Repair
A trailside plug repair doesn’t need to be elegant. It needs to be calm, deliberate, and done in the right order.

In NZ trail conditions, plug kits can seal holes up to 6mm. Using a rasp tool to roughen the puncture increases surface area by 200 to 300% for adhesion, and a self-vulcanising plug can restore 95 to 100% air retention and hold for 500km of mixed trail riding before re-inspection, according to this repair kit specification.
That tells you something important. The prep matters. Riders who rush straight to stuffing a plug into a smooth hole often create their own failure.
Step 1 Find the puncture properly
If the tyre is still holding a bit of air, rotate the wheel slowly and listen. Often you’ll hear the hiss before you see anything. If there’s sealant spraying, the wet spot gives it away.
Look for:
- A thorn, flint, or shard still embedded in the tread
- A damp patch of sealant on the casing
- Tiny bubbles if you wet a finger and hold it near the suspected spot
If an object is still in the tyre, don’t yank it out until you’re ready to plug immediately. Sometimes it’s the only thing slowing the leak.
Step 2 Position the wheel for an easier repair
Turn the puncture so it’s easy to access. Usually that means rotating the wheel until the hole is somewhere you can work on without fighting spokes, brake rotors, or awkward bike position.
If there’s still liquid sealant inside, keeping the puncture lower for a moment can help move sealant toward the hole before you start. Then move it into a comfortable working position for the plug.
Workshop habit: Stabilise the bike first. A rushed repair on a bike that keeps rolling or tipping over leads to dropped tools and wasted plugs.
Step 3 Remove the cause
Pull out the thorn, nail, or sharp debris with care. If it snaps, take a breath and inspect again. Leaving a fragment behind can slice the plug or keep the hole open.
Don’t enlarge the hole by digging around blindly. You want to remove the cause, not create a bigger repair.
Step 4 Use the rasp the way it’s meant to be used
This is the part many riders underdo. Insert the rasp into the puncture and work it in and out with firm pressure. You are not just clearing the hole. You are preparing the channel so the plug can grip and bond.
It should feel resistant, not delicate. On a proper tread puncture, the tool needs enough pressure to roughen the inside of the casing.
If your kit uses rubber cement or vulcanising solution, apply it as directed after rasping and before insertion. Not every bicycle kit needs this step, but when the system includes it, use it.
For riders who are still building their puncture setup, a compact inflator matters as much as the plug tool. A practical bike pump guide for NZ riders helps you choose something you’ll carry.
Step 5 Load the plug
Thread the plug into the insertion tool so there’s an even amount on both sides, unless your tool’s design says otherwise. The plug should sit securely without tearing or stretching too thin.
If the strip is dry, contaminated with dirt, or has been sitting loose in a bag for ages, bin it and use a fresh one. Old plugs are a common reason for mediocre repairs.
Here’s a visual walkthrough if you want to see the hand movements before trying it on the trail.
Step 6 Insert the plug with commitment
Push the loaded tool into the puncture until most of the plug has gone inside and a small amount remains outside the tyre. Don’t bury the whole thing. You need enough left to anchor the repair.
Then pull the tool back out smoothly. The tool should come free while the plug stays behind, folded into the puncture channel.
If the whole plug comes back out with the tool, one of three things usually happened:
- The hole wasn’t prepared enough
- The insertion angle was wrong
- You hesitated and dragged the plug back out
Use a fresh plug and repeat the process cleanly.
Step 7 Reinflate and watch
Put air back into the tyre. Don’t rush straight to full trail pressure if the repair is fresh and still settling. Get the tyre seated and stable, then watch the plug for a moment.
You want to see:
- No active hissing
- No fresh spray of sealant
- The plug staying in place as the tyre rounds out
A little seepage at first isn’t always a failure. Sometimes the plug and sealant need a short moment to settle together.
Step 8 Trim only if you need to
If the plug is sticking out a long way and could catch, trim the excess. Don’t cut it flush in a panic. Leaving a little proud is usually fine because it wears down naturally once you ride.
Then spin the wheel, check pressure once more, and ride a short distance before doing a final stop-and-look.
What the repair should feel like afterwards
A successful plug repair should feel boring. The tyre should support the bike normally, track properly, and stop losing pressure rapidly.
If it still feels soft, squirmy, or unstable, stop and recheck. The goal isn’t to “make it sort of hold”. The goal is to ride away on something you trust.
How to Choose the Right Kit for Your Ride
The right tyre repair kit depends less on brand and more on the kind of riding you do. A trail rider in Nelson needs something different from a parent doing short gravel path rides, and both need something different from an e-bike commuter.

That matters because New Zealand riders aren’t all dealing with the same tyre pressures, tread patterns, or distances from help. A generic “one kit fits all” answer usually misses the point.
A 2024 Consumer NZ study found 76% of parents with kids’ bikes prefer repair kits for balance and MTB models, with a 90% success rate on punctures under 5mm. The same market data notes a 42% surge in e-bike punctures from 2020 to 2025, which has increased demand for reliable kits, according to this market summary covering NZ repair kit adoption.
For the mountain biker
If you ride Nelson singletrack, rocky loops, or back-country style terrain, carry a plug-first kit.
That means:
- A proper rasp and insertion tool
- Fresh plugs
- A reliable way to add air
- A valve tool if you run tubeless
Why this setup works: trail punctures are often larger than the tiny holes sealant handles on its own. You want a repair that can be done fast, with dirty hands, without taking the tyre off.
This is also the one place to mention that a tubeless bike repair setup sold through Rider 18 is one practical option among many if you want a workshop-style tool choice that matches common MTB needs.
For the e-bike commuter
E-bikes ask more from tyres. They’re heavier, often run different pressure preferences, and a flat is more frustrating to deal with because pushing the bike home isn’t much fun.
For commuters, a combo kit usually makes the most sense:
- Sealant support for small punctures
- A plug tool for anything larger
- A pump you can trust, not just CO2
- Gloves or wipes because roadside sealant gets messy fast
A commuter’s main priority is reliability and speed. You want a setup that handles a small puncture quickly but still gives you a second option if the sealant alone won’t close the hole.
For families and kids’ bikes
Family riding needs simplicity more than technical range. Parents don’t want a huge toolkit. They want something they can understand quickly and use without stress while children are waiting.
A sensible family setup usually includes:
- A compact repair kit that’s easy to identify in a bag
- Simple inflation option
- Basic puncture supplies matched to the bike setup
- A check-before-you-leave habit
For younger riders on shorter loops, ease of use matters more than carrying every possible tyre solution. If the bike is tubeless, include plugs. If it isn’t, carry the repair items that match that wheel system. The main mistake families make is carrying random bits that don’t suit the bike they’re riding.
The best kit is the one that matches your tyre system and lives in your bag every ride, not the larger kit left in the garage.
A simple buying filter
When you’re choosing, ask four things:
- Is my bike tubeless or tube-based?
- Am I riding close to home or far from help?
- Will I need to repair quickly in poor conditions?
- Can I effectively use the tools I’m carrying?
That last one matters. A small, familiar kit beats a clever one you’ve never practised with.
Smart Packing and Kit Maintenance Tips
A tyre repair kit only helps if you can find it quickly and the contents still work. A lot of roadside frustration comes from bad packing, dried-out consumables, or tools buried under snacks and spare layers.
Pack for access, not for tidiness
Put the kit somewhere you can reach without unpacking your whole ride setup. Saddle bag, frame bag, bum bag, or tool roll all work if they keep the repair gear together.
Good packing habits look like this:
- Keep the puncture items grouped: Plug tool, plugs, inflator, and valve tool should live in the same pouch.
- Protect the sticky parts: Loose plugs attract grit. Keep them sealed so they stay usable.
- Separate sharp tools: A rasp bouncing around loose can damage other gear or punch through a bag lining.
Check the kit before it lets you down
Rubber consumables age. Sealant dries. Tiny tools disappear.
Every so often, empty the kit and inspect it:
- Look at the plugs: If they’re dry, dirty, or hardened, replace them.
- Check sealant condition: If you carry emergency sealant, make sure it hasn’t sat for ages unopened and forgotten.
- Test pump function: Mini pumps often fail at the worst time because nobody checks them in advance.
- Confirm the valve tool is still there: Riders miss this one constantly.
A tyre repair kit isn’t a buy-once item. It’s more like brake pads or sealant. You need to keep an eye on it.
Think through your inflation plan
CO2 is fast and compact. A mini pump is slower but repeatable. Many riders carry one and wish they had the other depending on the day.
If you’re heading deep into trails or riding with family, a pump is often the safer choice because you can make multiple attempts. If your rides are shorter and you value speed, CO2 can make sense, provided you know how to use it and still have a backup plan.
The smart move is to pack around your real riding pattern, not an idealised one.
When to Skip the DIY and See the Experts at Rider 18
Some punctures are straightforward. Some damage only looks straightforward until the tyre fails again a few minutes later. Knowing where the DIY line stops is part of being a prepared rider.
If the damage is in the sidewall, near the bead, or the tyre casing looks torn rather than punctured, don’t treat it like a routine plug job. Those areas carry load differently and flex harder. A tyre that seems to hold in the car park or at the trailhead can become a real problem once speed, cornering load, and repeated impacts get involved.
Emergency sealants can fix up to 80% of tread punctures, but they can also complicate permanent repairs later on and may affect tyre longevity or wheel balancing, according to this emergency puncture repair guidance. That’s the key trade-off. A temporary fix is useful. It isn’t the same as a clean bill of health.
Stop riding and get help when you see these signs
- Sidewall cuts: These aren’t the place for a casual trailside repair.
- A damaged bead: If the tyre won’t seat or looks distorted at the rim, stop.
- A bent or cracked rim: No tyre repair kit can solve a wheel problem.
- Repeated pressure loss after plugging: If it won’t stabilise, the tyre needs proper inspection.
- Large casing damage: If the tyre structure looks compromised, don’t gamble on it.
Why a workshop follow-up matters
A shop can remove the tyre, inspect the inside, look at the puncture channel, assess the sealant mess, and tell you whether the tyre is worth saving. That’s especially useful after a hard hit, an e-bike puncture under heavier load, or any repair that got you home but didn’t inspire confidence.
For riders around Nelson, that’s exactly where workshop support earns its keep. If you’ve had a puncture that doesn’t look routine, or your repair held but you’re not convinced, bring the wheel or the bike in and get it checked properly.
If your tyre repair kit got you home but you’re not sure the tyre should stay in service, get a proper assessment from Rider 18. The workshop can inspect the tyre, rim, and tubeless setup, help you choose the right repair path, and make sure your bike is ready for the next ride instead of just surviving the last one.


Please upload banner from store admin blog pages